
Wooden craft is capturing the hearts of DIY enthusiasts all over, and for good reason. It’s a rewarding hobby that allows you to create functional and decorative items while honing a valuable skill. As a beginner, the limitless options may be overwhelming, but starting with simpler projects can help you build confidence and experience. This listicle offers twenty woodcraft projects that are perfect for those just starting out. They vary in complexity and time investment, so you can progressively challenge yourself as you grow from a novice to a skilled woodworker.
Table of Contents
Allow this curation of projects to be your guide into the fulfilling world of woodcraft. Whether you’re looking to spruce up your home, handcraft gifts for friends, or just enjoy the process of creating, these ideas will provide the perfect springboard for your journey into woodworking.
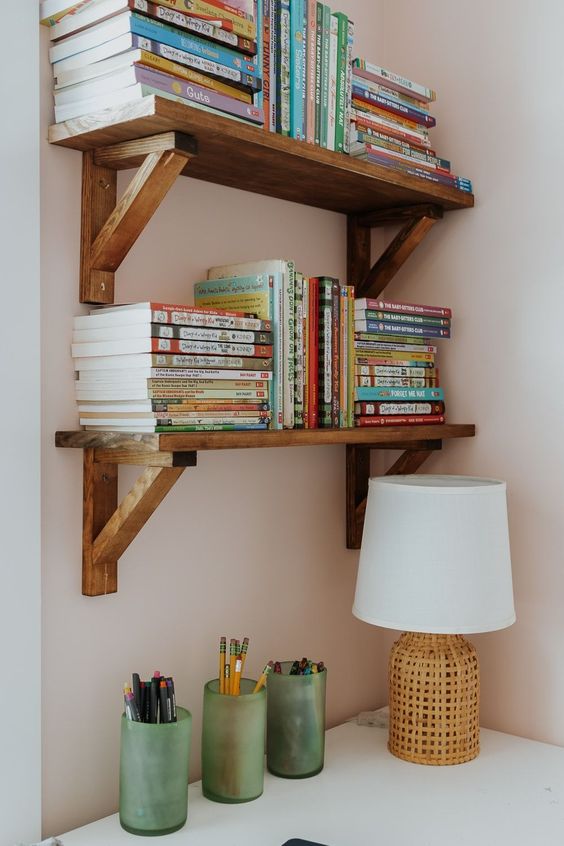
1. Simple Wooden Shelf
A wooden shelf is an ideal first project. With straightforward cuts and assembly, it will give you practice measuring, cutting, and finishing—and you’ll add some handy storage space to any room.
Step 1: Gather Your Materials
First, gather the necessary supplies. You’ll need a piece of wood of your desired dimensions, sandpaper, wood glue, screws, and a saw if you plan to cut the wood yourself.
Step 2: Measure and Cut Your Wood
Next, measure and cut your wood. Remember to double-check your measurements to ensure accuracy.
Step 3: Sand The Wood
After cutting the wood, use the sandpaper to smooth any rough edges. This will also prepare the wood for gluing and finishing.
Step 4: Apply Wood Glue
Carefully apply a layer of wood glue on the joining surfaces. This will help secure the pieces together.
Step 5: Assemble and Secure with Screws
Now it’s time to attach the pieces together. Use screws to secure the pieces. Make sure they’re tight, but be careful not to strip the wood.
Step 6: Apply a Finish
The final step is to apply a finish of your choice. This could be varnish, paint, or a wood stain. The finish will not only beautify your creation but also protect the wood.
And there you have it! You’ve just created your own simple wooden shelf. This project provides a great starting point for novice woodworkers, and as you gain confidence, you can tackle more complex projects. Happy woodworking!
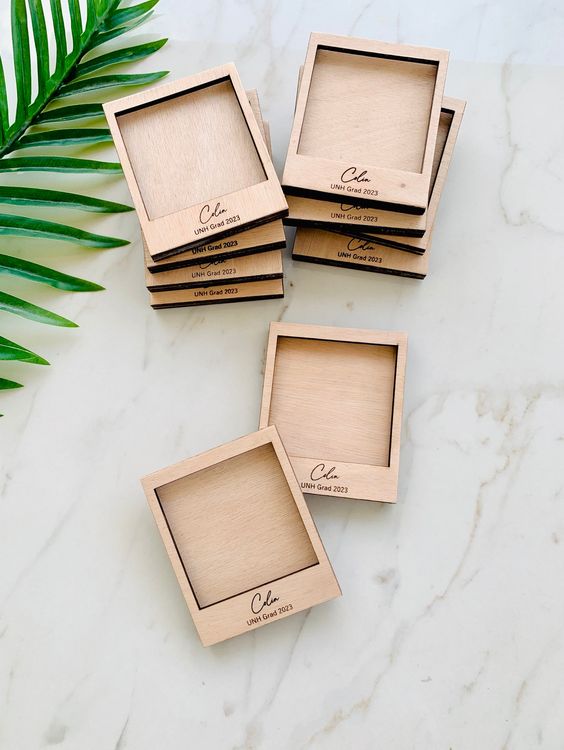
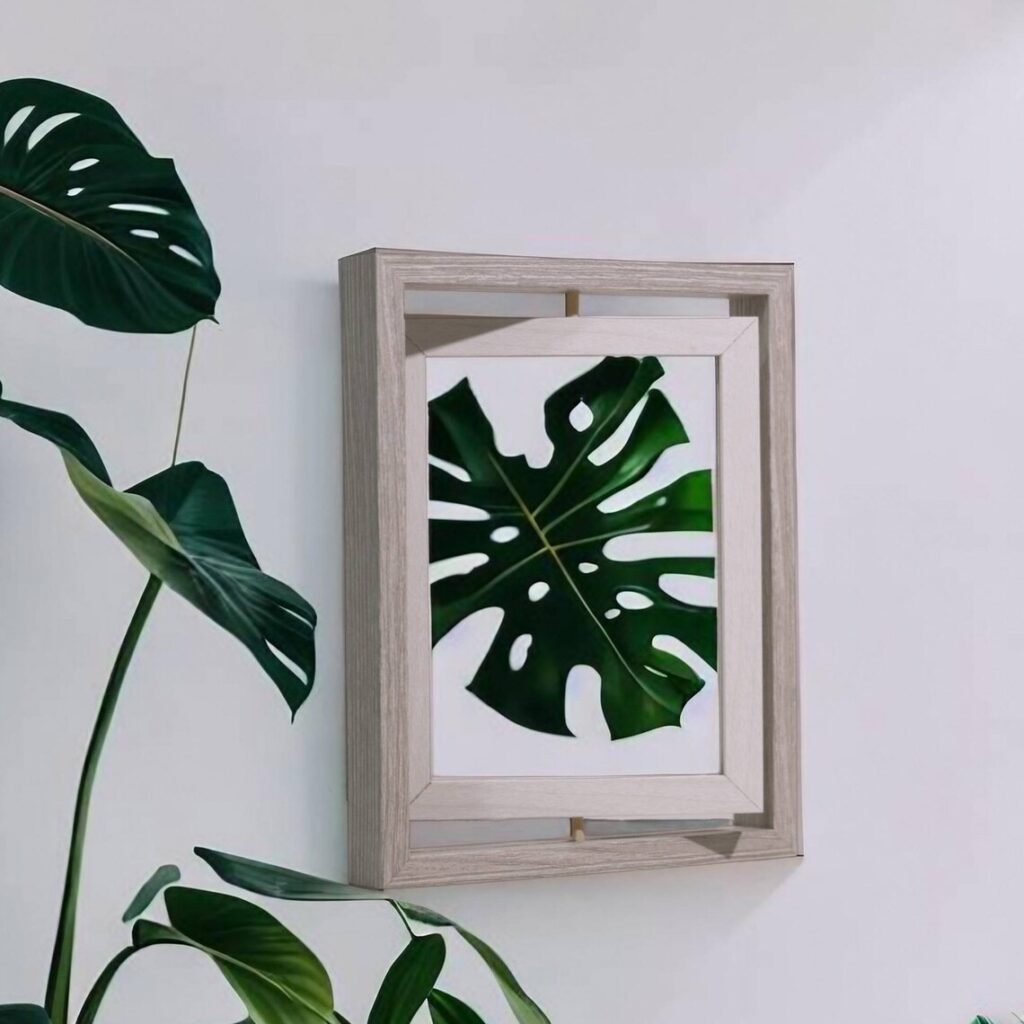
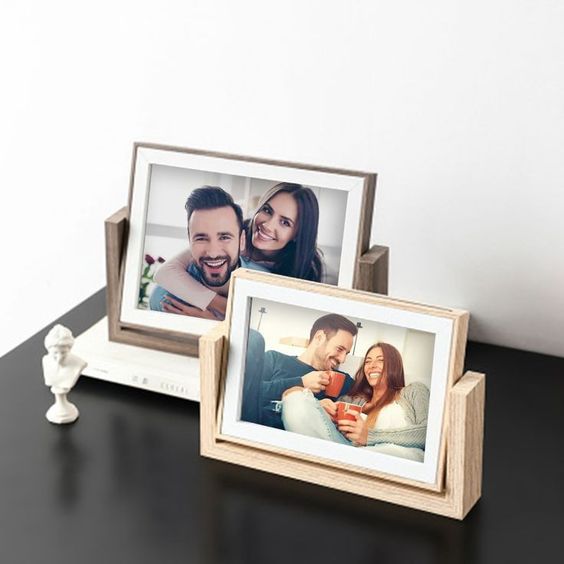
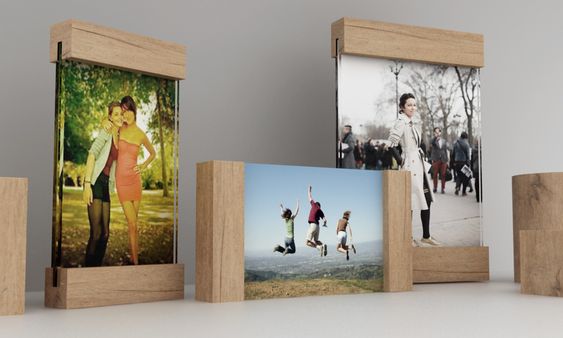
2. DIY Picture Frame
Create something personal with a homemade picture frame. It can be as simple or intricate as you like, and it’s a perfect way to showcase beloved photos or art.
Step 1: Gather Your Materials
To start, you’ll need a piece of wood or other framing material, a saw, wood glue or a hot glue gun, sandpaper, a ruler, a pencil, and glass or plexiglass for the front of the frame.
Step 2: Measure Your Photo
Measure the photo or artwork you’re framing. This will determine the dimensions for your picture frame.
Step 3: Mark and Cut Your Frame Pieces
Mark the measurements on your wood or other framing material, adding an extra length for overlap. Then, cut four pieces to make the frame.
Step 4: Sand the Edges
Sand down any rough edges on your cut pieces to make sure they fit together smoothly. This step is important to ensure a professional finish.
Step 5: Assemble the Frame
Apply glue to the ends of your frame pieces and assemble them into a rectangle or square, depending on the dimensions of your photo. Use clamps or heavy objects to hold the pieces together while the glue dries.
Step 6: Install the Glass and Photo
Once the glue is dry, place your glass or plexiglass into the frame, followed by the photo. Make sure it fits snugly.
Step 7: Secure the Back
Cut a piece of cardboard or another sturdy material to fit the back of the frame. Glue or otherwise secure this back piece to keep the photo and glass in place.
Step 8: Add Hanging Hardware
The last step is to attach a picture hanger or a piece of string to the back of the frame, giving you a way to display your new DIY picture frame.
And voila! You’ve crafted a custom picture frame to showcase your favorite photo or piece of art. This project, like woodworking, allows you to express your creativity and personalize your space. Happy DIY-ing!
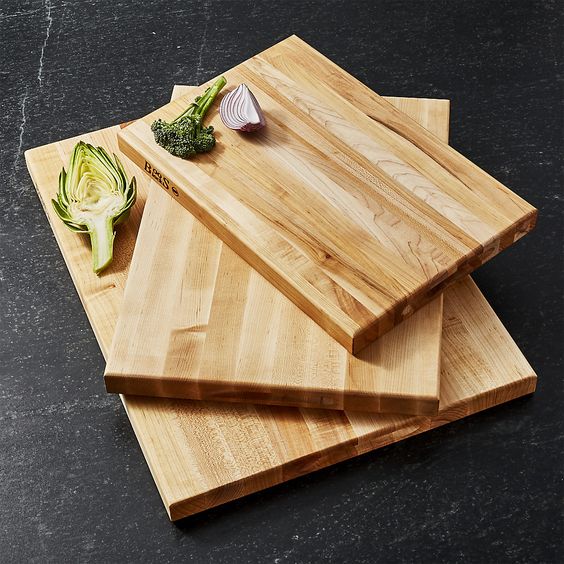
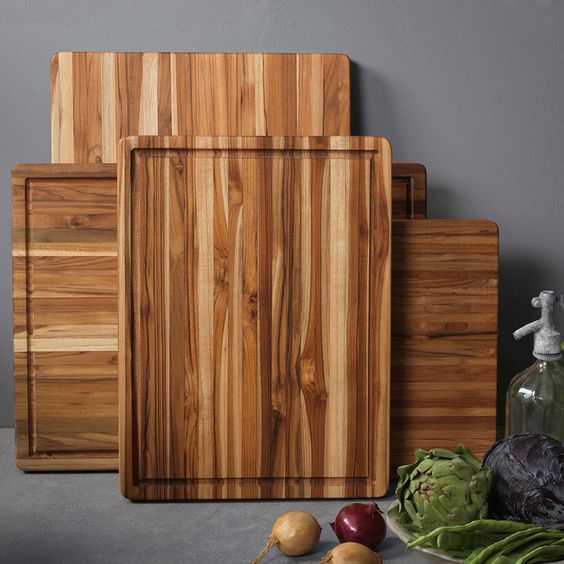
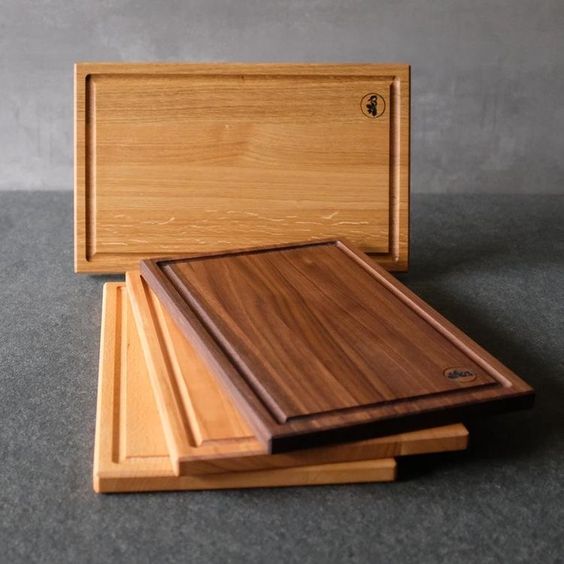
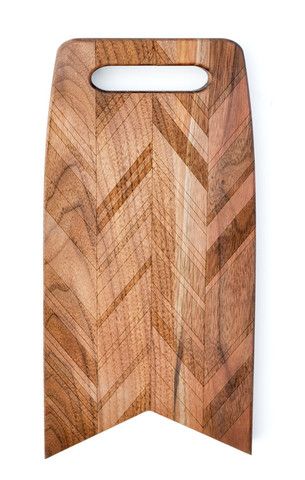
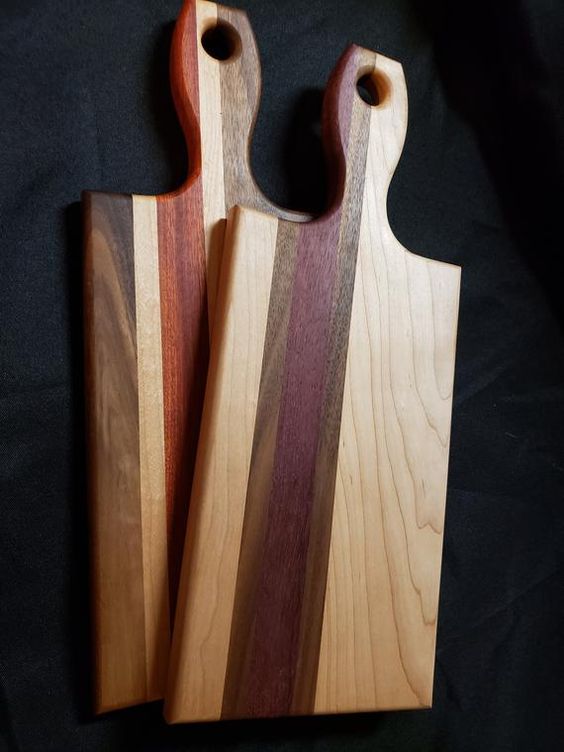
3. Wooden Cutting Board
Functional and stylish, a wooden cutting board is not just a kitchen staple—it’s a woodworking project that teaches the basics of sizing and sanding.
Step 1: Choose and Purchase Your Wood
Select the type of wood you want for your cutting board. Hardwoods like maple, walnut, or cherry are excellent choices due to their durability. Purchase the wood from a reliable supplier.
Step 2: Measure and Mark Your Board
Decide on the size of your cutting board and mark the measurements on your chosen piece of wood. The dimensions will depend on your personal preference, but a typical cutting board measures around 18×12 inches.
Step 3: Cut Your Board
Using a table saw or circular saw, cut your wood according to the marked measurements. Always remember to follow safety precautions when handling power tools.
Step 4: Sand the Board
Start with a coarse-grit sandpaper to smooth any rough edges or surfaces. Gradually move to a finer grit for a polished finish. Always sand in the direction of the wood grain to avoid scratches.
Step 5: Apply Food-Safe Finish
Once your board is smooth, apply a food-safe finish like mineral oil or a blend of beeswax and mineral oil. This will seal the wood and make it safe for food preparation.
Step 6: Allow the Board to Dry
Let the cutting board dry completely before using it. This could take a few hours to a full day, depending on the finish used.
Step 7: Maintain Your Board
Regular maintenance will prolong the life of your cutting board. Clean it after each use and periodically apply a coat of a food-safe finish.
There you have it, your own DIY wooden cutting board. These boards also make heartfelt and useful gifts. Enjoy your woodworking journey!
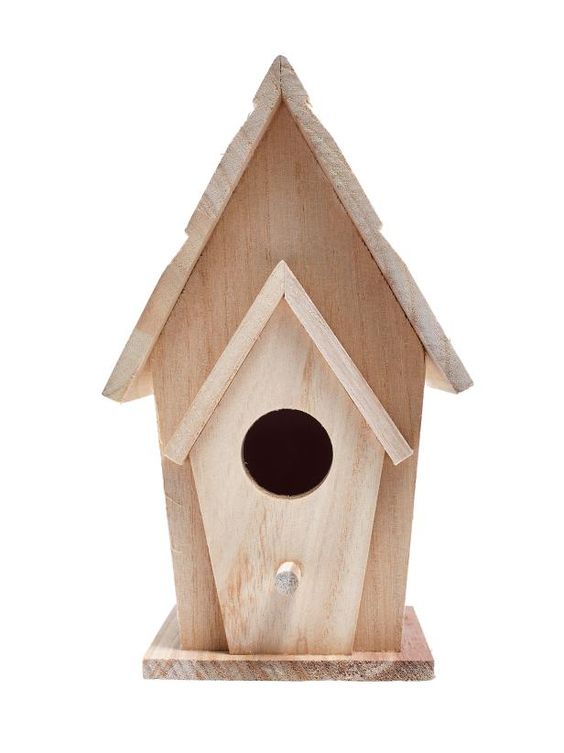
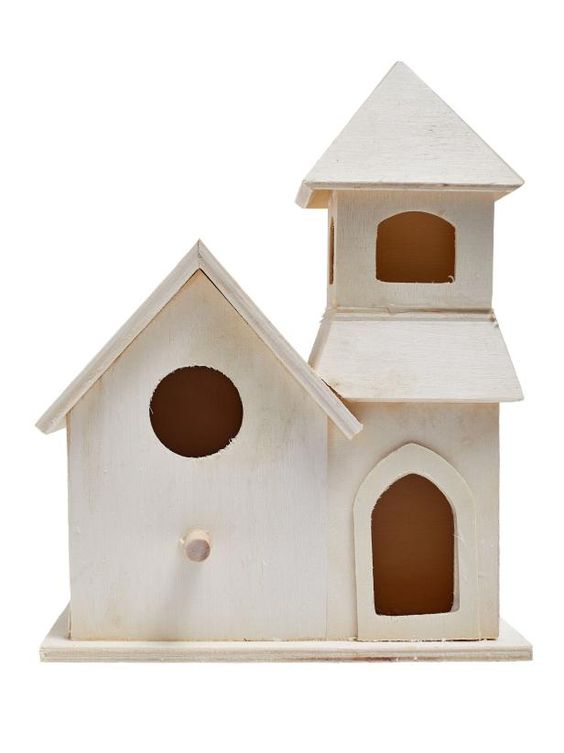
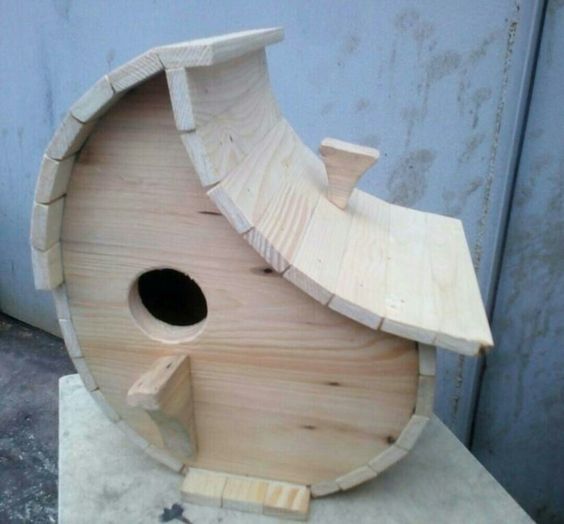
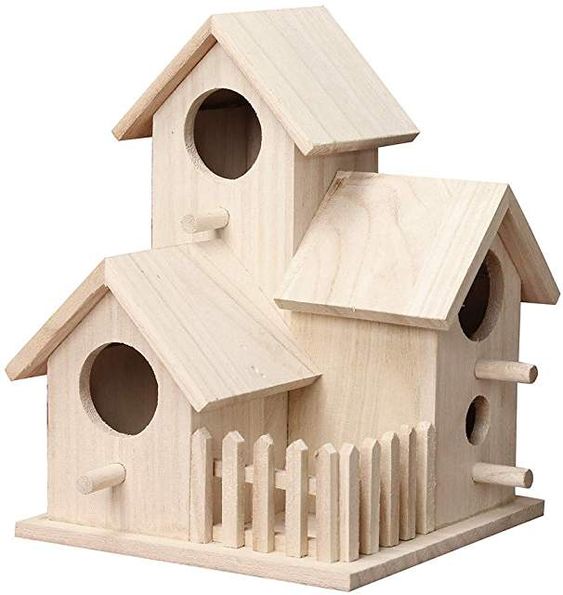
4. Basic Birdhouse
Invite feathered friends into your garden with a basic birdhouse. This project lets you experiment with different designs while practicing precision.
Step 1: Gather Your Materials
First, gather all the necessary materials. You’ll need a plank of untreated wood, preferably cedar, measuring around 1×6 inches and 8 feet long. Additionally, you will need exterior screws, wood glue, and waterproof paint if you choose to paint your birdhouse.
Step 2: Measure and Cut
Next, measure and cut the wood into six pieces: a 8×6 inch back, a 8×6 inch front, two 6×4 inch sides, a 6×6 inch base, and a 6×4 inch roof. Remember to cut an entrance hole in the front piece. The size of the hole depends on the bird species you’re targeting.
Step 3: Assemble the Birdhouse
Start by attaching the sides to the back piece using the wood glue and screws. Next, attach the base and the front. Ensure the entrance hole is correctly placed. Lastly, attach the roof piece, ensuring it overhangs the front to keep the interior dry.
Step 4: Paint and Decorate
Optional: paint the birdhouse using a non-toxic, waterproof paint. This will not only protect the wood but also make your birdhouse more attractive to birds. Allow the paint to dry completely before progressing.
Step 5: Mount Your Birdhouse
Finally, find a suitable location in your garden to mount your birdhouse. It should be in a quiet, sheltered location, ideally at least 5 feet off the ground to keep the birds safe from predators.
There you have it! Your very own homemade birdhouse, ready to welcome its first visitors. Happy bird watching!
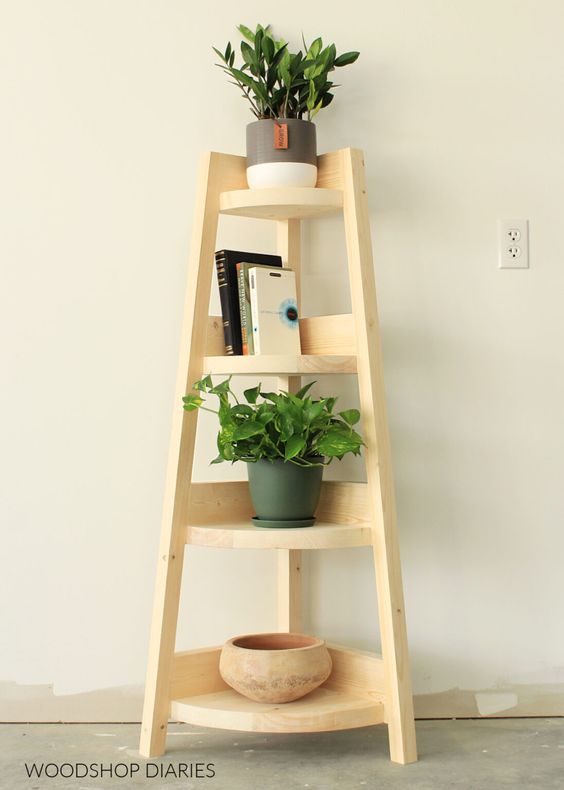
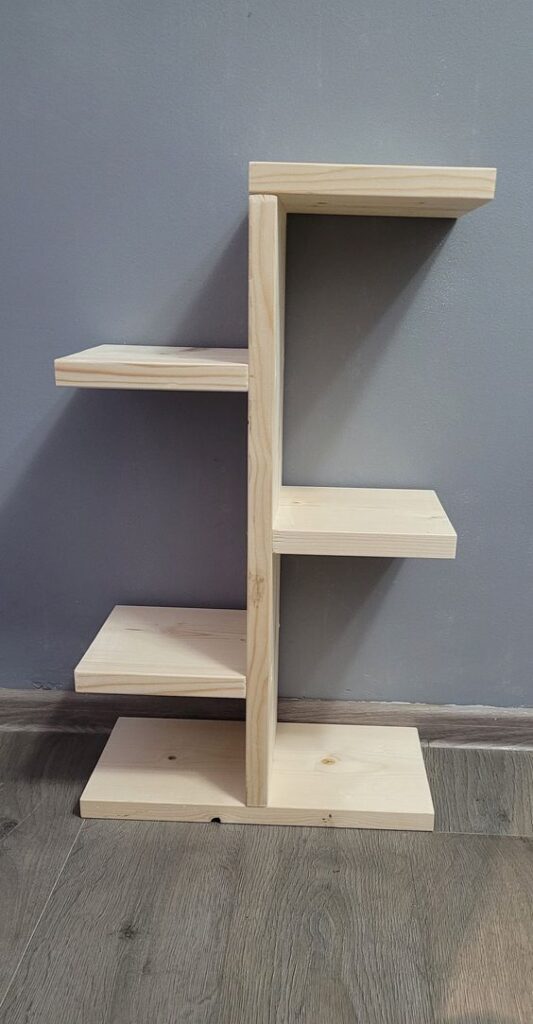
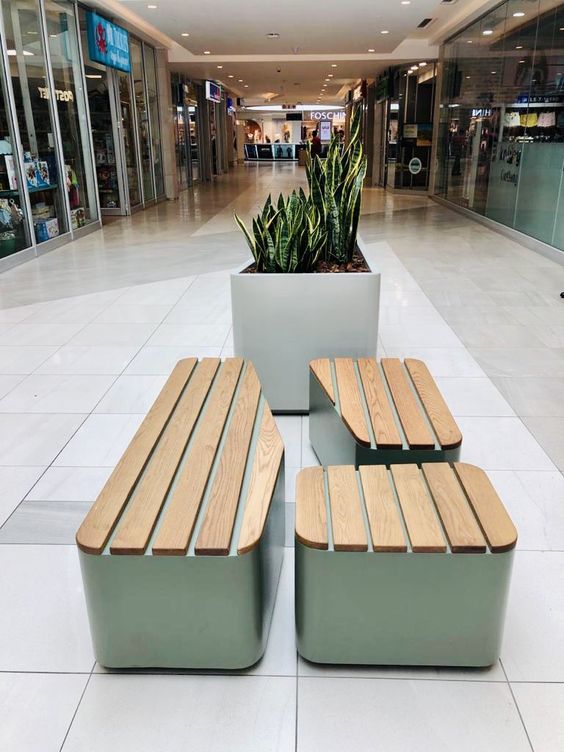
5. Wooden Plant Stand
Elevate your greenery literally and figuratively. A wooden plant stand can be an uncomplicated yet chic addition to any indoor space.
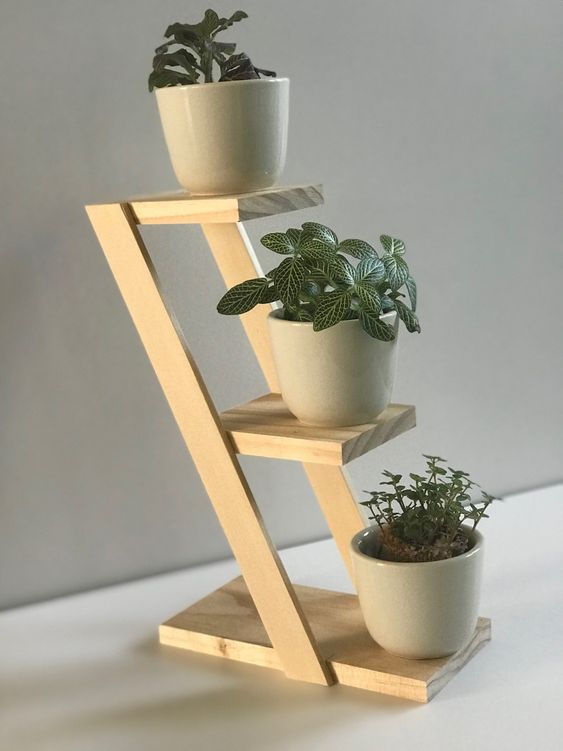
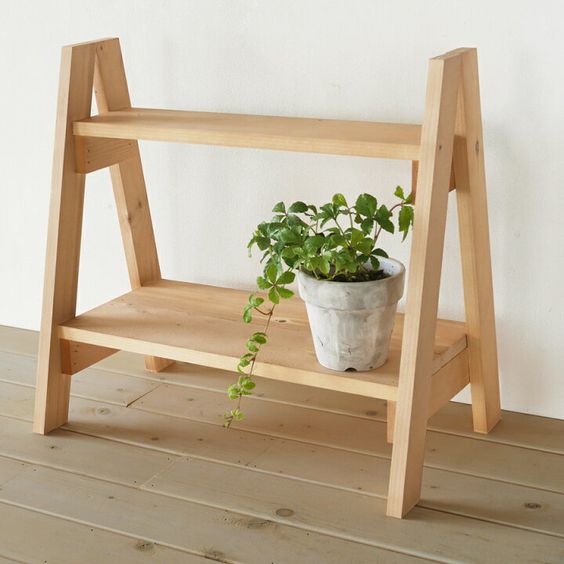
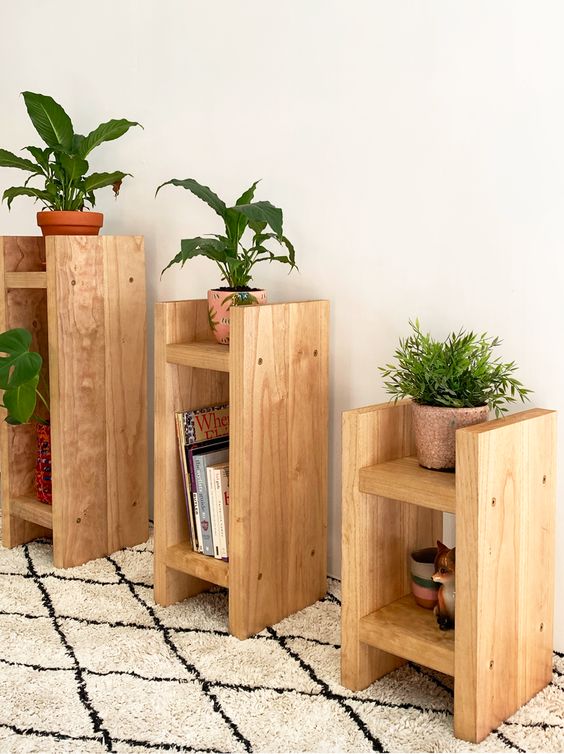
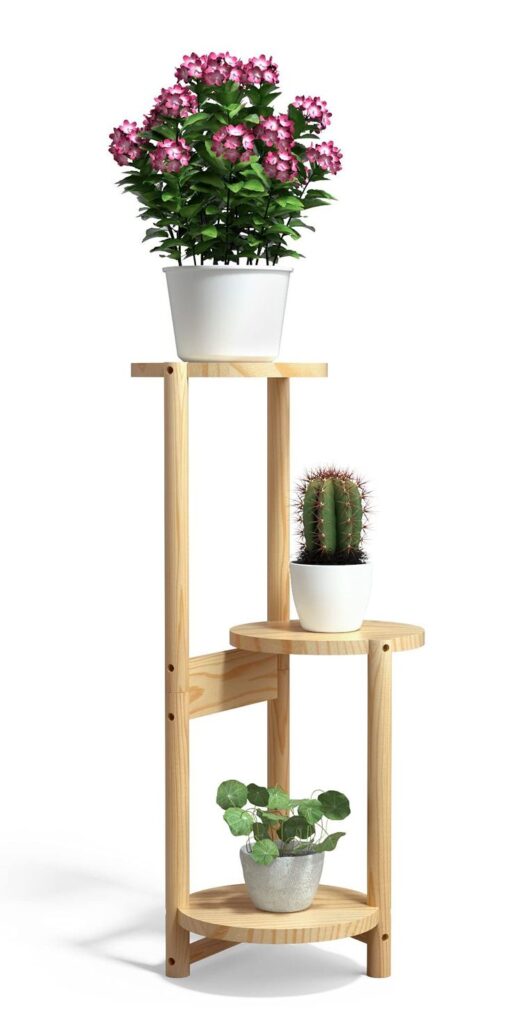
Step 1: Gather Your Materials
To construct your wooden plant stand, you’ll need four wooden legs (each about 2 feet long), a circular or square wooden top (depending on your preference), wood screws, and wood glue. Optionally, you may want to have sandpaper and non-toxic wood finish on hand for finishing touches.
Step 2: Measure and Cut
Measure the legs to ensure they’re equal in length. Then, measure and cut your top piece to your desired dimensions. Consider the size of the plant pot that will sit on it to ensure it fits comfortably.
Step 3: Assemble the Stand
First, lay out the legs in a cross shape, aligning them in the center. Next, apply wood glue at the intersection point for added stability, then screw the legs together. Ensure the structure is sturdy and the legs are level. Then, attach the top piece to the legs using screws.
Step 4: Sanding and Finishing
For a smooth, professional finish, sand the entire plant stand, focusing on any rough edges. Once sanded, apply a layer of non-toxic wood finish if desired. This will help to protect the wood and bring out its natural beauty.
Step 5: Position Your Plant Stand
Find the perfect spot in your home for your new stand. Consider placing it near a window to provide your plant with plenty of natural light. Now, place your plant pot on top, and admire your handiwork!
Follow these five simple steps to create a stylish and functional wooden plant stand that adds a touch of natural beauty to your interiors. Happy building!
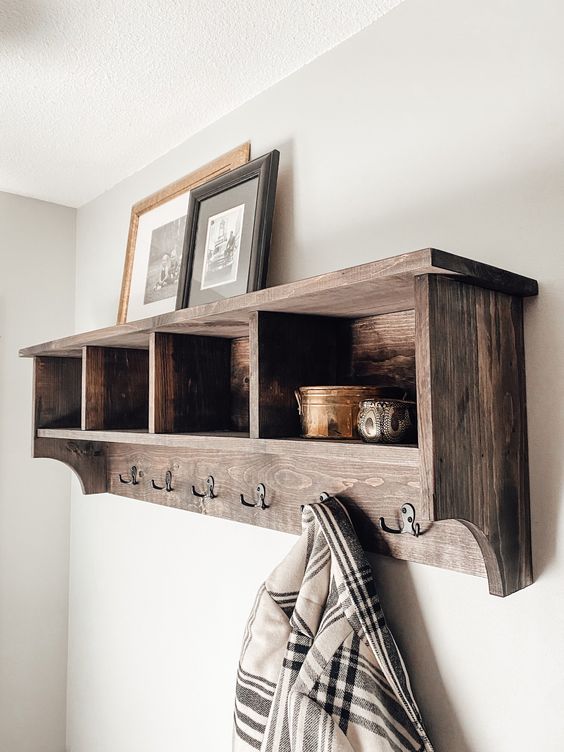
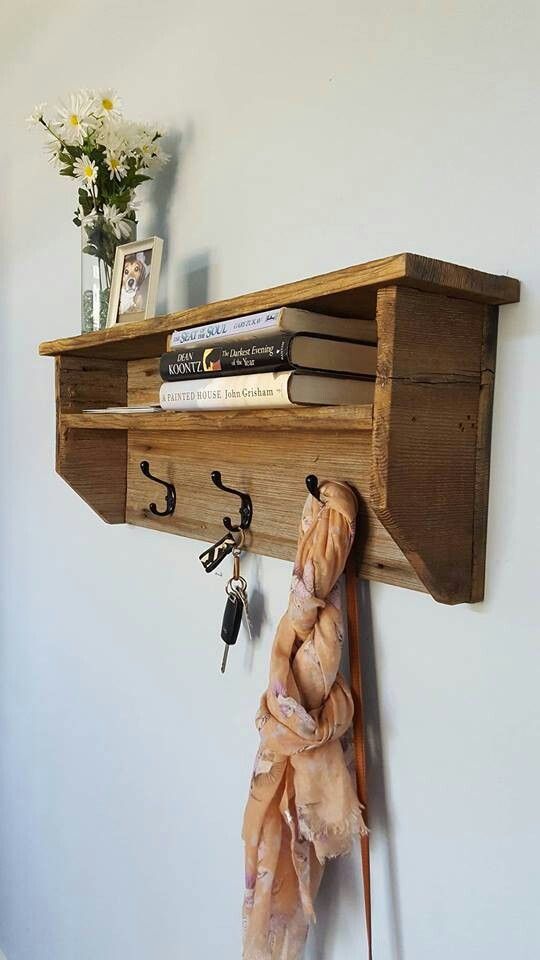
6. Rustic Coat Rack
Need a practical piece for your entryway? A rustic coat rack offers a dash of charm and useful hanging space. It’s a great beginner project that doesn’t skimp on style.
Step 1: Gather Materials
For this project, you’ll need a piece of reclaimed wood that suits the size of your desired coat rack, a set of vintage hooks, and screws. Having a drill, a screwdriver, and optionally some wood finish or paint on hand will also be useful.
Step 2: Prepare and Measure
Clean your reclaimed wood, and measure and mark where you would like your hooks to be placed. Ensure the marks are evenly spaced for an aesthetically pleasing result.
Step 3: Attach the Hooks
Drill guide holes at the marked positions to make attaching the hooks easier. Then, use the screws to fix the hooks to the wood. Make sure each hook is firmly secured.
Step 4: Sanding and Finishing
Sand the coat rack to smooth out any rough spots, and then apply your chosen finish. This could be a wood finish to highlight the natural grains or paint for a more colorful look.
Step 5: Mount the Coat Rack
Choose a suitable spot in your entryway for the coat rack. Use a drill to create holes in the wall that align with the ones in the coat rack, and secure it in place with screws. Ensure it’s sturdy before adding any weight.
Step 6: Enjoy Your Rustic Coat Rack
Hang your coats, hats, scarves, and other items on your newly created rustic coat rack. Now, step back and admire your handy work.
Follow these six simple steps to create a functional and stylish rustic coat rack that adds a dash of charm to your entryway. Happy DIY-ing!
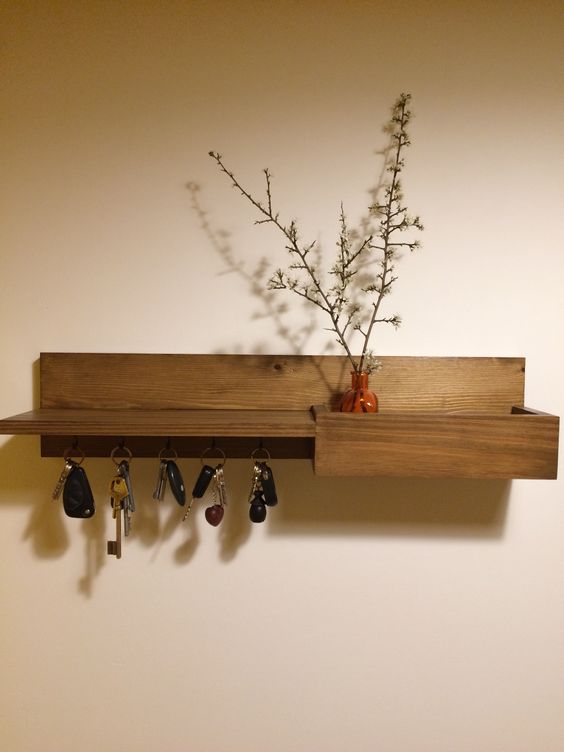
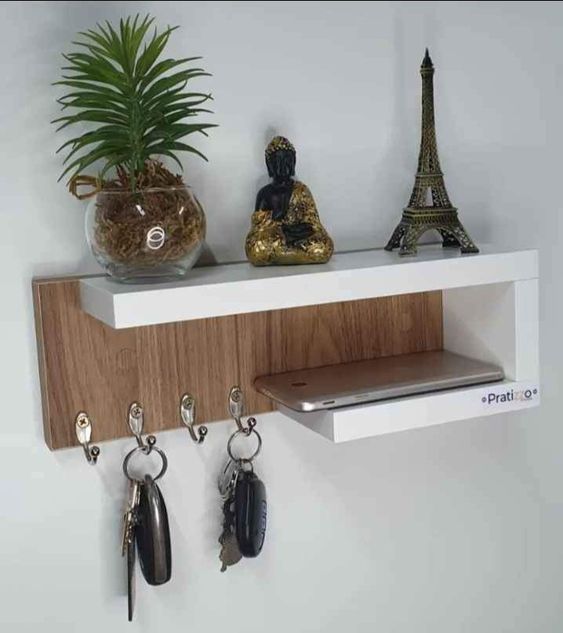
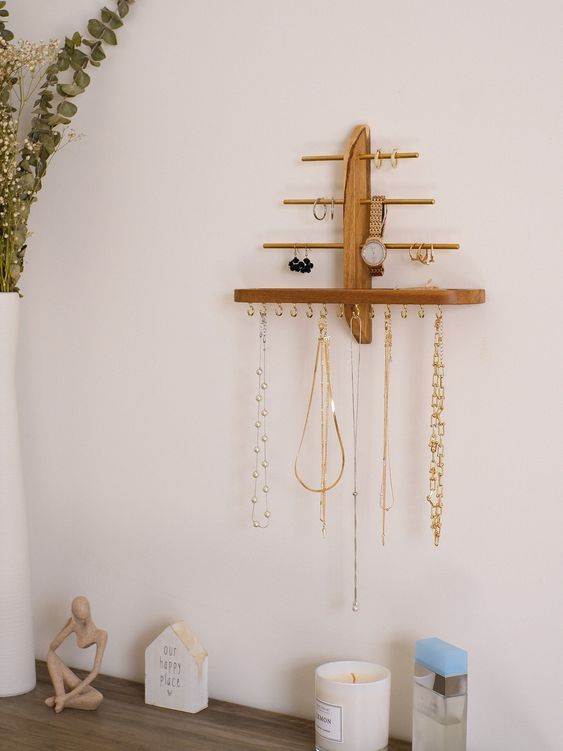
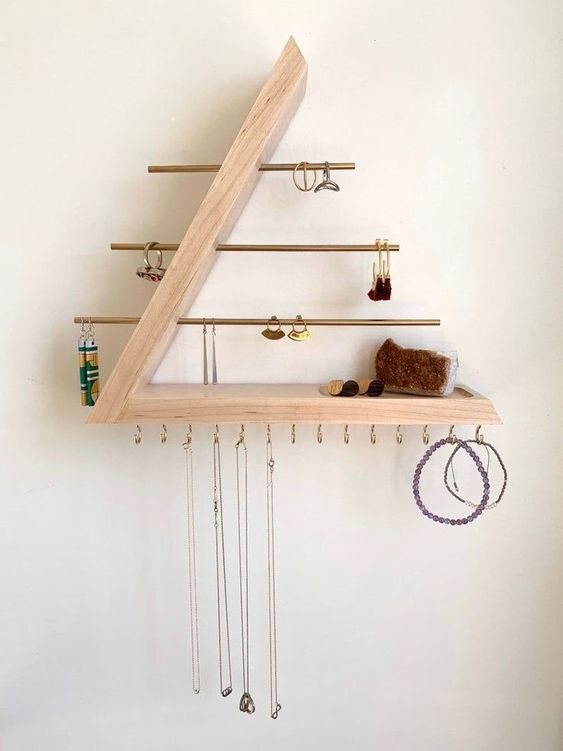
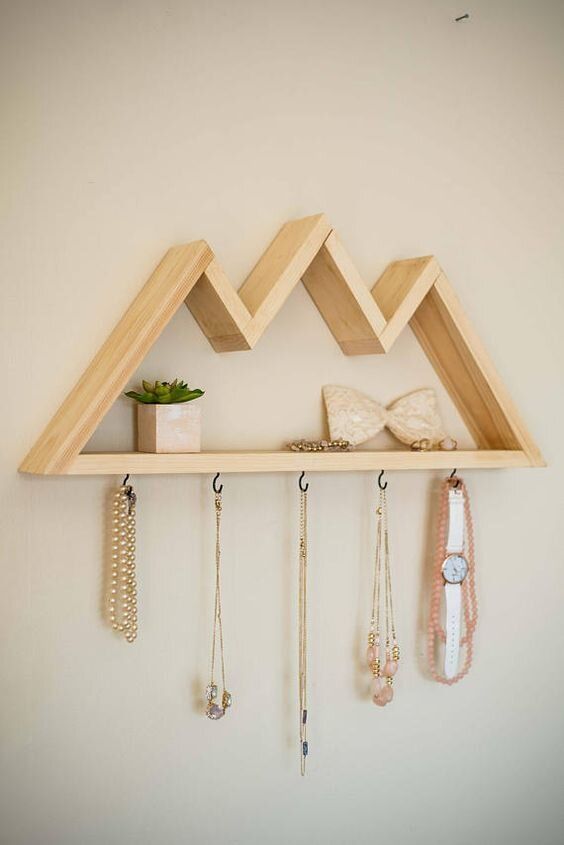
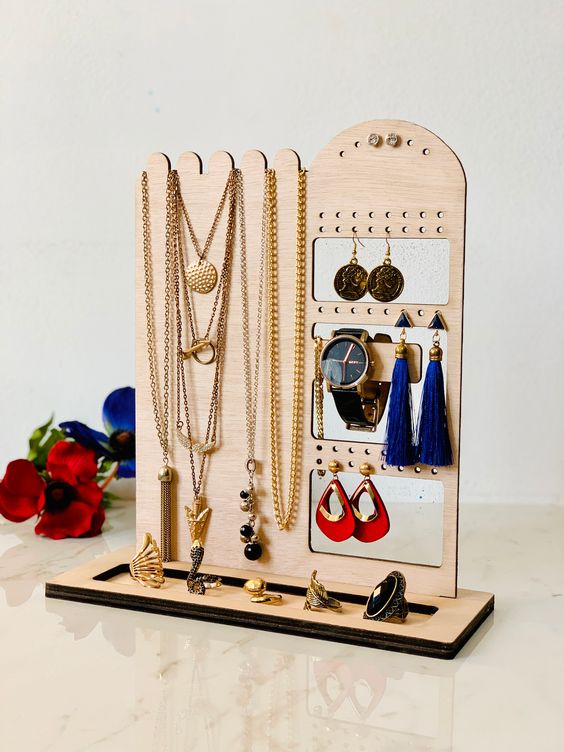
7. Wooden Jewelry Holder
Fashion meets function with a wooden jewelry holder. This project is typically simple yet provides an elegant solution to keep your jewelry organized.
Step 1: Gather your Materials
To create a wooden jewelry holder, you’ll need a piece of reclaimed wood, a selection of knobs and hooks, and screws. You will also need a drill, a screwdriver, sandpaper, and optionally some wood finish or paint.
Step 2: Clean and Measure
Clean your reclaimed wood thoroughly and let it dry. Then, measure and mark where you would like your knobs and hooks to be placed. Make sure to space them evenly for a tidy and organized look.
Step 3: Attach the Knobs and Hooks
Drill guide holes at the marked positions, making attaching the knobs and hooks easier. Use the screws to fix them to the wood. Ensure each knob and hook is firmly attached and can withstand the weight of your jewelry.
Step 4: Sand and Finish
Sand the jewelry holder to smooth out any rough spots. After this, apply your chosen finish. You might opt for a wood finish to emphasize the natural textures or paint for a pop of color.
Step 5: Mount the Jewelry Holder
Choose a suitable spot on your wall for the jewelry holder. Drill holes in the wall that align with the ones in the holder, and secure it in place with screws. Make sure it’s sturdy before hanging any jewelry.
Step 6: Organize your Jewelry
Arrange your necklaces, bracelets, rings, and earrings on your new wooden jewelry holder. Now you can enjoy an elegant and functional addition to your room decor.
Follow these six simple steps, and you’ll have a homemade wooden jewelry holder that’s not only useful but also adds a stylish touch to your decor. Happy DIY-ing!
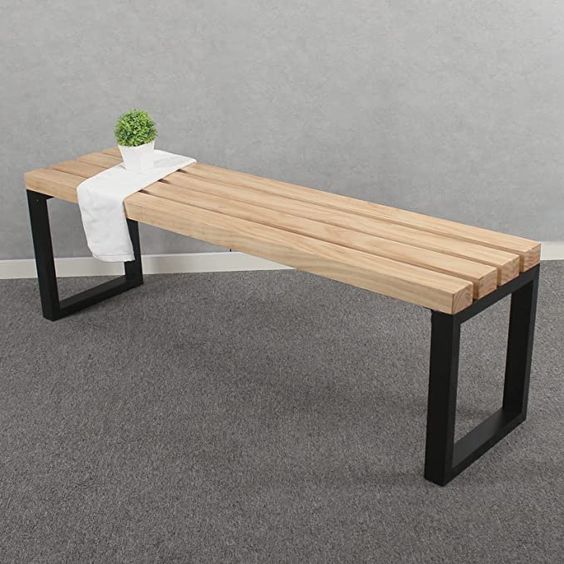
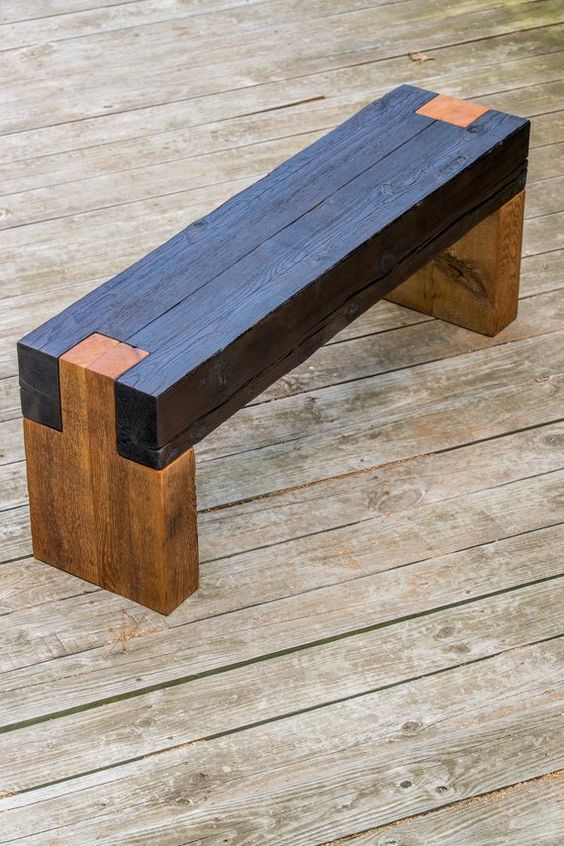
8. Outdoor Bench
An outdoor bench would require a bit more time and effort, but it’s still within a beginner’s abilities. A robust and weather-resistant design will provide a comfortable seat in your backyard.

Step 1: Gather Materials
First, gather all necessary materials. You’ll need sturdy wood (cedar or redwood is a good choice for outdoor furniture), screws, a drill, a saw, sandpaper, and wood sealant to protect your bench from the elements.
Step 2: Cut the Wood
Cut your wood to the desired length for the bench’s seat, back, and legs. Typically, a bench will have two pieces for the back and seat, and four pieces for the legs.
Step 3: Assemble the Seat
Next, assemble the seat of your bench by attaching two of the leg pieces to both ends of one of the seat pieces using your drill and screws. Ensure the legs are square to the seat for stability.
Step 4: Attach the Back
Attach the back piece to the seat and legs. Make sure it’s at a comfortable angle, and secure it with screws.
Step 5: Sand and Seal
Sand your bench to smooth out any rough edges and apply the sealant. This will help protect your bench from weather damage.
Step 6: Let it Dry
Allow the sealant to dry completely before placing your bench outside. Once it’s dry, your new outdoor bench is ready to be enjoyed!
By following these steps, you can create a robust, weather-resistant bench that adds comfort and aesthetic appeal to your outdoor space. Happy building!
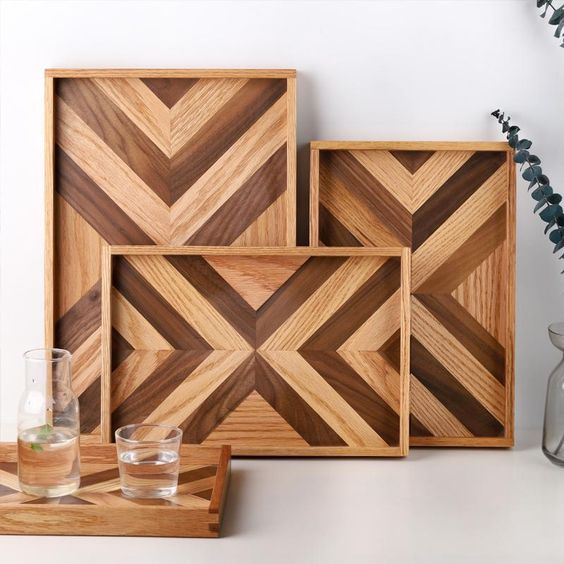
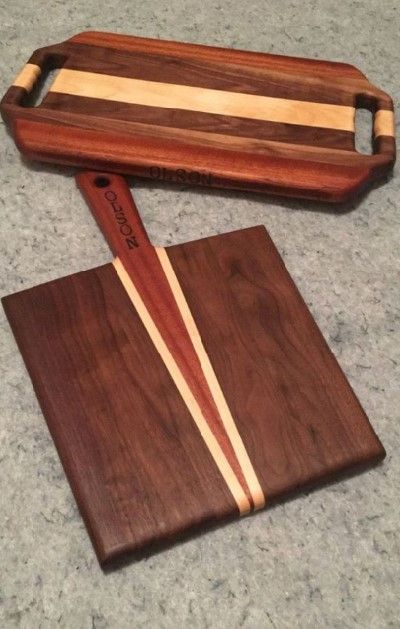
9. Wooden Serving Tray
Serve up style and craftsmanship with a handmade wooden tray. This project can be personalized with handles of your choice and finished to match your decor.

Step 1: Gather Materials
To begin, gather all the necessary materials. You’ll need a wood board for the base, wood strips for the sides, screws, a drill, a saw, sandpaper, and wood sealant. If you wish, you can also add handles for a refined touch.
Step 2: Cut the Wood
Cut the base of your tray to your preferred size first. Measure and cut four wood strips to create the sides of your tray. These should correspond to the length and width of your base.
Step 3: Assemble the Tray
Use your drill and screws to secure the side pieces to the base, creating a rectangular shape. Ensure all corners are square and the sides are flush with the base for a clean, professional look.
Step 4: Attach the Handles
If you’ve chosen to add handles, now is the time to attach them. Position them evenly on the shorter sides of the tray, and secure them with screws.
Step 5: Sand and Seal
Just like the outdoor bench, it’s crucial to sand your serving tray to remove any rough edges. Once smooth, apply the sealant to protect the tray from potential stains or water damage.
Step 6: Let it Dry
Allow the sealant to fully dry before use. After drying, your handmade wooden serving tray is ready to impress guests at your next gathering. With your personal touch, it’s not just a tray— it’s a conversation piece. Happy crafting!
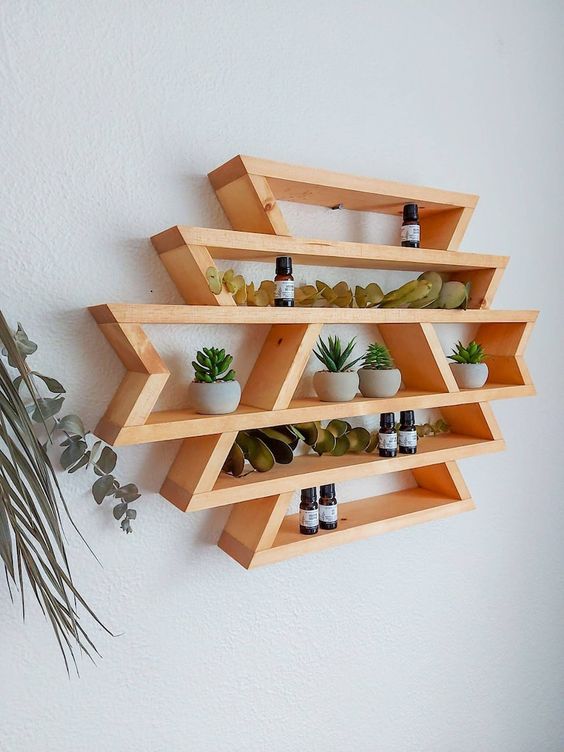
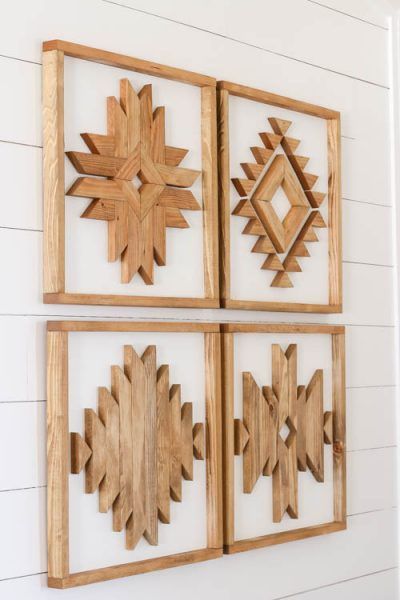
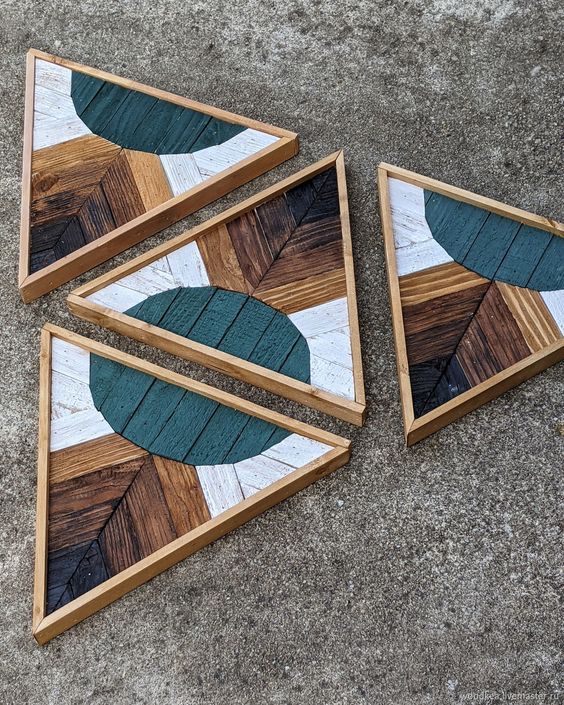
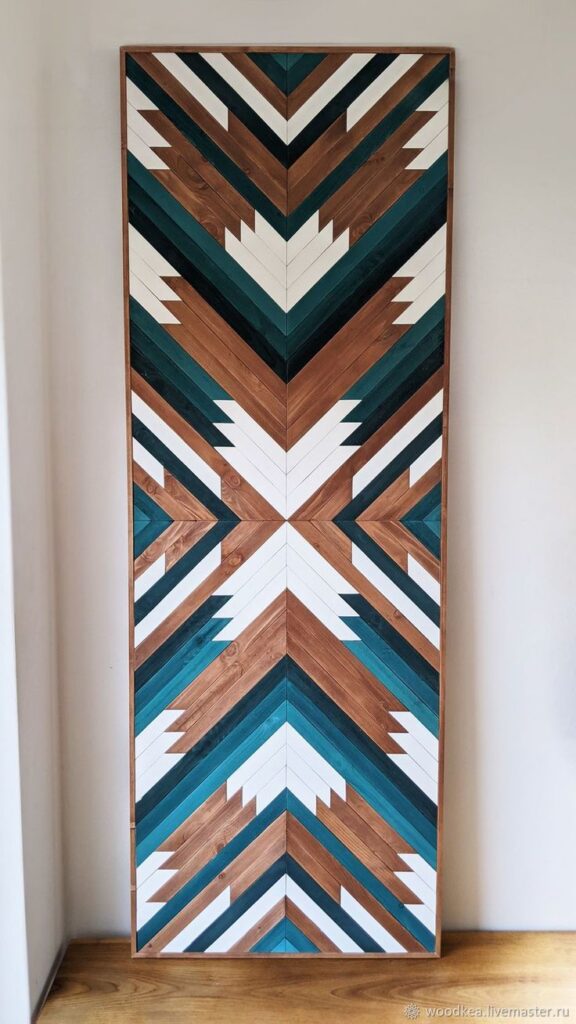
10. Decorative Wall Art
Showcase your creativity with wooden wall art. The forms and patterns are limitless and allow for personal expression with a saw and some stains or paints.

Materials
For this project, you’ll need a solid wood panel, a pencil, a jigsaw, sandpaper, primer, paint, brushes, and a clear sealant. Feel free to choose paints that fit your color scheme or artistic vision.
Step 1: Sketch Your Design
Begin by sketching your design on the wood panel with a pencil. You could choose an abstract pattern, a geometric design, or even a representation of something meaningful to you. This will serve as your guide when you start cutting and painting.
Step 2: Cut Out Your Design
Use your jigsaw to carefully cut along the lines of your sketch. Remember to take your time and follow the lines as closely as possible to ensure a clean, precise cut. Always remember safety first when using power tools.
Step 3: Sand and Prime
Once you’ve cut out your design, sand the edges and surfaces to remove any rough spots. After sanding, apply a coat of primer to prepare the wood for painting. This will help the paint adhere better and last longer.
Step 4: Paint Your Design
When the primer is dry, it’s time to paint! Use your selected colors to bring your design to life. Depending on your design, you might want to use a variety of brush sizes to achieve different effects.
Step 5: Apply the Sealant
After the paint has completely dried, apply a clear sealant to protect your artwork from dust and moisture. This will also give your wall art a professional, finished look.
Step 6: Hang Your Artwork
Finally, when the sealant is fully dried, your decorative wall art is ready to hang. Find the perfect spot in your home to showcase your new piece of art, and take pride in knowing you created it yourself.
Read our more: wooden-based projects