
Woodcraft has taken the DIY world by storm, captivating the hearts of enthusiasts far and wide. And it’s no wonder why! This incredibly gratifying hobby lets you unleash your creativity while mastering a valuable skill. For beginners, the array of possibilities may seem overwhelming, but fear not! Starting with simpler projects is the key to building confidence and gaining experience.
Table of Contents
Ready to dive in? We’ve curated a list of twenty woodcraft projects tailor-made for beginners like you. From easy-peasy to slightly more challenging, these projects will help you level up your woodworking game at your own pace. Let this collection be your guiding light as you embark on an exciting journey into the world of woodcraft.
Get ready to spruce up your home, craft heartfelt gifts for your loved ones, or simply revel in the joy of creation. These ideas will serve as the perfect springboard for your woodworking adventure. Let’s get crafting!
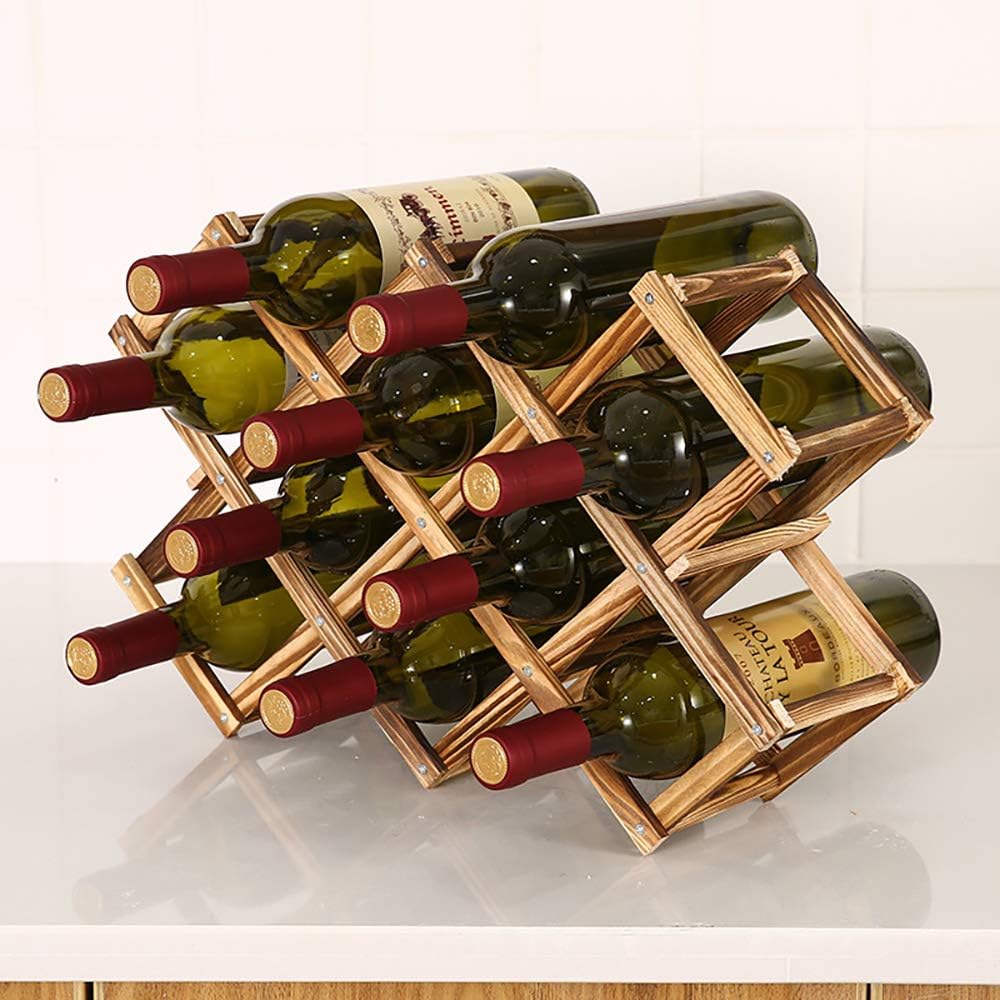
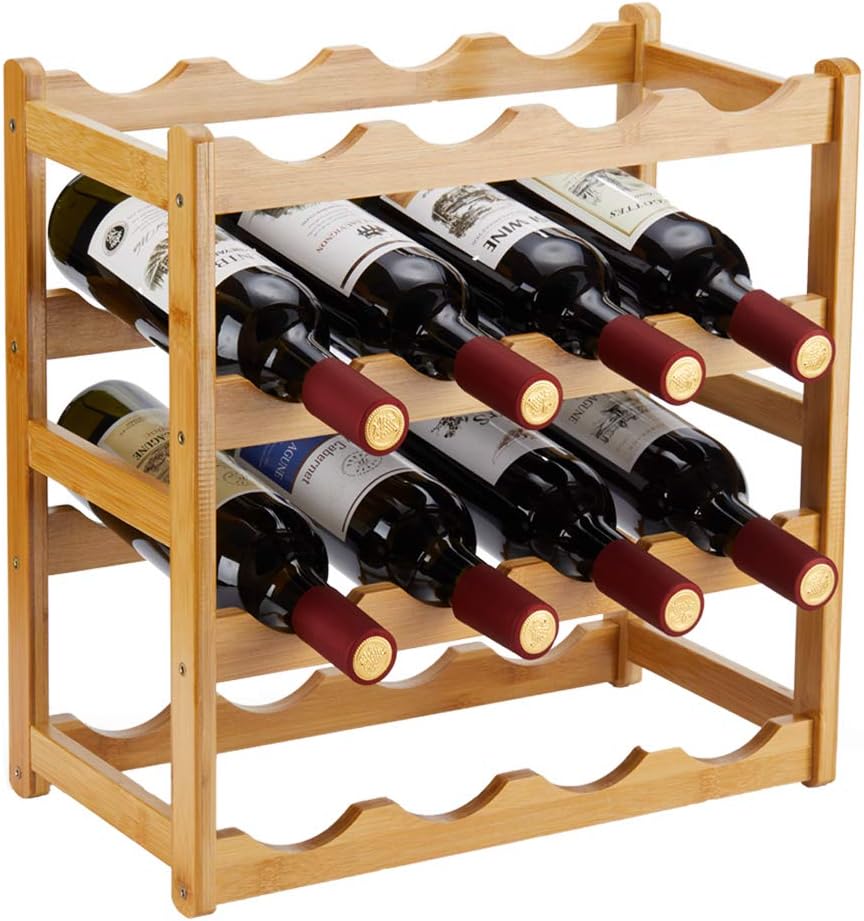
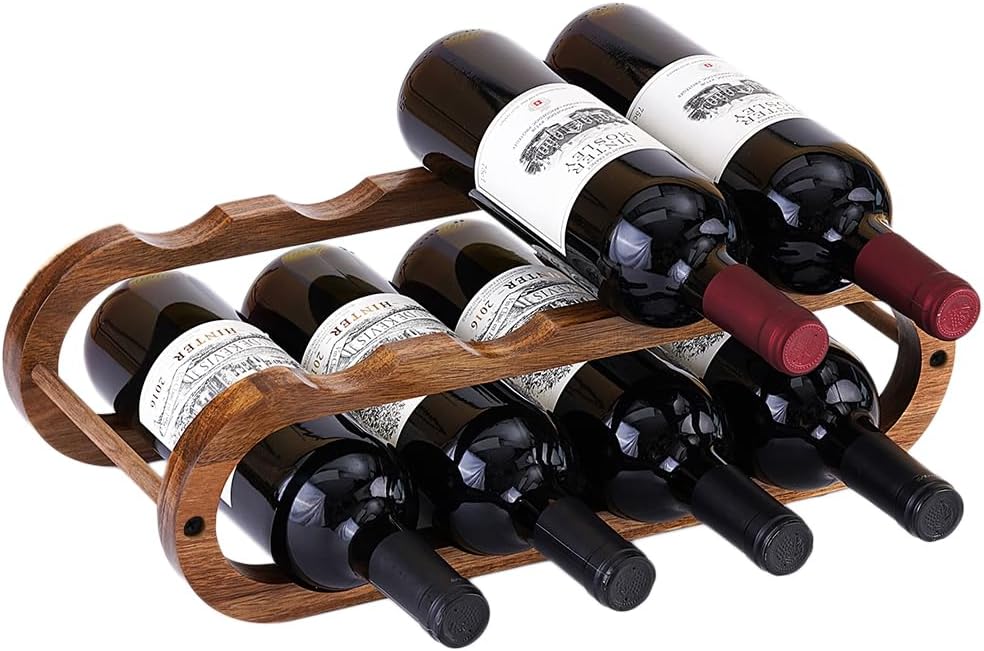
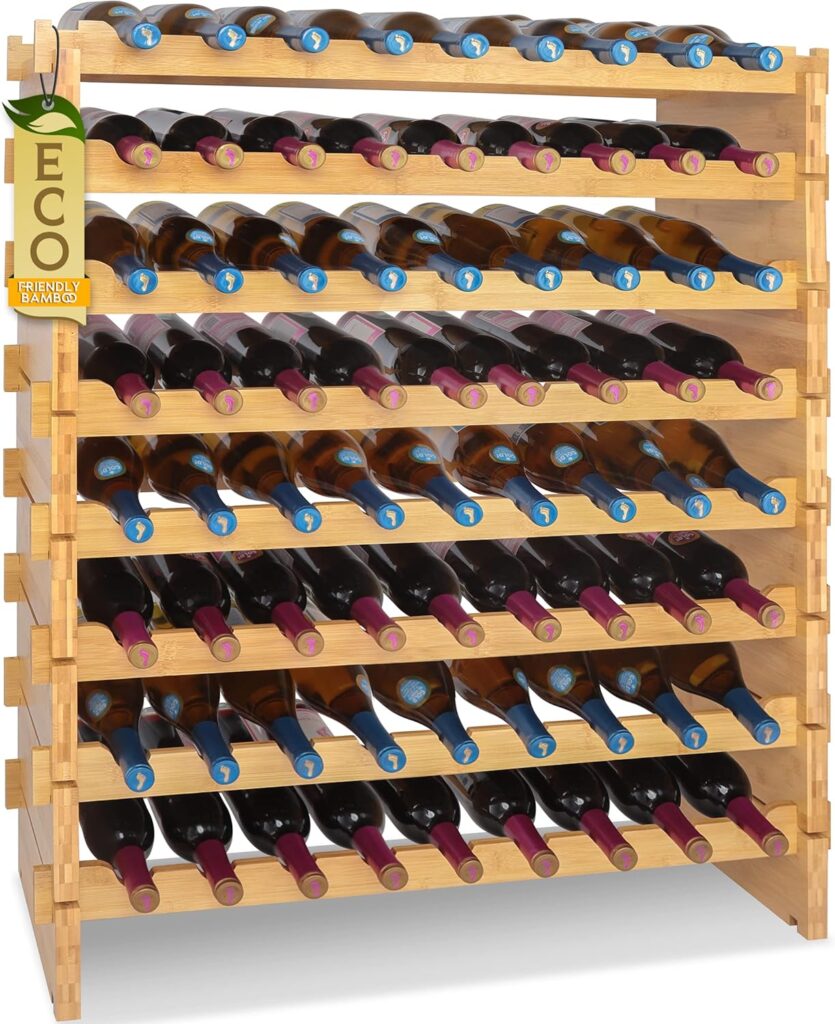
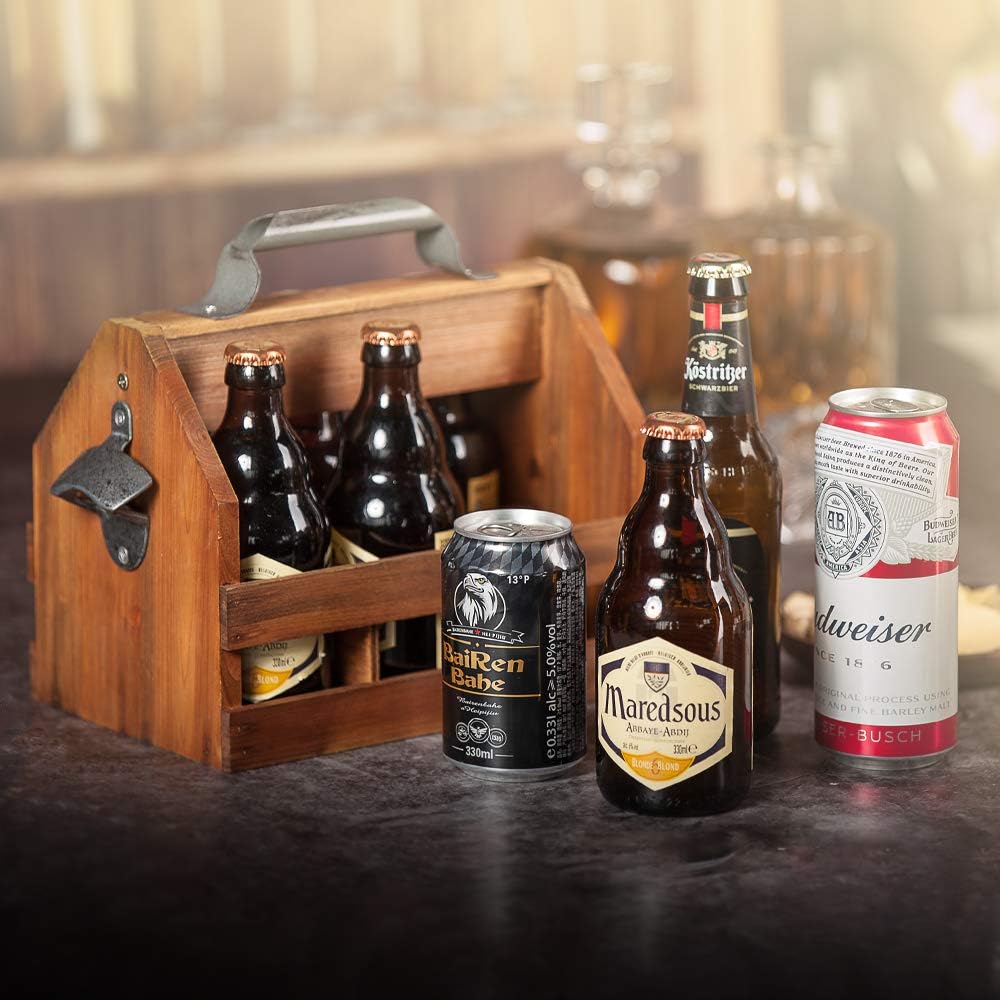
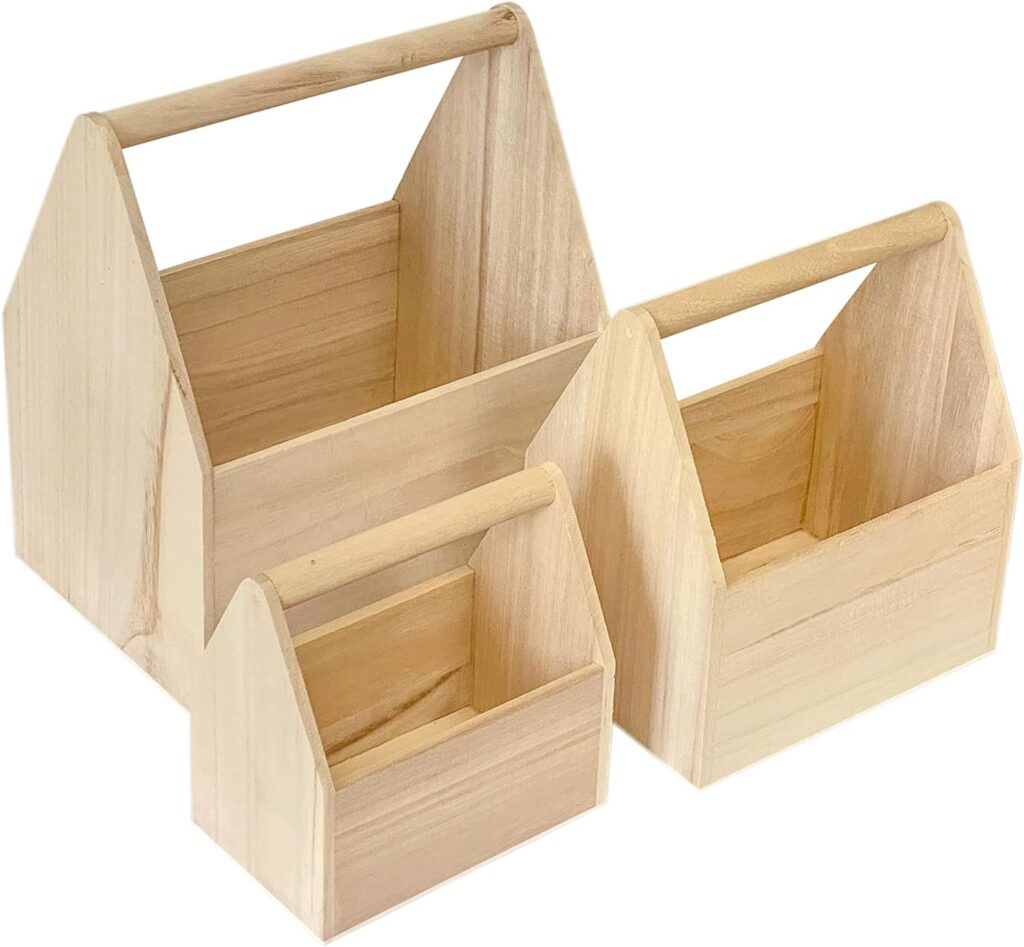
1. Wooden Wine Rack
Ideal for wine enthusiasts, a simple rack can be made with minimal materials. It’s an excellent project for learning how to create secure joins.

Step 1: Gather Your Materials
First, gather all the necessary materials. You’ll need pieces of good quality, sturdy wood, a saw, sandpaper, wood glue, screws, drill, and a wood sealant. Selecting a wood type that suits your interior decor can elevate the overall aesthetics of the rack.
Step 2: Measure and Cut
Mark the dimensions on your wood and cut the pieces to form the main frame and shelves of the wine rack. You’ll need a base, top, and individual holders for the wine bottles. Be sure to measure twice and cut once to ensure accuracy.
Step 3: Assembling the Rack
Once all the parts are cut to the correct size, it’s time to assemble the rack. Use wood glue and screws to secure the pieces together, ensuring that the structure is solid and sturdy. The individual bottle holders should be placed at a slight angle to keep the cork moist and prevent the wine from spoiling.
Step 4: Sand and Seal
After assembling the rack, sand the entire structure to ensure a smooth finish. Once done, apply a coat of wood sealant to protect the rack from moisture and give it a polished look.
Step 5: Mount the Rack
Finally, choose a suitable location for your wine rack. It can be freestanding or mounted on a wall. If you choose to mount it, ensure it’s done securely to prevent any accidents. Now, all that’s left is to fill the rack with your favorite wines and enjoy the fruits of your labor.
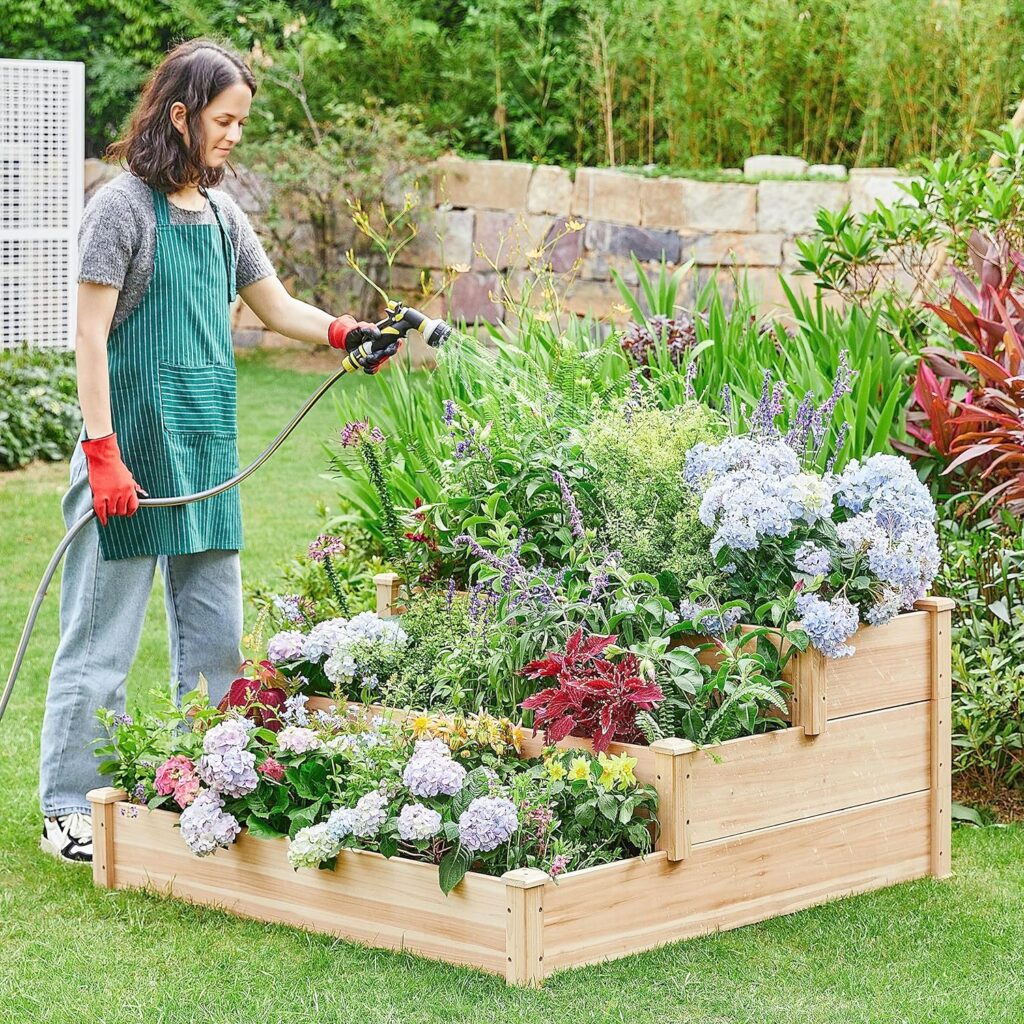
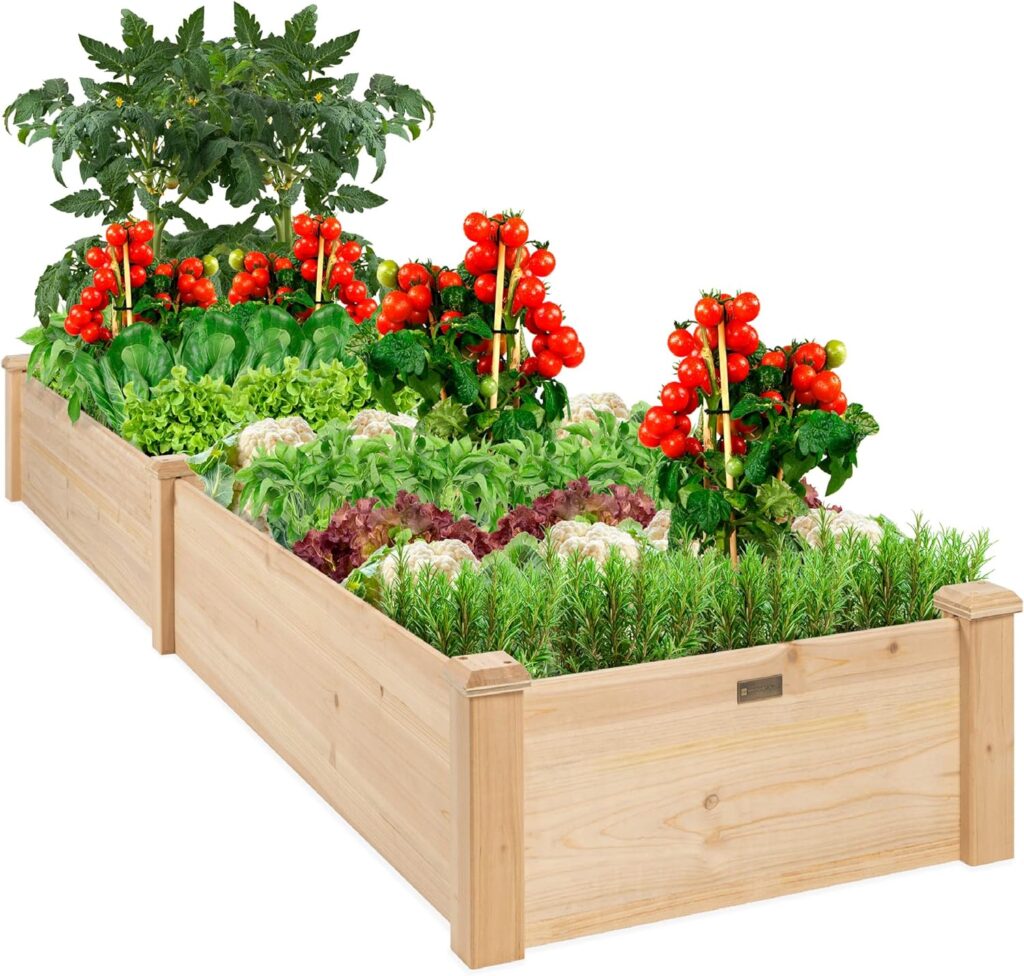
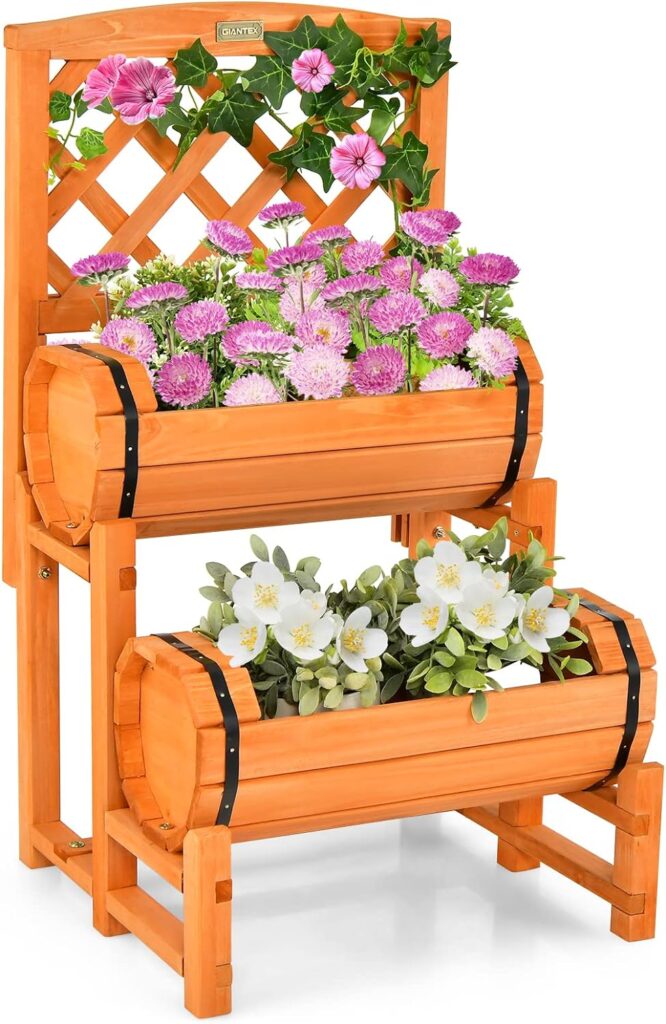
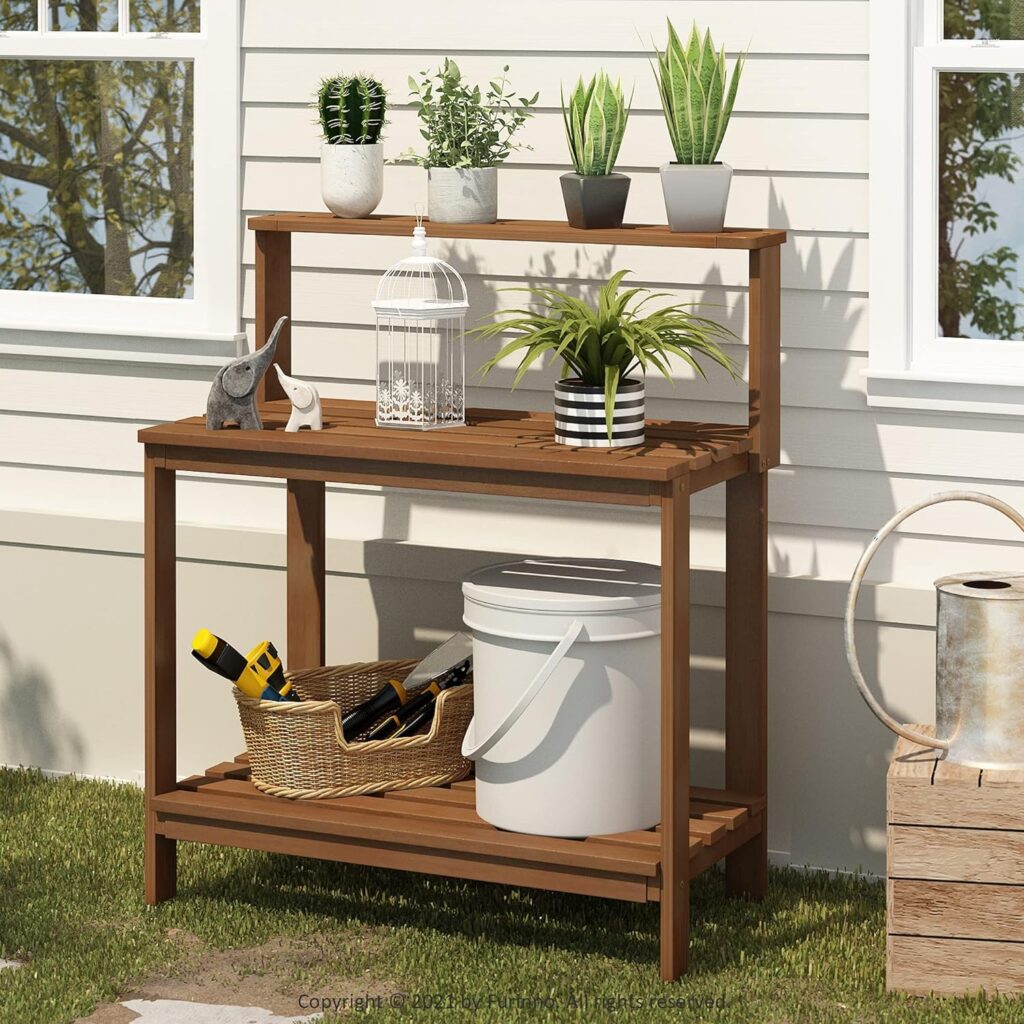
2. Garden Planter Box
Bring life to your patio or windowsill with a garden planter box. It’s an outdoor project that’s as satisfying to build as it is to use.
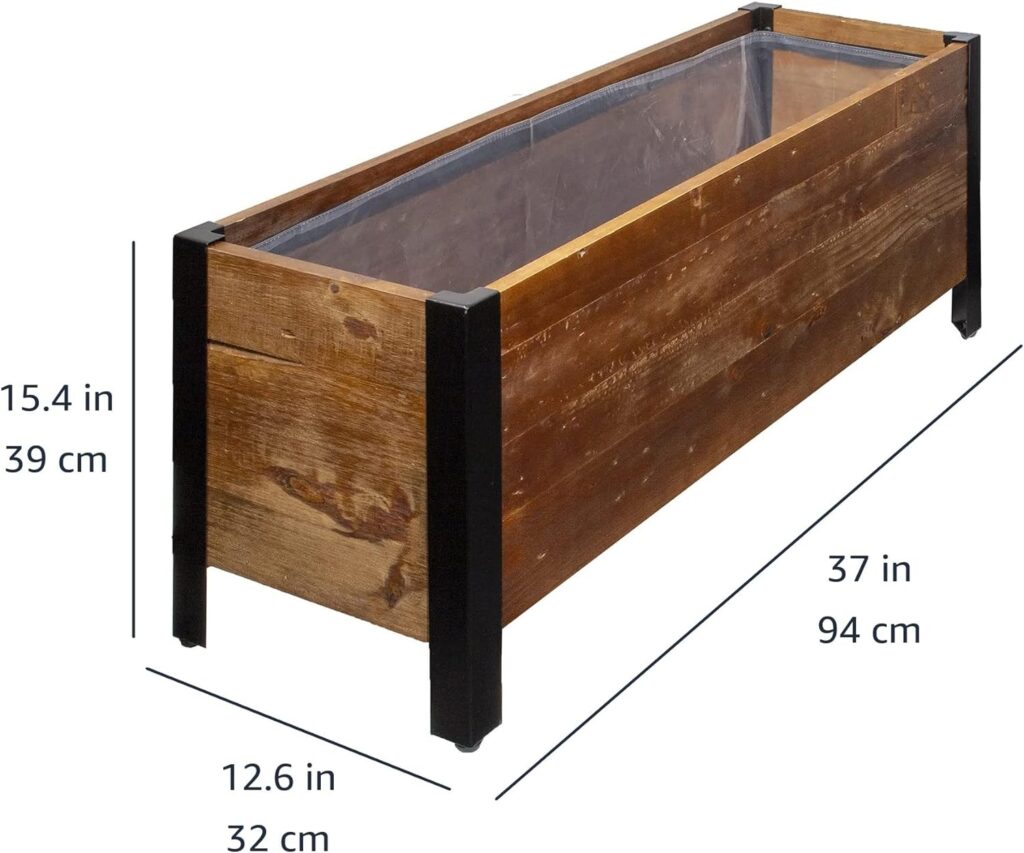
Step 1: Gather Materials
You’ll need to start by gathering all the necessary materials. This includes quality wood (cedar or redwood are excellent choices), a saw, drill, screws, sandpaper, and a protective sealant.
Step 2: Measure and Cut
Just like the wine rack, start by measuring and marking the dimensions for your planter box on the wood. You’ll need to cut out the sides, bottom, and any internal dividers if you’re planning to have separate sections in your planter.
Step 3: Assemble the Box
Next, use your drill and screws to assemble the box. Make sure the bottom is secure, and add support through the middle if necessary to handle the weight of the soil and plants.
Step 4: Sand and Seal
Once the box is assembled, sand all the surfaces to create a smooth finish. Then apply a layer of sealant to protect the wood from the elements and prolong the life of your planter box.
Step 5: Plant Your Garden
With the box ready, it’s now time to fill it with soil and plant your seeds or seedlings. Remember to water them regularly and provide sufficient sunlight. Enjoy watching your garden grow!
3. Wooden Tool Tote
Organize your growing toolkit with a tote you’ve crafted yourself. This practical project will get ample use as you continue on your woodworking path.
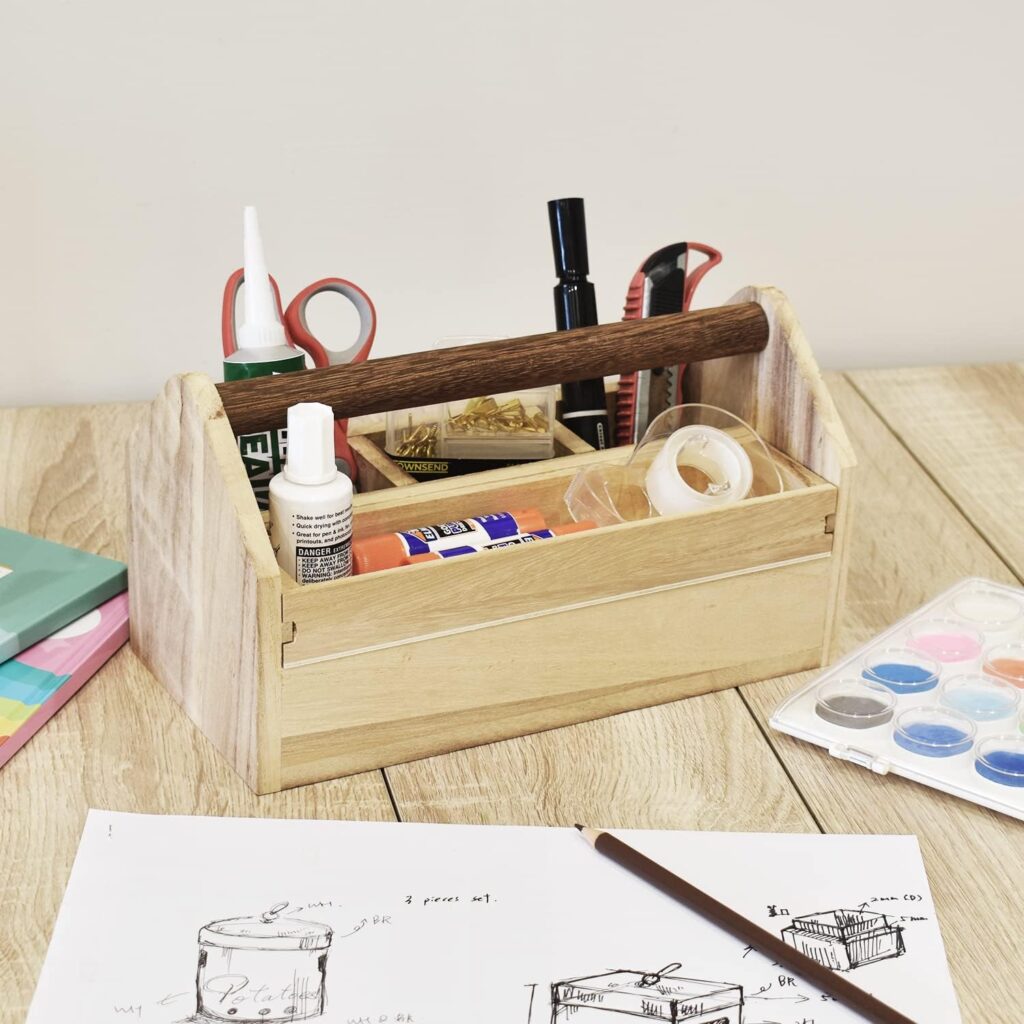
Step 1: Gather Materials
Firstly, collect all required materials and tools. This includes a sturdy choice of wood, a saw, wood glue, nails, a hammer, and sandpaper. Also, you may want to consider paint or wood stain to give your tool tote a finished look.
Step 2: Measure and Cut
Measure the desired dimensions on the pieces of wood. These measurements will vary based on how large or small you want your tool tote to be. Remember, you’ll need to cut out pieces for the sides, bottom, and handle of the tote.
Step 3: Assemble the Tote
Start by attaching the sides to the bottom piece using wood glue and nails for added strength. Make sure everything is square and aligned correctly. Once the base and sides are secure, attach the handle. This will require drilling through the handle piece and sides of the tote, and securing with screws or nails.
Step 4: Sand and Finish
After the tool tote is assembled, use sandpaper to smooth out any rough edges and surfaces. This is also the time to apply paint or wood stain if desired. Let the tote dry completely before use.
Step 5: Organize Your Tools
Now that your wooden tool tote is complete, you can fill it with your tools. Its practical design should provide easy access and great organization, making your woodworking projects even more enjoyable.
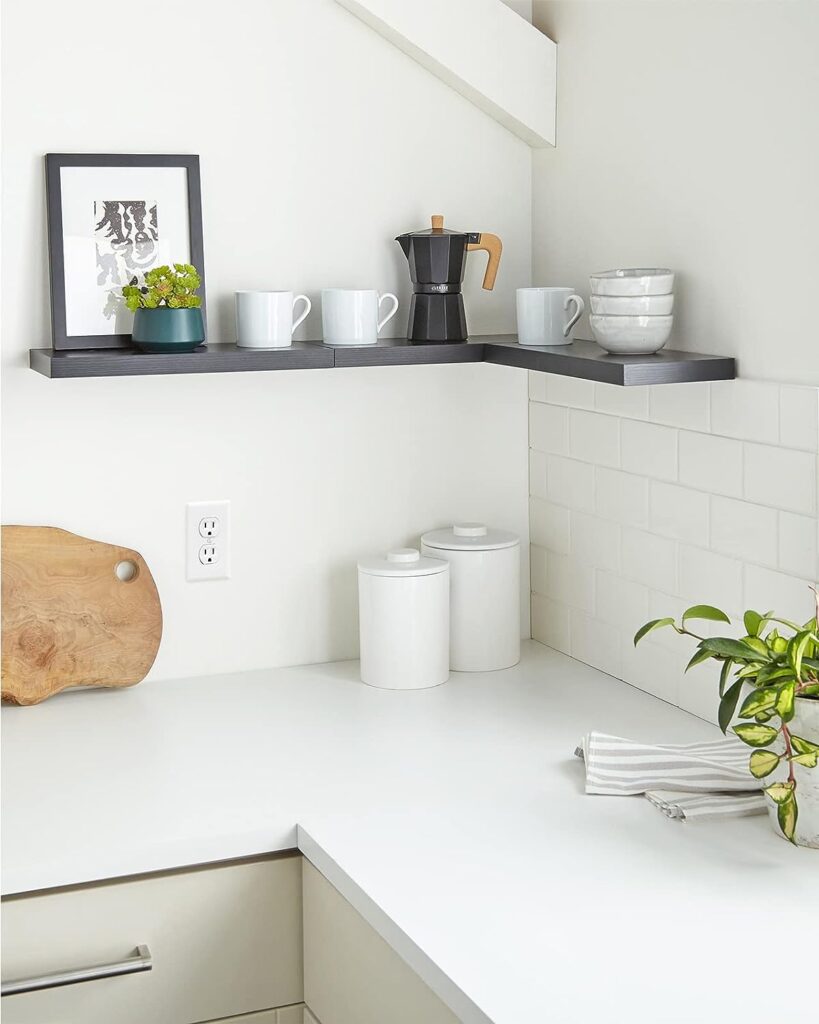
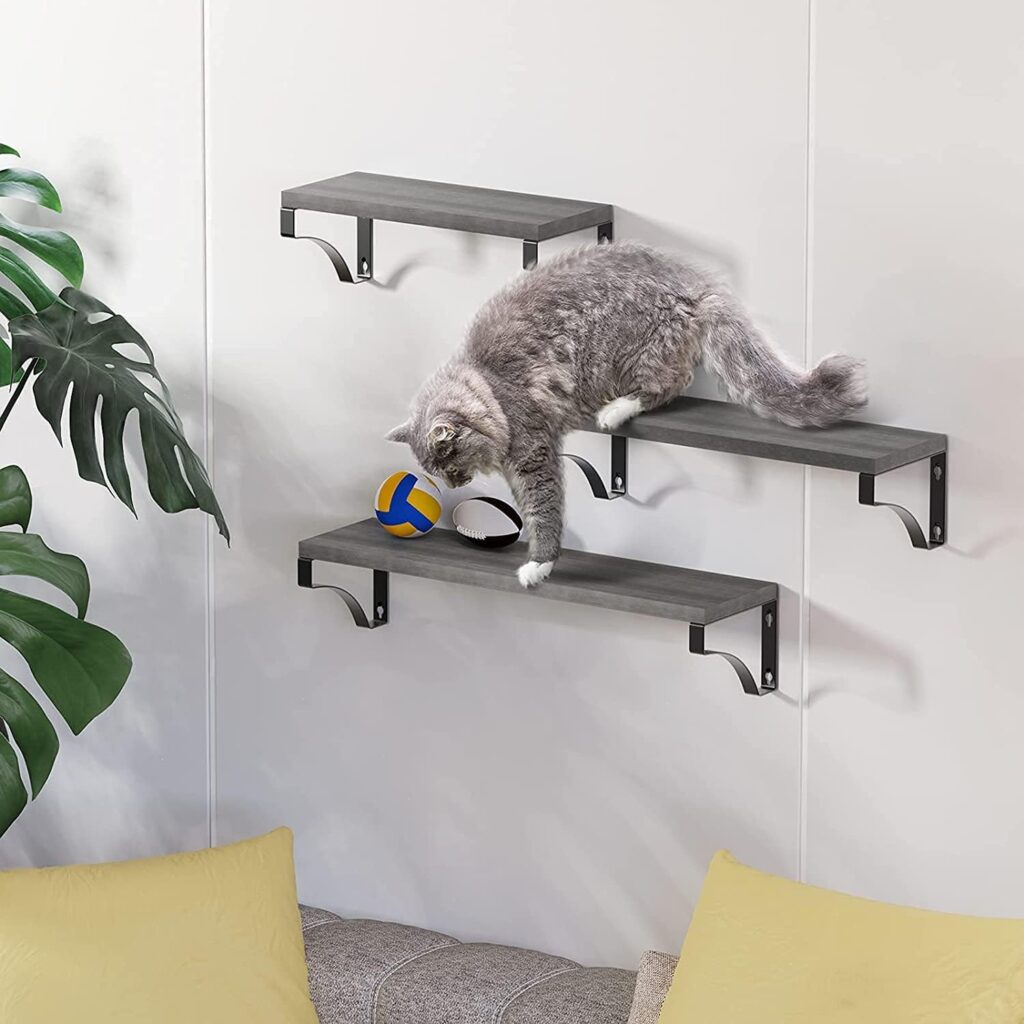
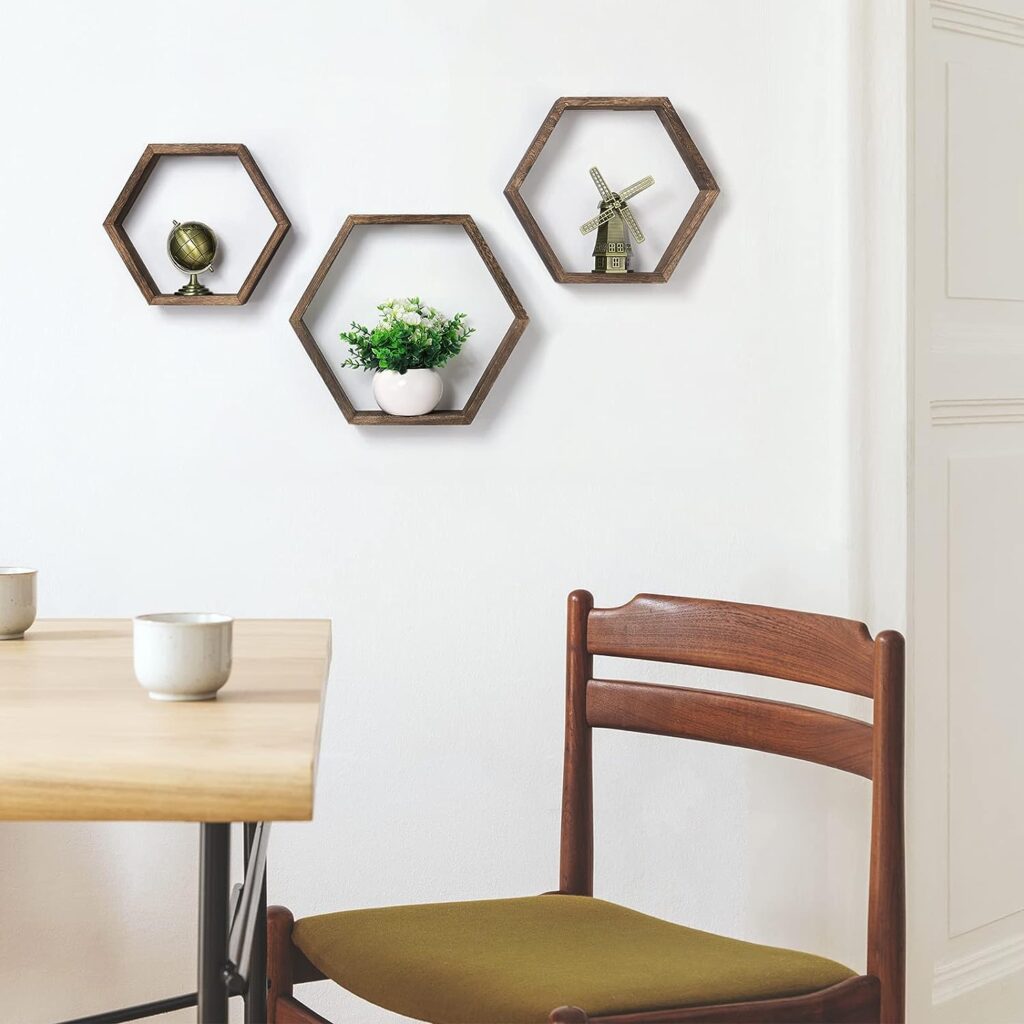
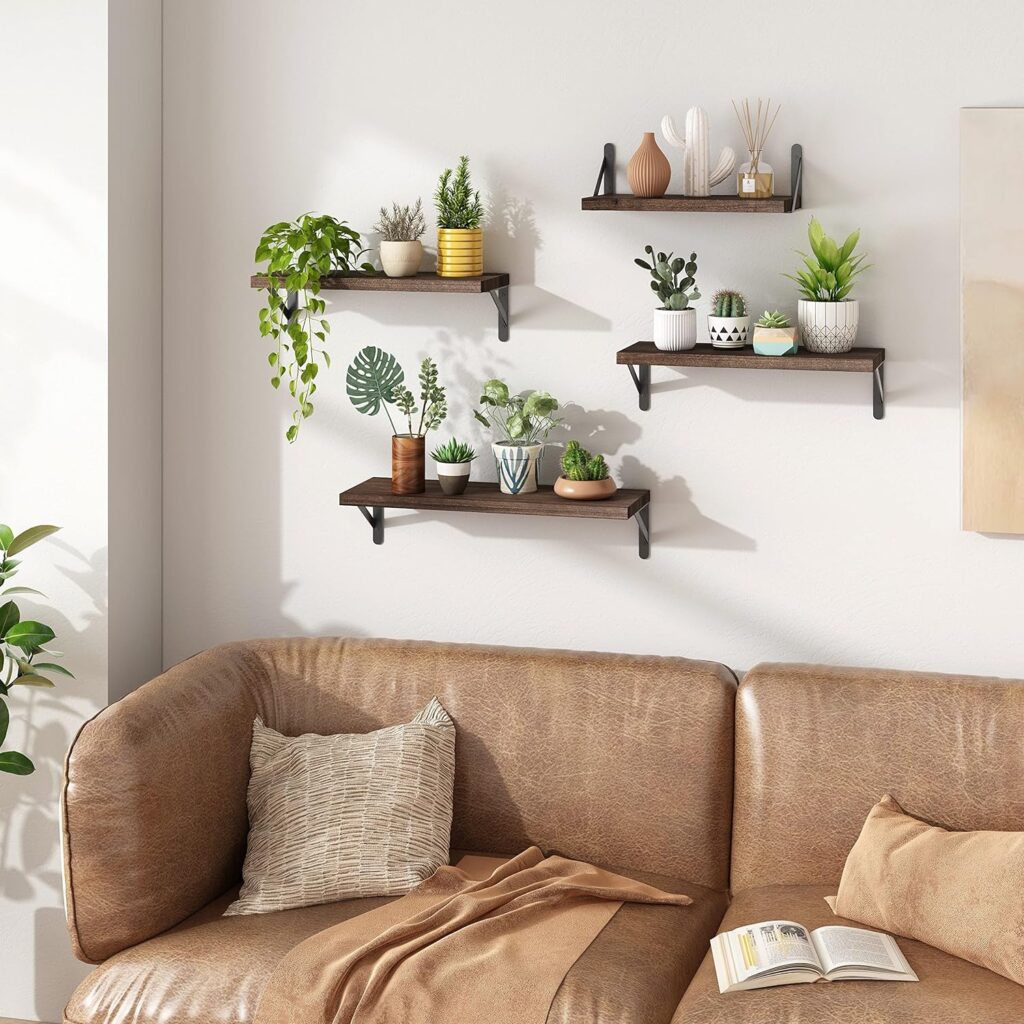
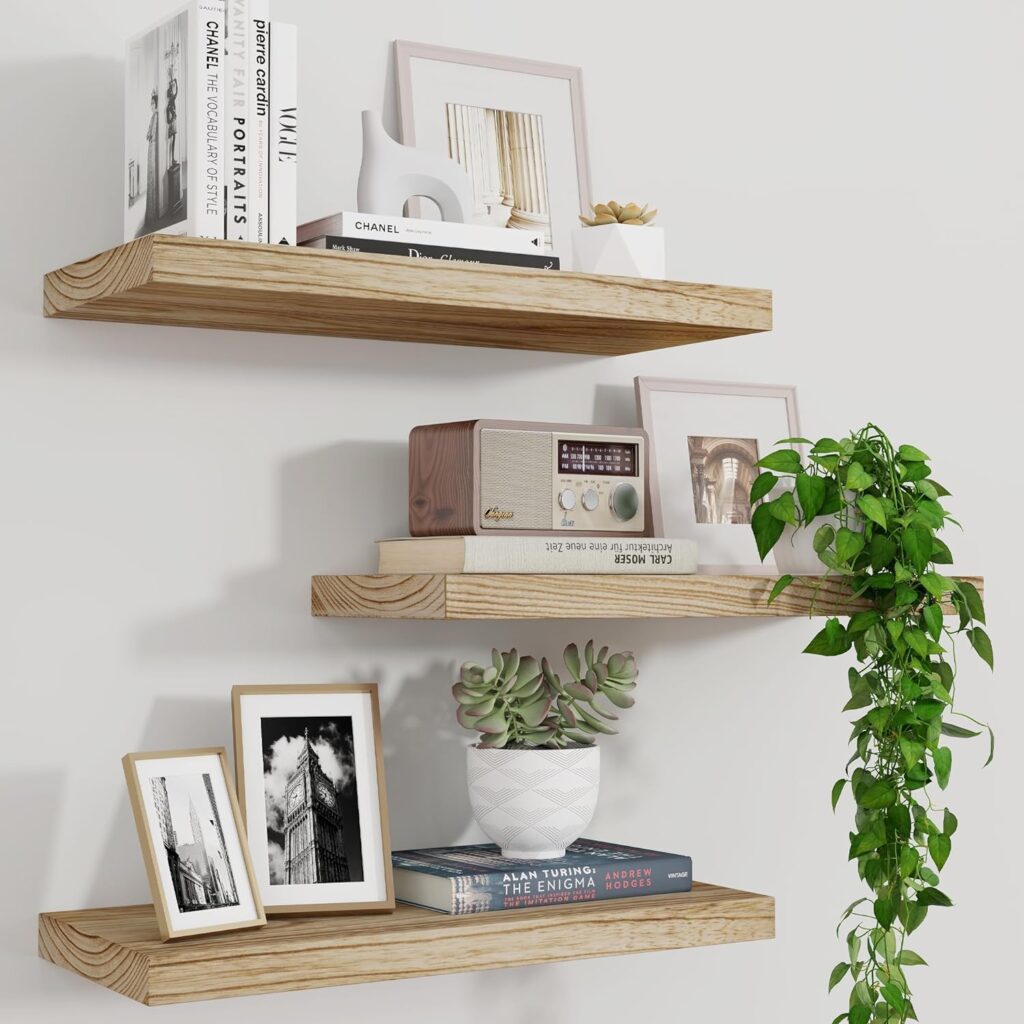
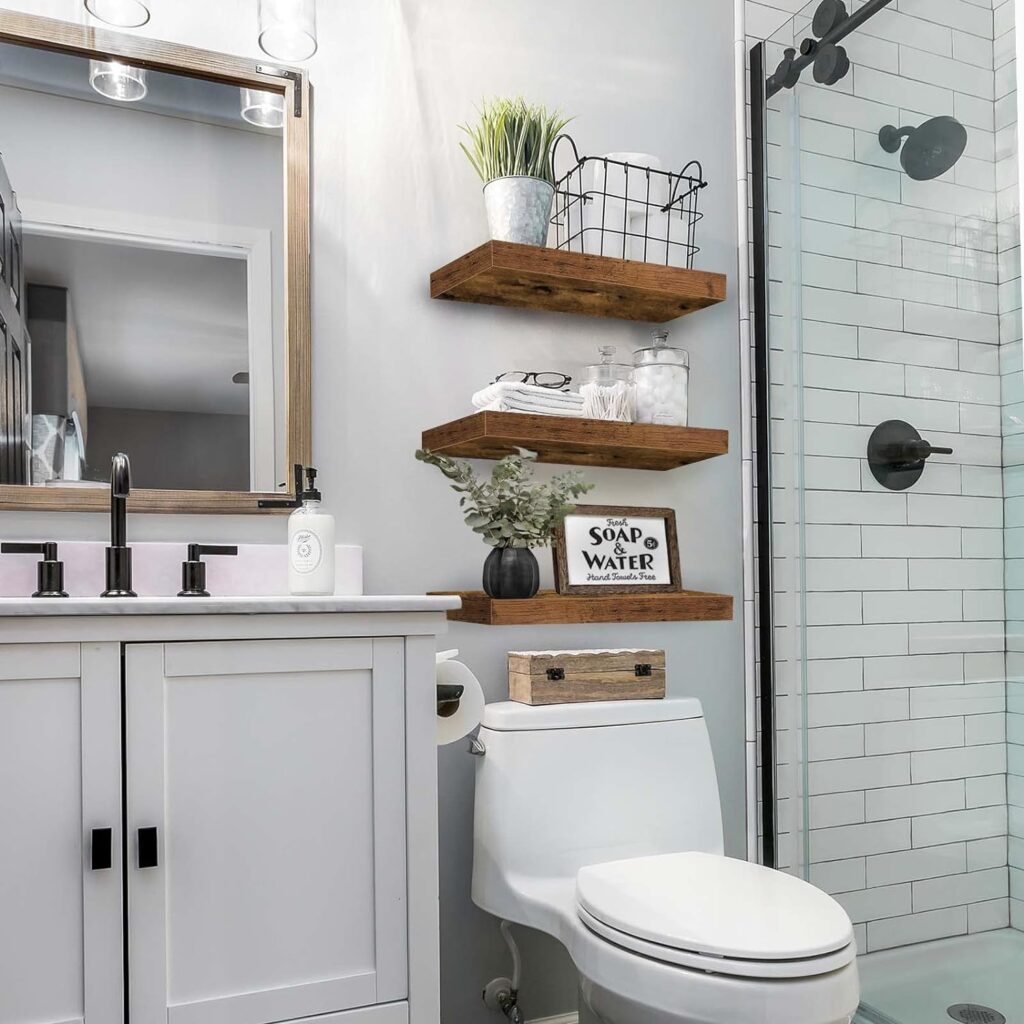
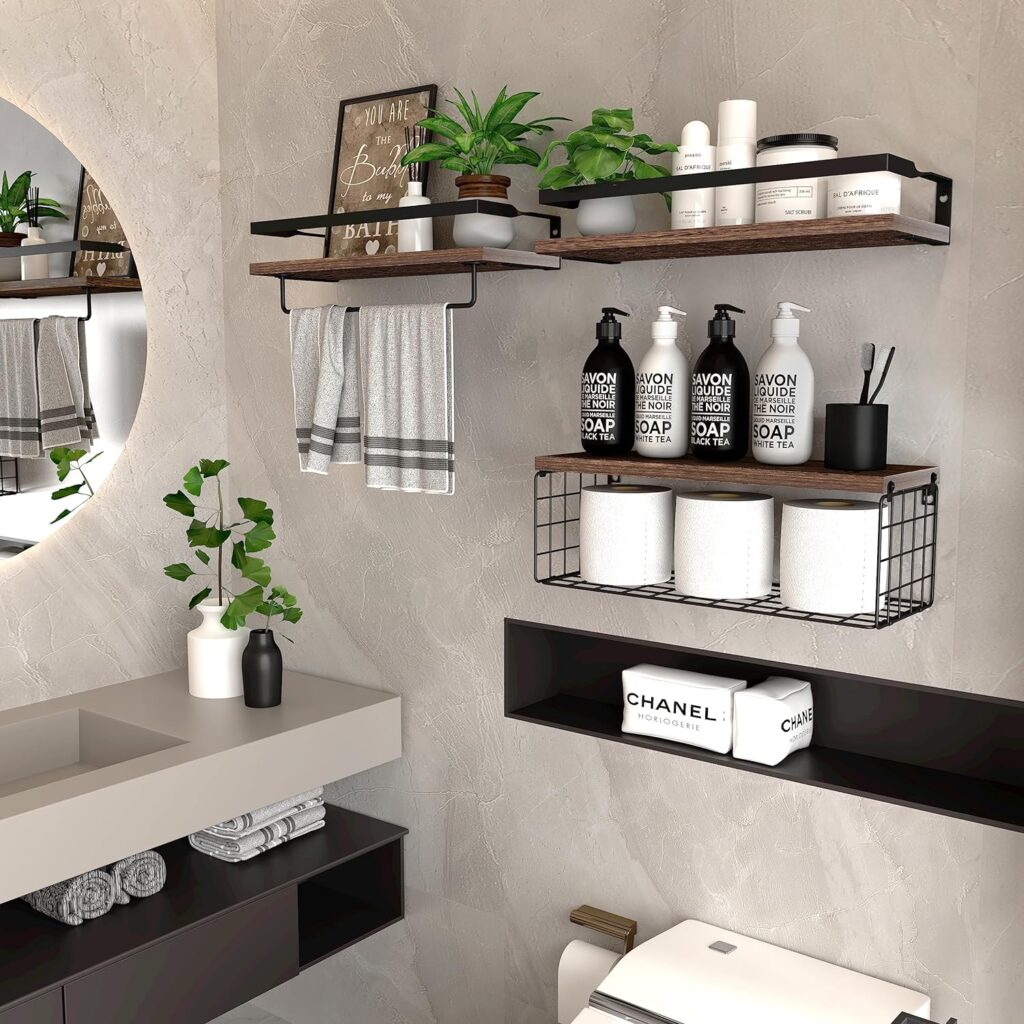
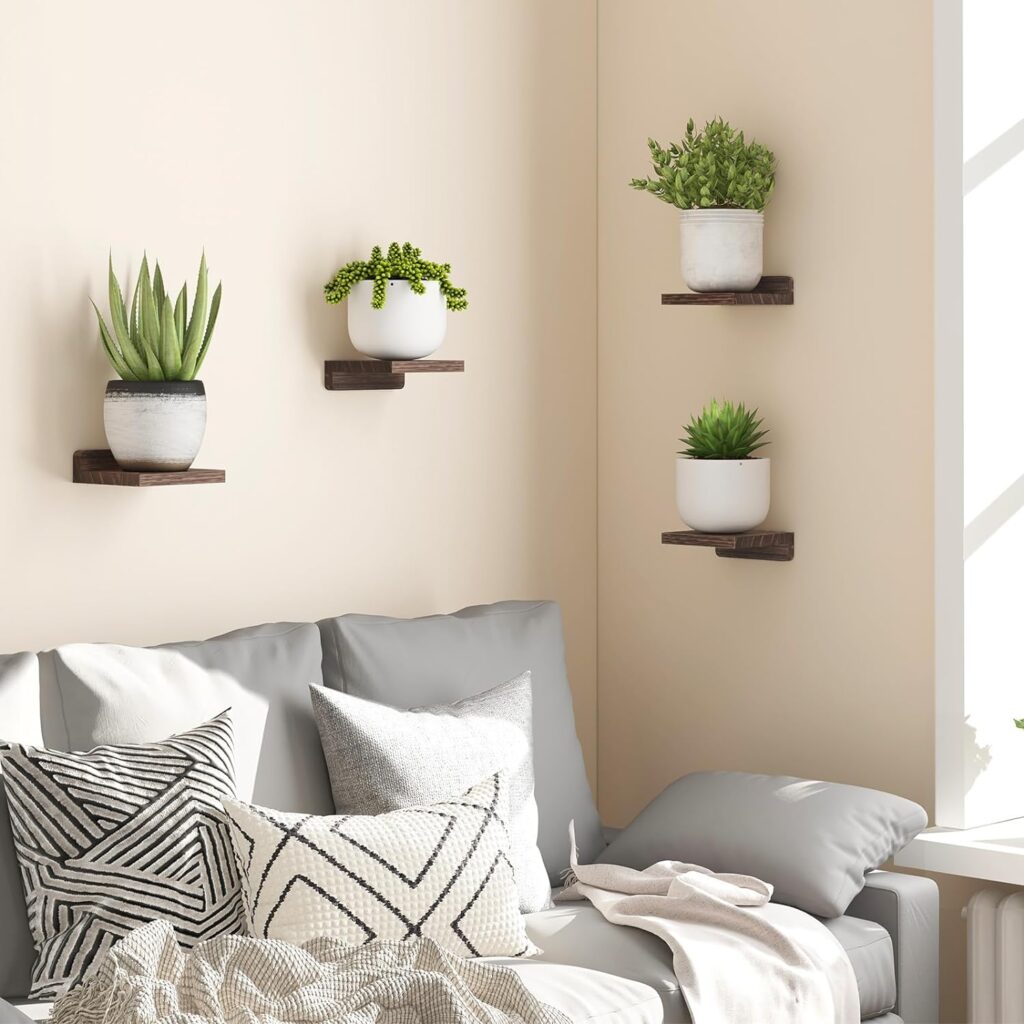
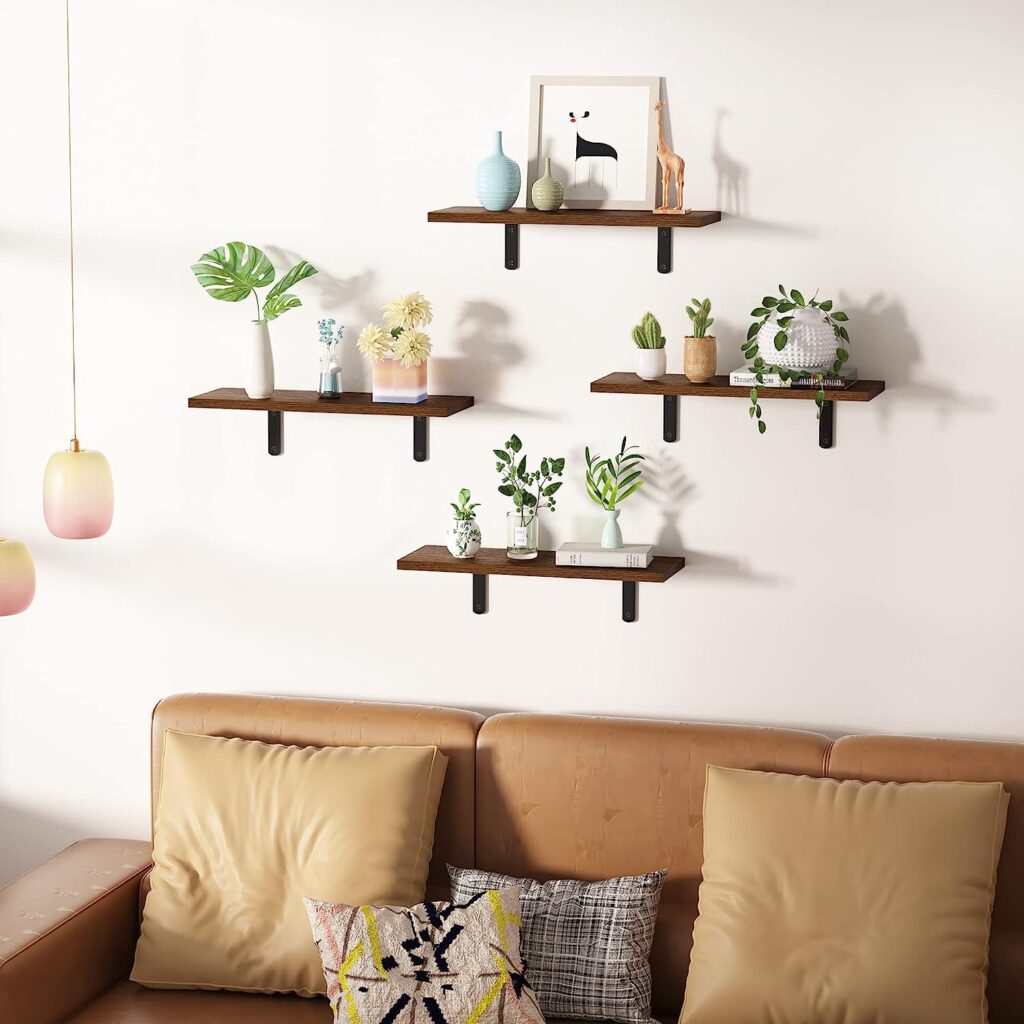
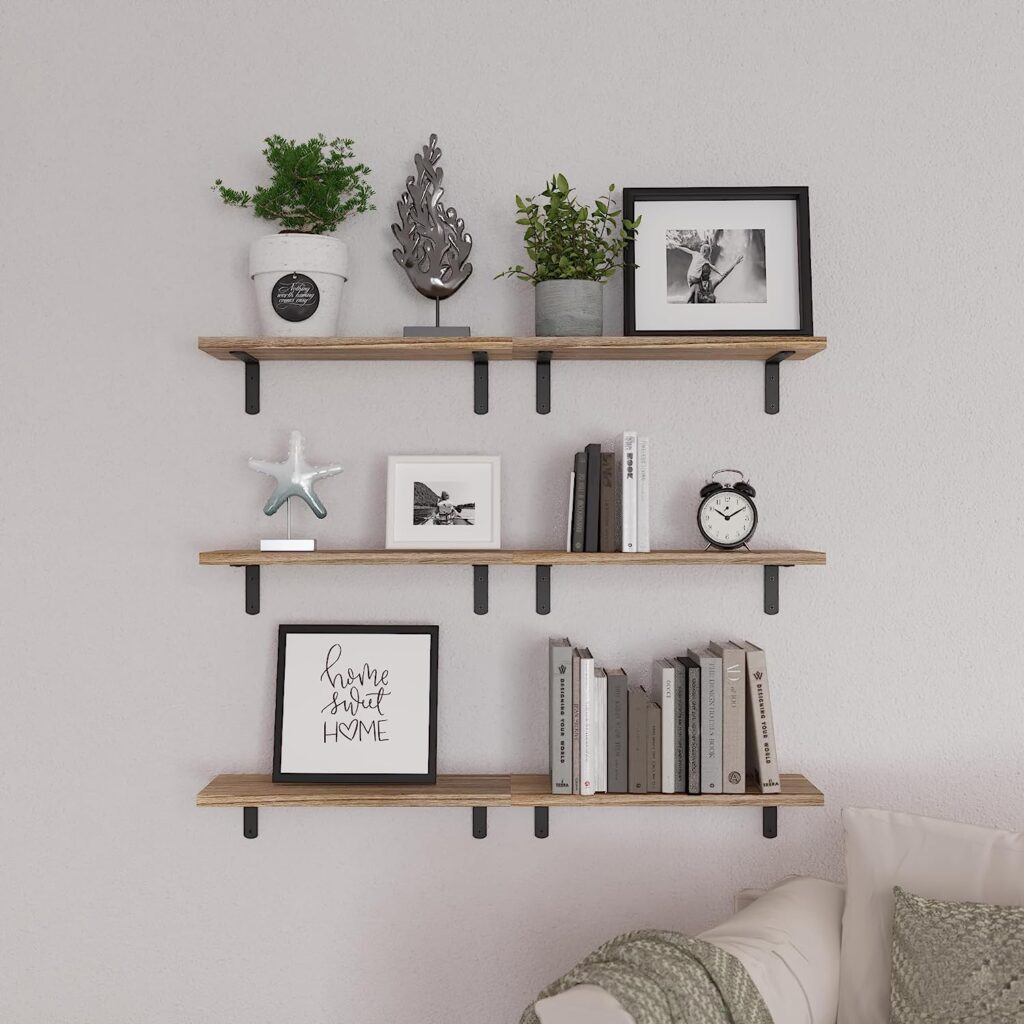
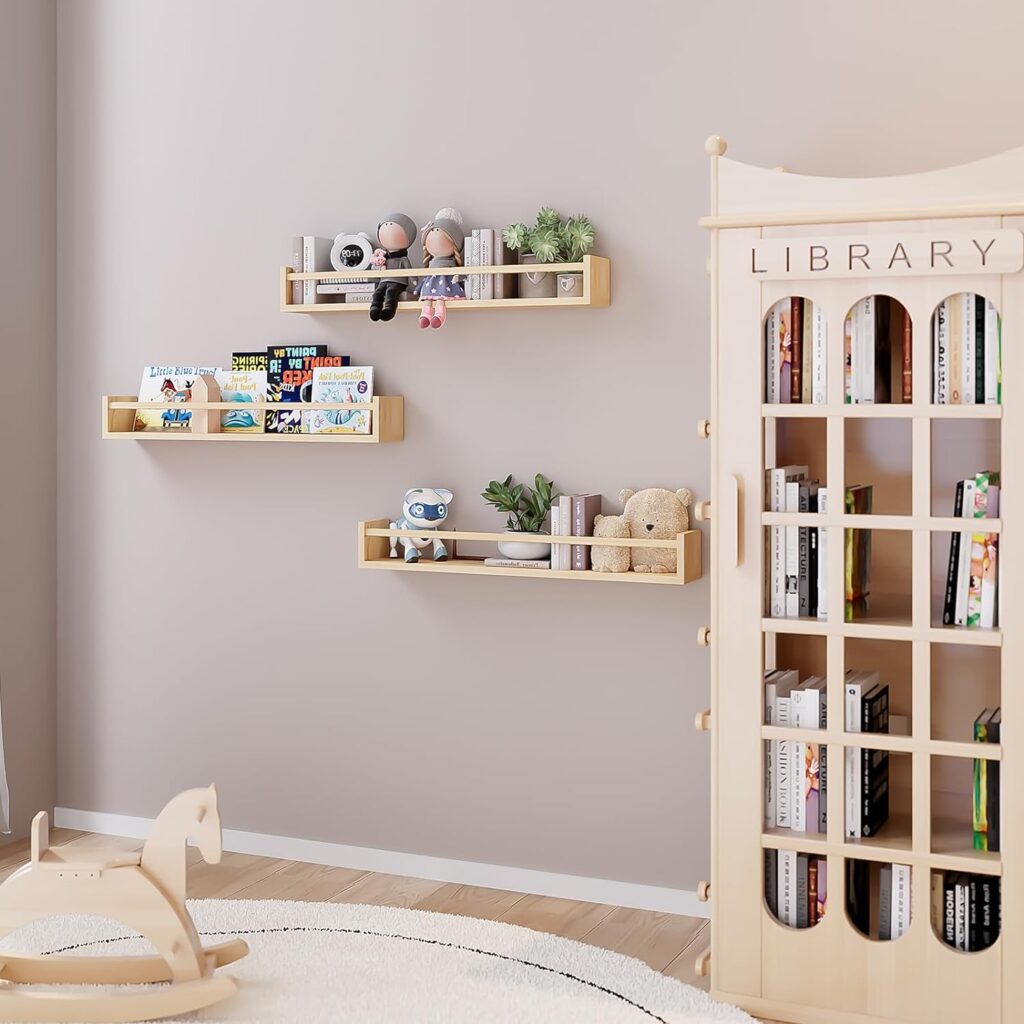
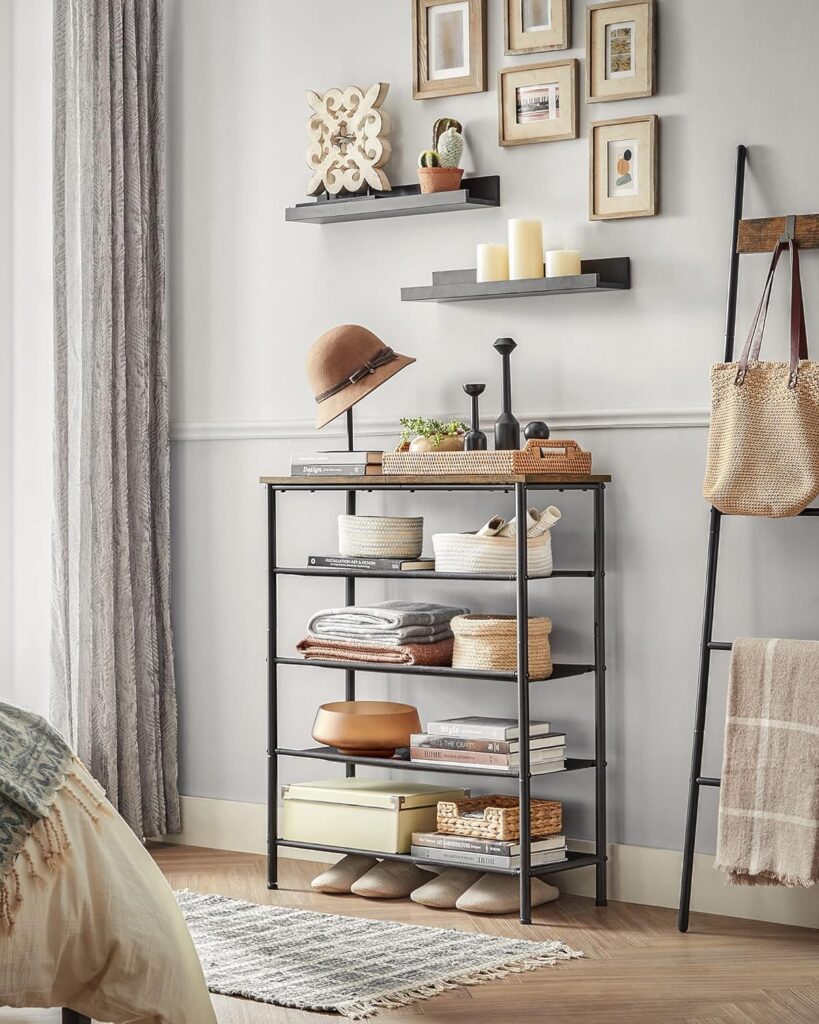
4. Floating Shelves
Sleek and modern, floating shelves are surprisingly simple to make. They offer a minimalistic storage solution and are perfect for small spaces.

Step 1: Gather Materials
To begin, you’ll need to collect all necessary materials including a sturdy piece of wood (the length and width will depend on the size of shelf you want), brackets, a saw, a drill, screws, and a level for proper installation.
Step 2: Measure and Cut
Determine the length you want your shelf to be and measure it on the piece of wood. Use the saw to cut the wood to the desired size. Remember to measure twice and cut once to avoid mistakes.
Step 3: Install Brackets
Decide where you want your shelf to be on the wall. Use a level to mark the precise locations where you will install the brackets. Drill holes into the wall and securely fasten the brackets, ensuring they are straight and level.
Step 4: Attach the Shelf
Place the cut piece of wood on top of the installed brackets. Make sure the shelf is centered on the brackets. Use screws to secure the shelf to the brackets.
Step 5: Finish and Decorate
Now that your floating shelf is installed, you can choose to paint or stain it to match your interior decor. Once dry, you can start decorating your shelf with books, photos, or other items.
Remember, floating shelves are more for light to medium weight objects. Avoid placing anything heavy on these shelves to prevent them from falling.
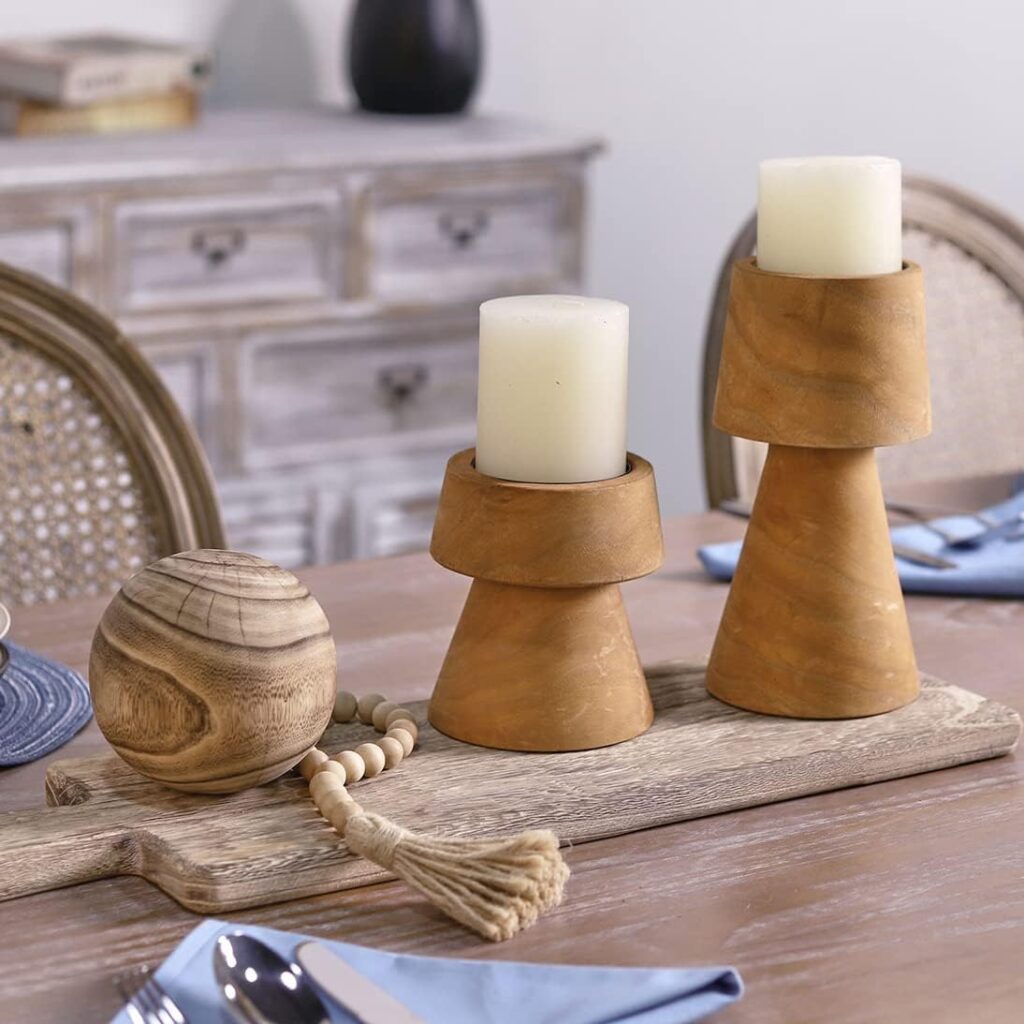
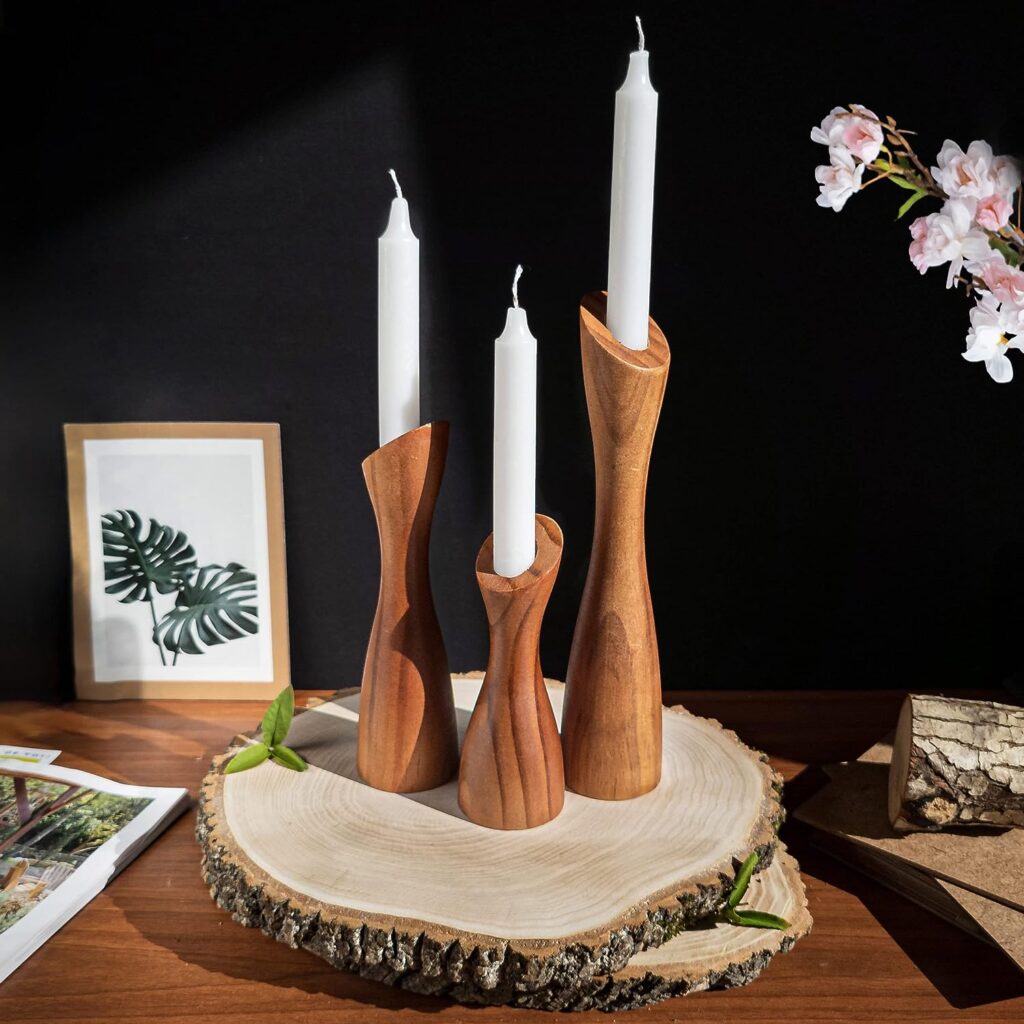
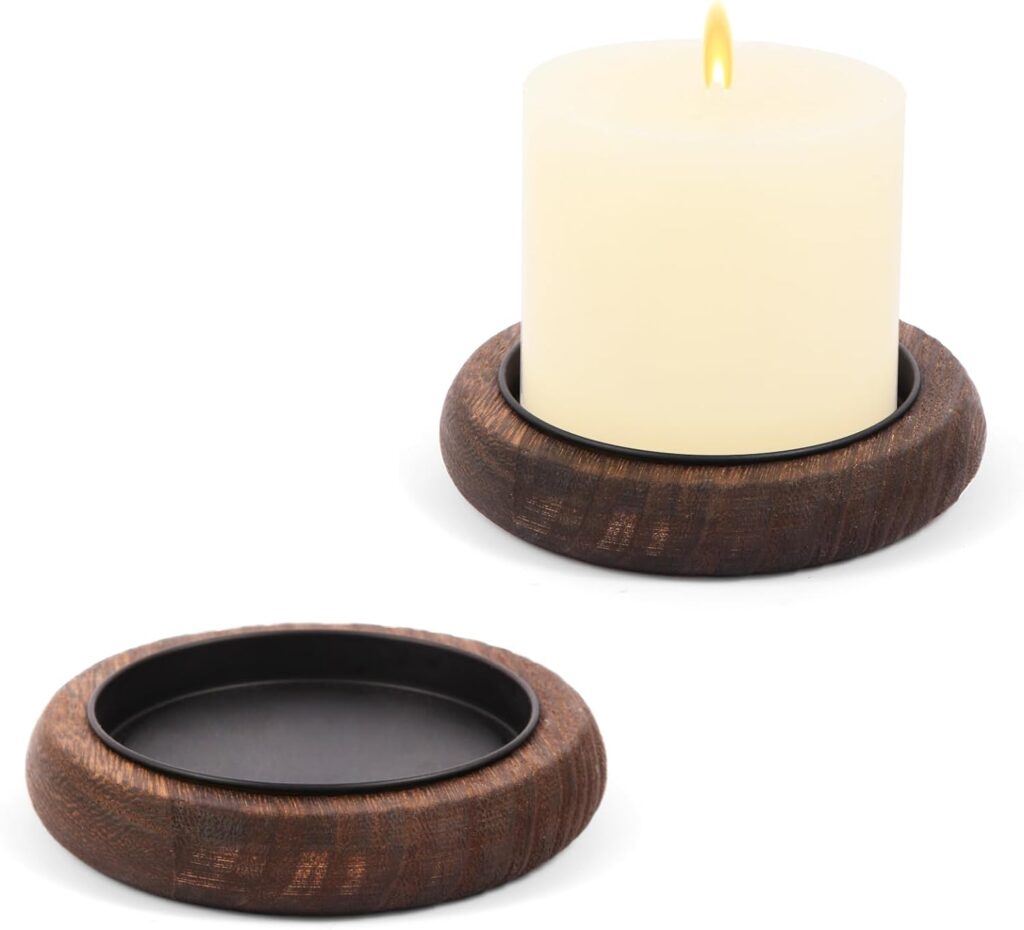
5. Wooden Candle Holders
With just a few cuts and some drilling, you can create beautiful wooden candle holders that add ambiance to any setting.


Step 1: Gather Materials
To start off, gather all the necessary materials such as pieces of wood (your choice of type and size), a saw, a drill with a spade bit to hold the candle, sandpaper, and wood finish for a polished look.
Step 2: Measure and Mark
Decide on the height of your candle holders and mark the measurements on your piece of wood. Remember, you can create a set of candle holders with varying heights for a more dynamic look.
Step 3: Cut the Wood
Use a saw to cut the pieces of wood according to the marked measurements. Make sure to cut carefully to have a flat surface for better stability.
Step 4: Drill a Hole
Mark the center of the top of each wooden piece, and then use a drill with a spade bit to create a hole deep enough to securely hold a candle.
Step 5: Sand and Finish
Use sandpaper to smooth out any rough edges on the wood, and wipe away any dust with a dry cloth. Apply your choice of wood finish, and let it dry according to the product instructions.
Step 6: Insert Candles
Once the finish is dry, insert the candles into the drilled holes. Your wooden candle holders are now ready to illuminate your space with a warm, inviting glow.
Remember, never leave burning candles unattended. Always monitor them to prevent potential fire hazards.
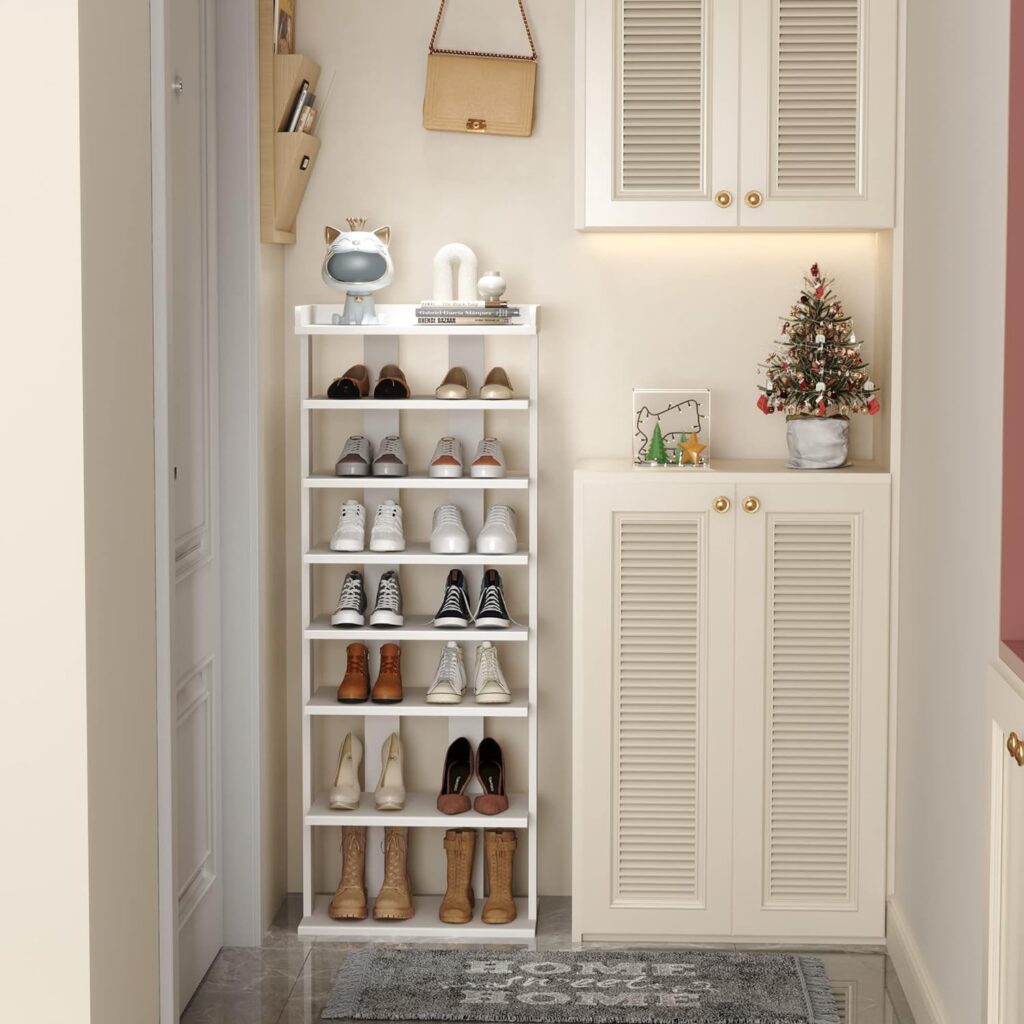
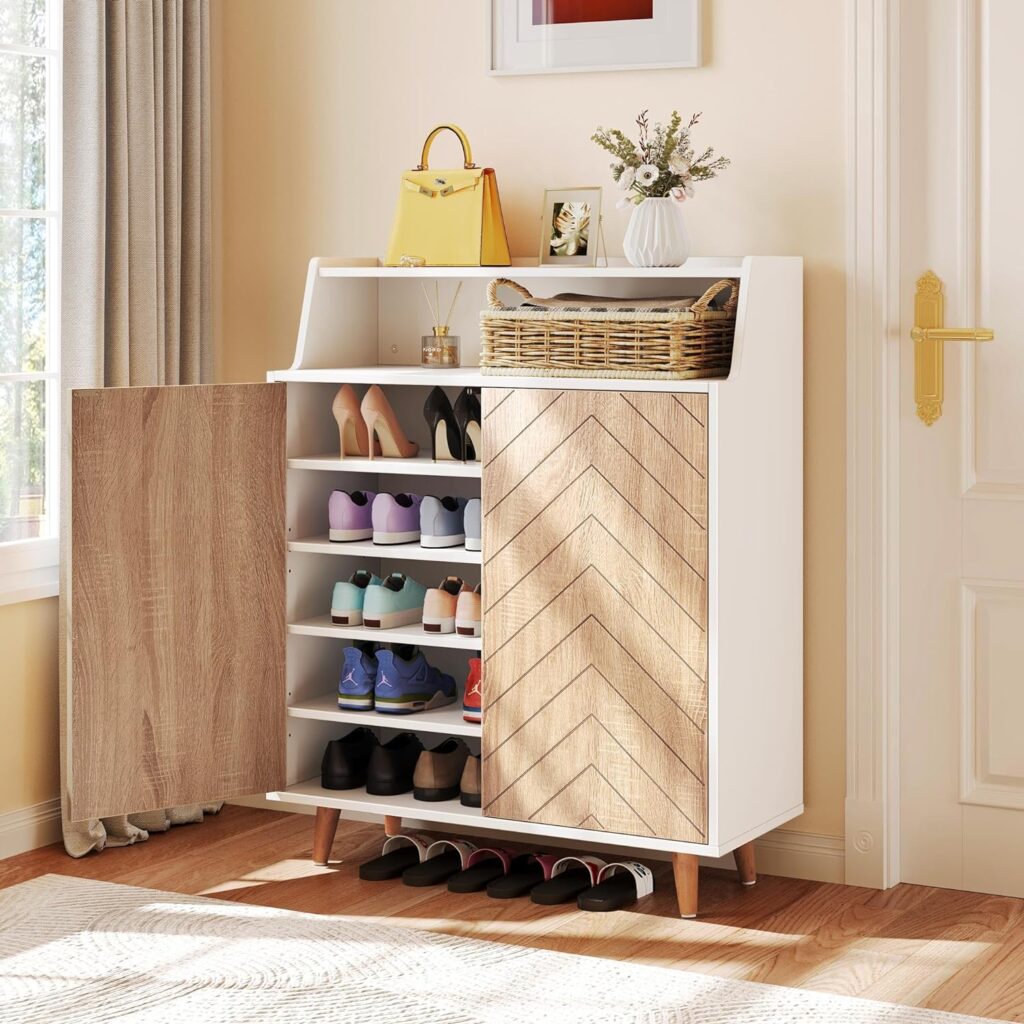
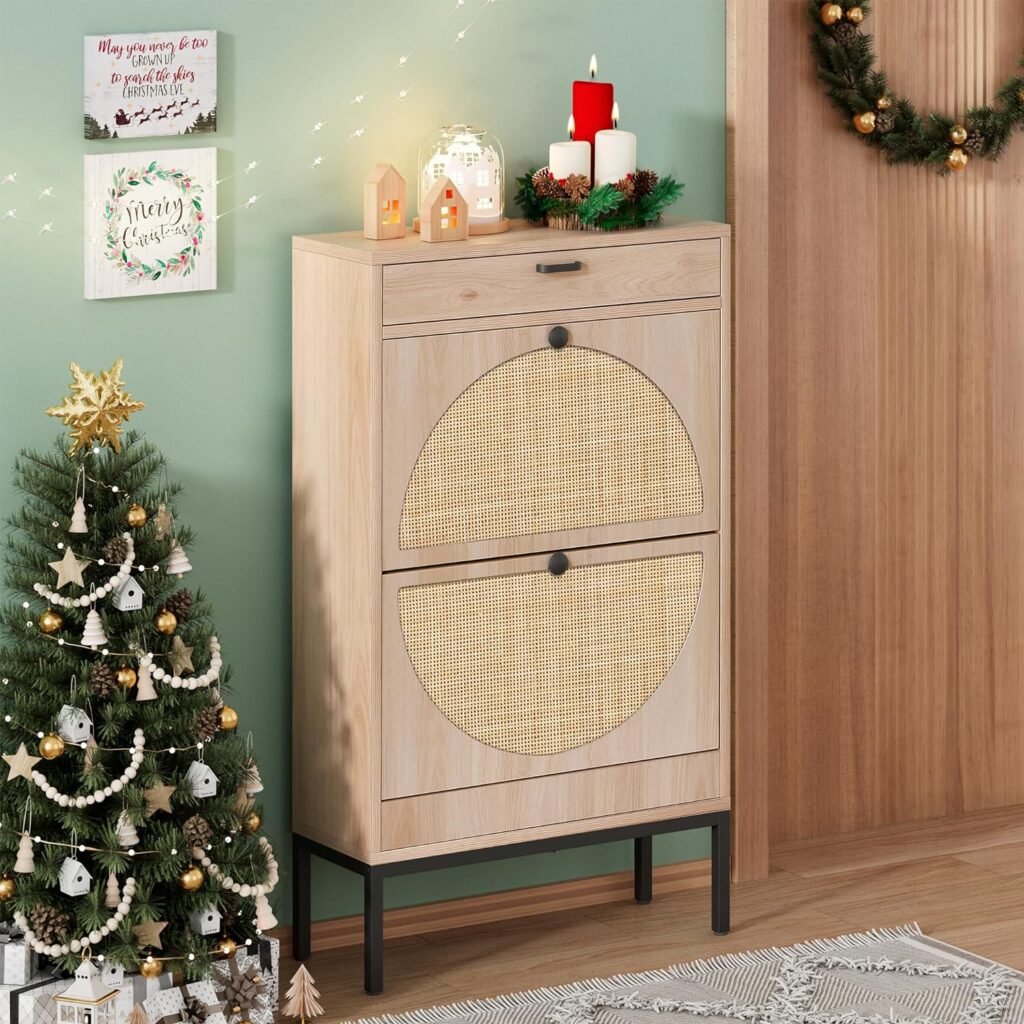
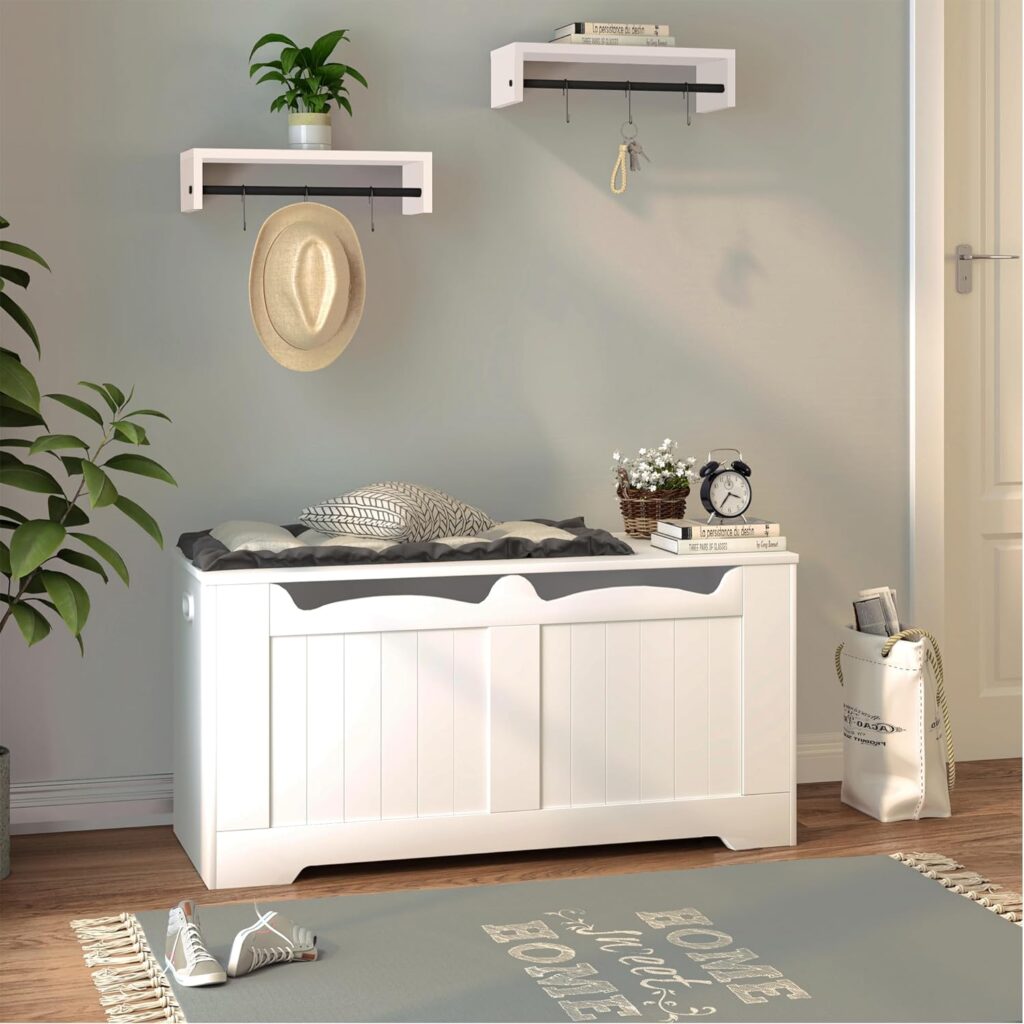
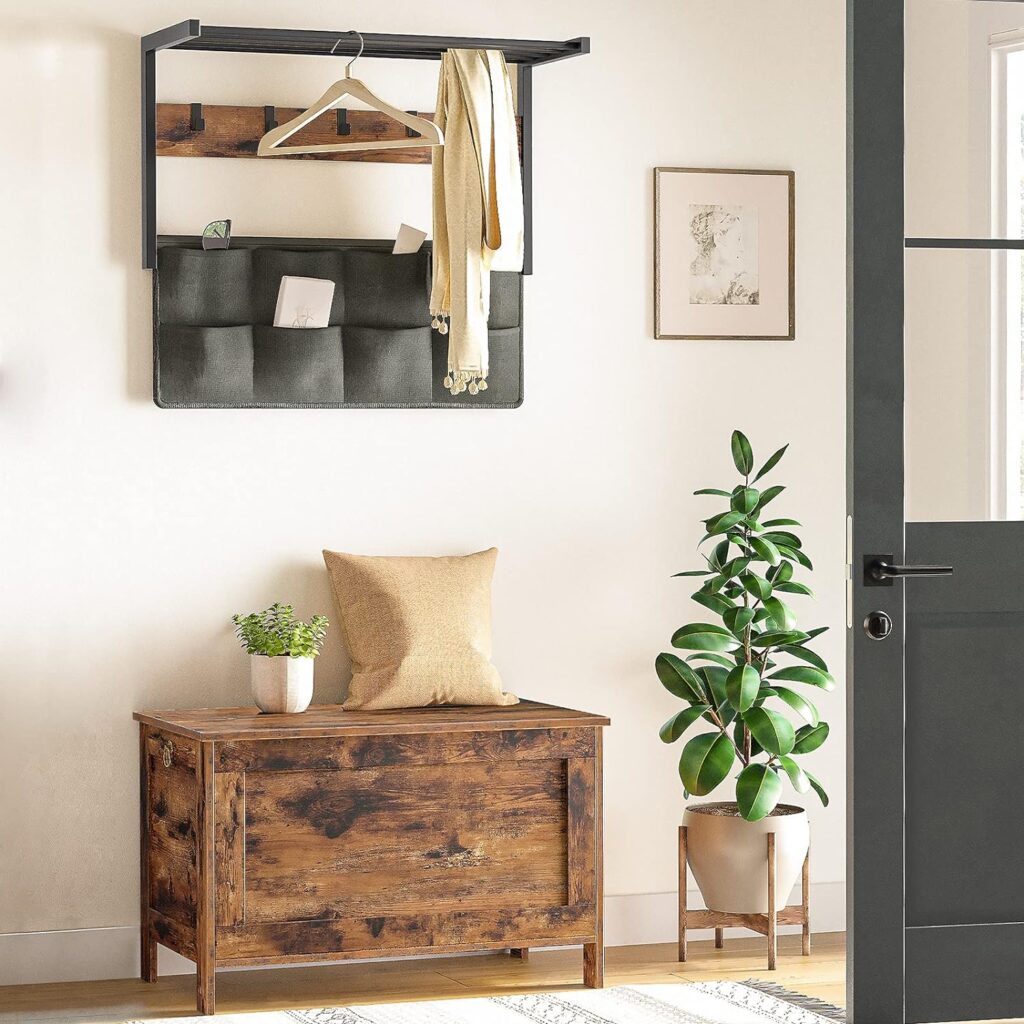
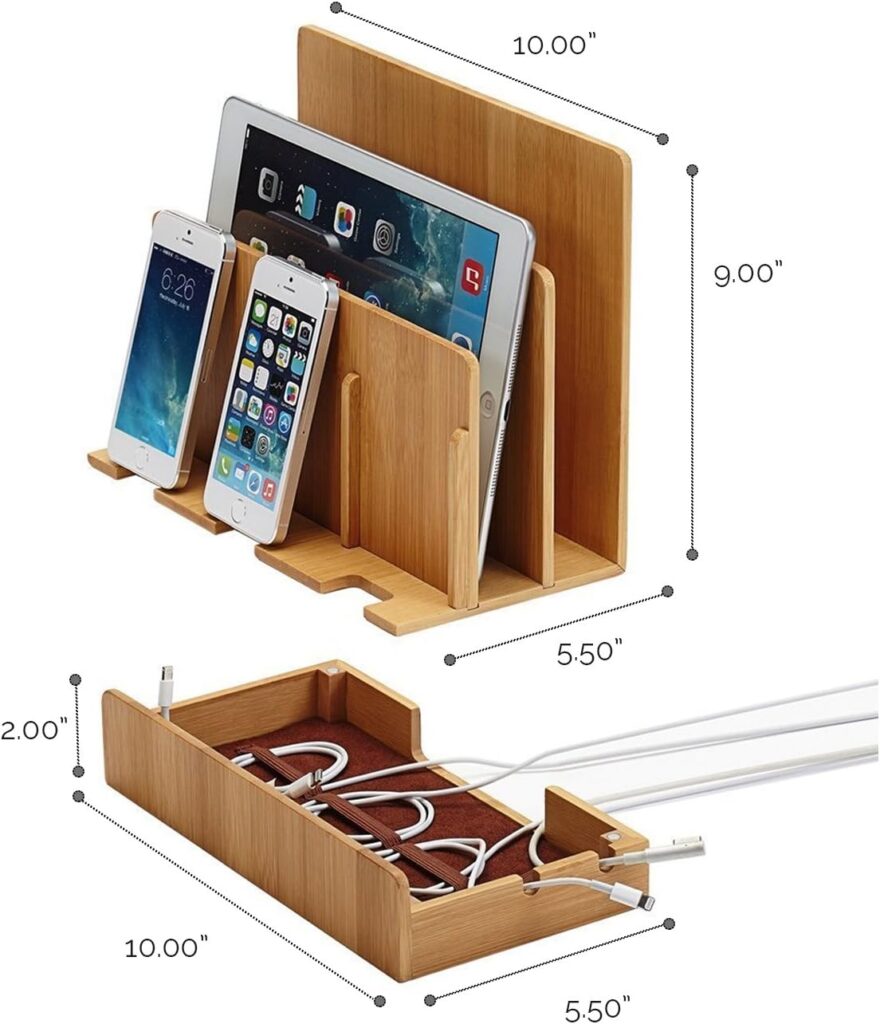
6. Entryway Organizer
Take on a project that’ll help you keep things tidy. An entryway organizer can be customized with hooks for coats and slots for mail.
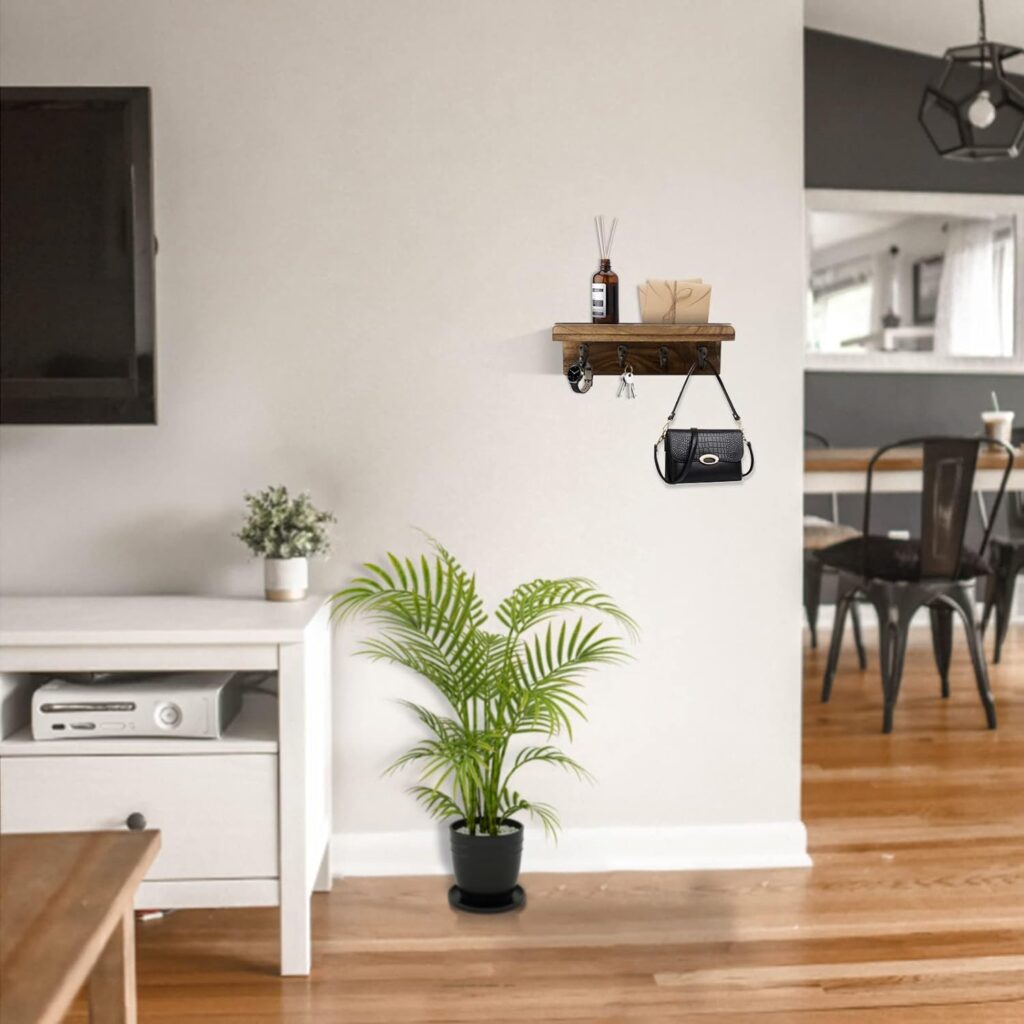
Step 1: Gather Materials
Begin by collecting all the necessary materials. You will need a piece of wood (choose the size and type according to your preference), a saw, a drill, screws, sandpaper, wood finish, hooks for coats, and compartments for mail.
Step 2: Measure and Mark
Decide on the size of your entryway organizer and mark the measurements on your piece of wood. This will serve as the base of the organizer.
Step 3: Cut the Wood
Using a saw, cut the piece of wood according to the marked measurements. Ensure a straight cut for a smooth and stable surface.
Step 4: Sand and Finish
Smooth out any rough edges with sandpaper, and dust off with a dry cloth. Apply the wood finish of your choice and let it dry as per the instructions on the product.
Step 5: Attach Hooks and Compartments
Once the finish is dry, mark and drill holes for the hooks and compartments. Use screws to attach them securely to the wooden base.
Step 6: Mount the Organizer
To mount the organizer on the wall, drill holes into the wall and insert wall anchors. Attach the organizer to the wall using screws.
And voila! Your custom entryway organizer is ready to keep your space tidy and organized.
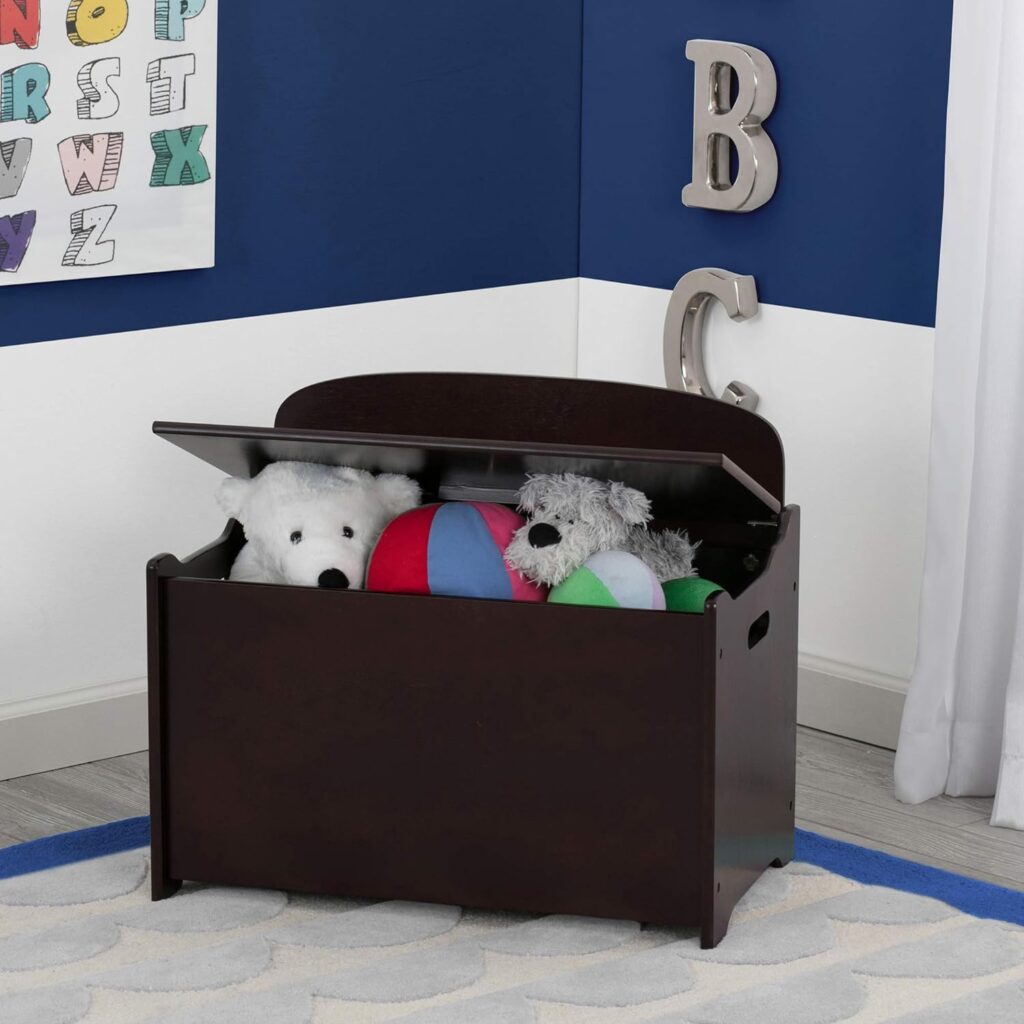
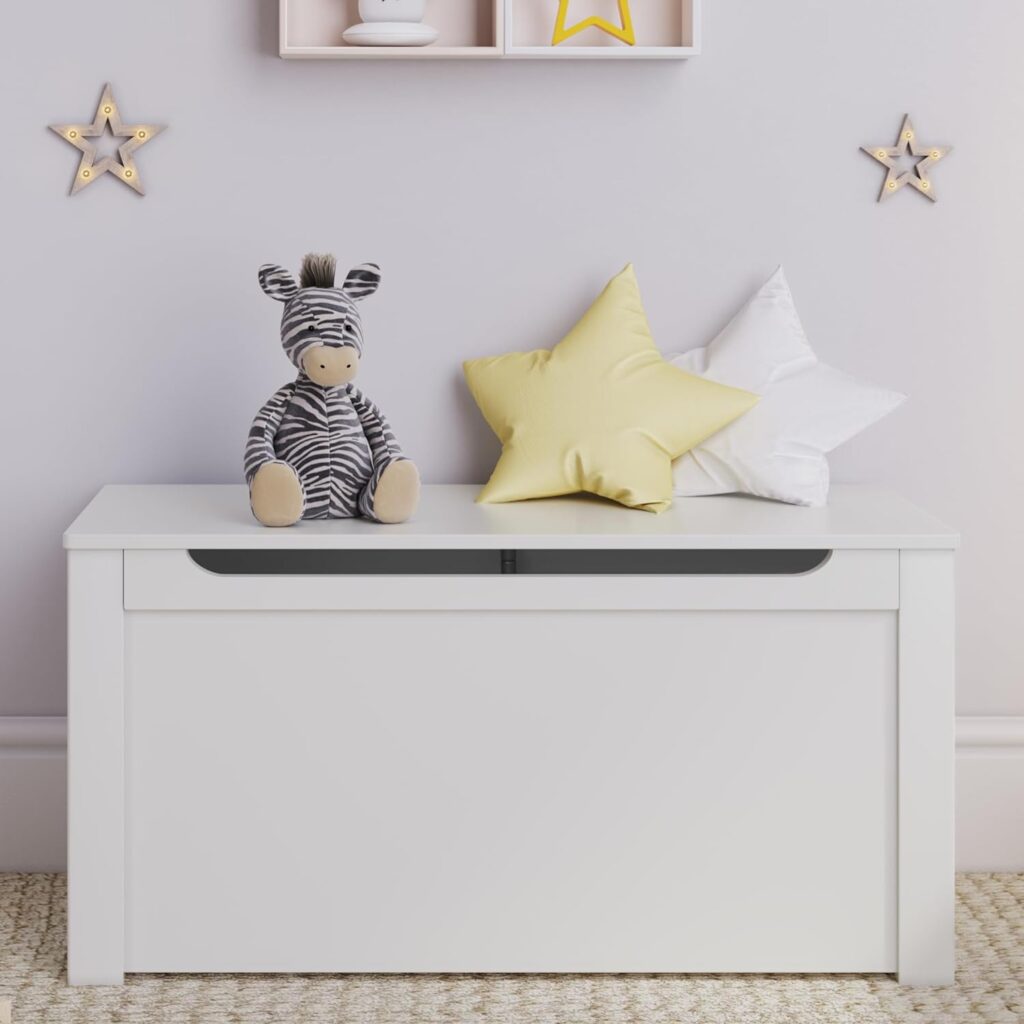
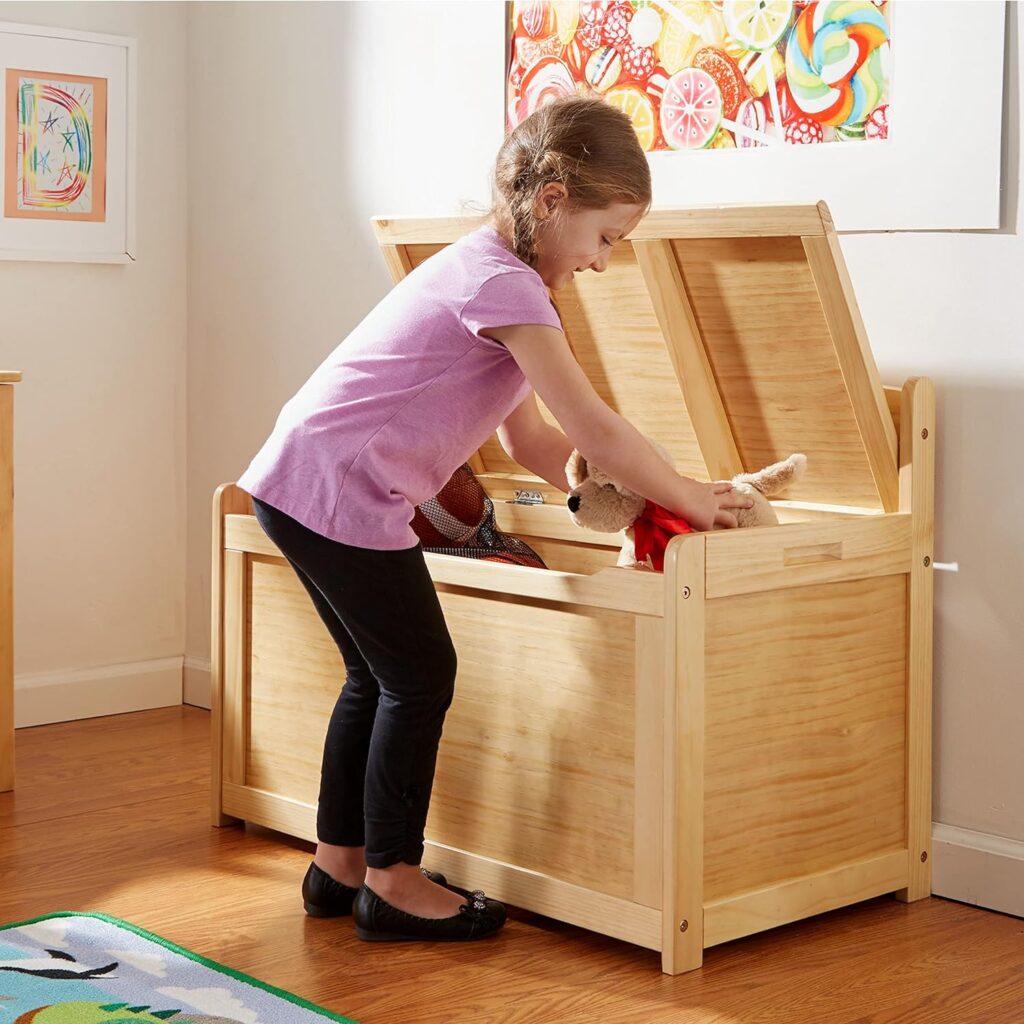
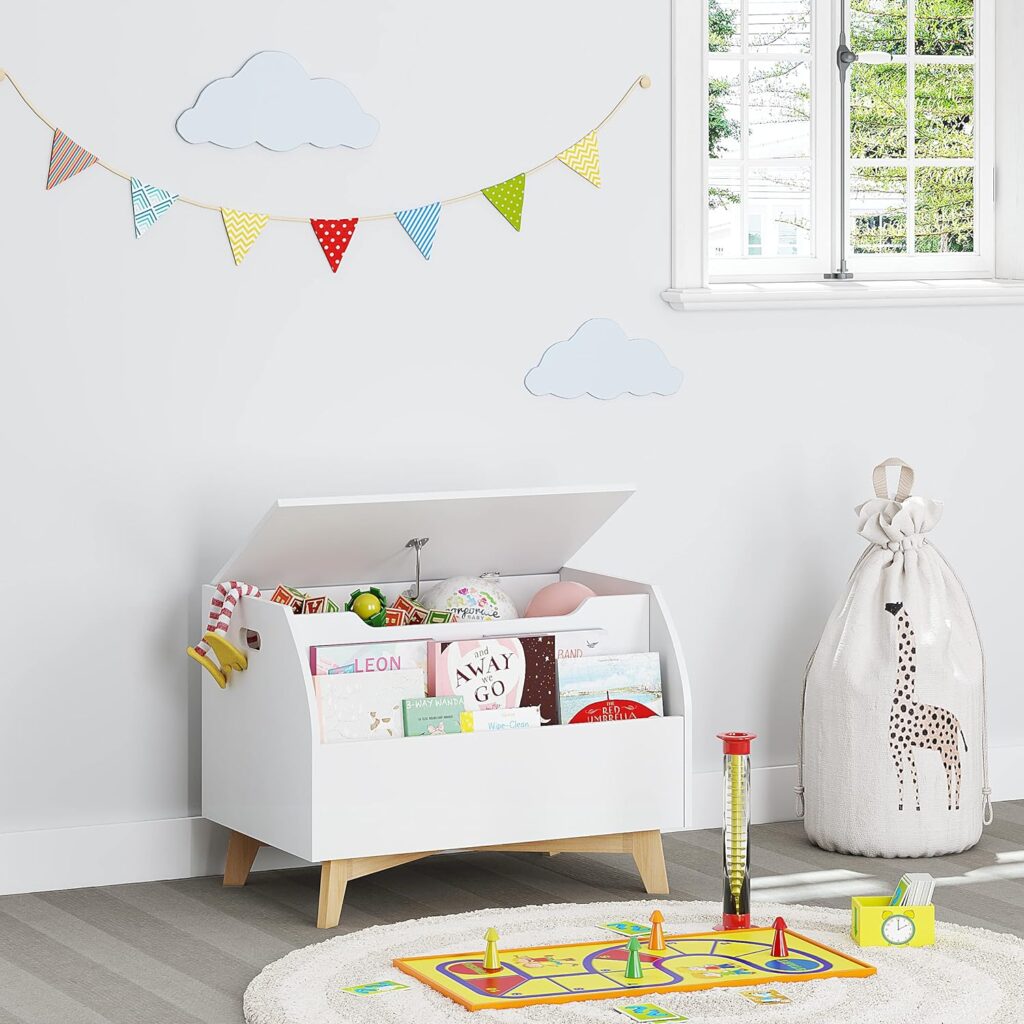
7. Wooden Toy Box
If you’ve got little ones in your life, a sturdy toy box can make a heartfelt gift. This project allows you to explore more complex joinery techniques at your own pace.
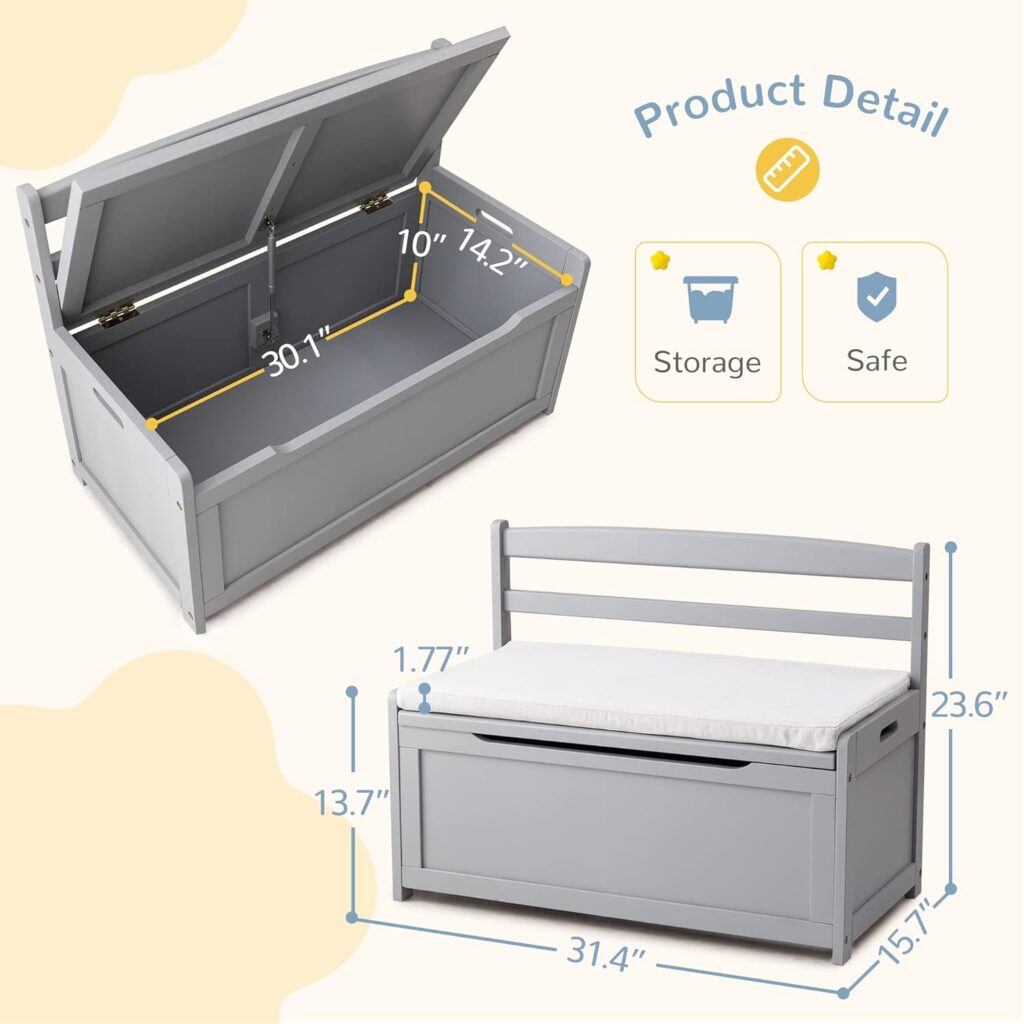
Step 1: Gather Materials
To craft a wooden toy box, gather the necessary materials. This includes wood (choose the type and quantity as per your desired size for the toy box), a saw, a drill, screws, sandpaper, wood glue, wood finish, and hinges for the lid.
Step 2: Measure and Mark
Decide the dimensions of your toy box and mark these measurements on your wood. These marks will guide your cuts to form the base, sides, front, back, and lid of the toy box.
Step 3: Cut the Wood
Using a saw, cut the wood according to the marked measurements. Remember, precision is key for a well-fitted toy box.
Step 4: Assemble the Box
Now, begin assembling the box. Start with the base and sides, securing them together with wood glue and screws. Then, attach the front and back panels in the same way.
Step 5: Attach the Lid
To attach the lid, install the hinges on one side of the box and the corresponding side of the lid. Make sure the lid opens and closes smoothly.
Step 6: Sand and Finish
Smooth out any rough edges with sandpaper, and then dust off with a dry cloth. Apply the wood finish of your choice and let it dry as per the instructions on the product.
Step 7: Add Finishing Touches
Consider adding a soft-close mechanism to prevent the lid from slamming, or casters to the bottom to make the box easy to move. You’ve now crafted a wooden toy box that’s not just practical, but an heirloom piece that can be cherished for generations.
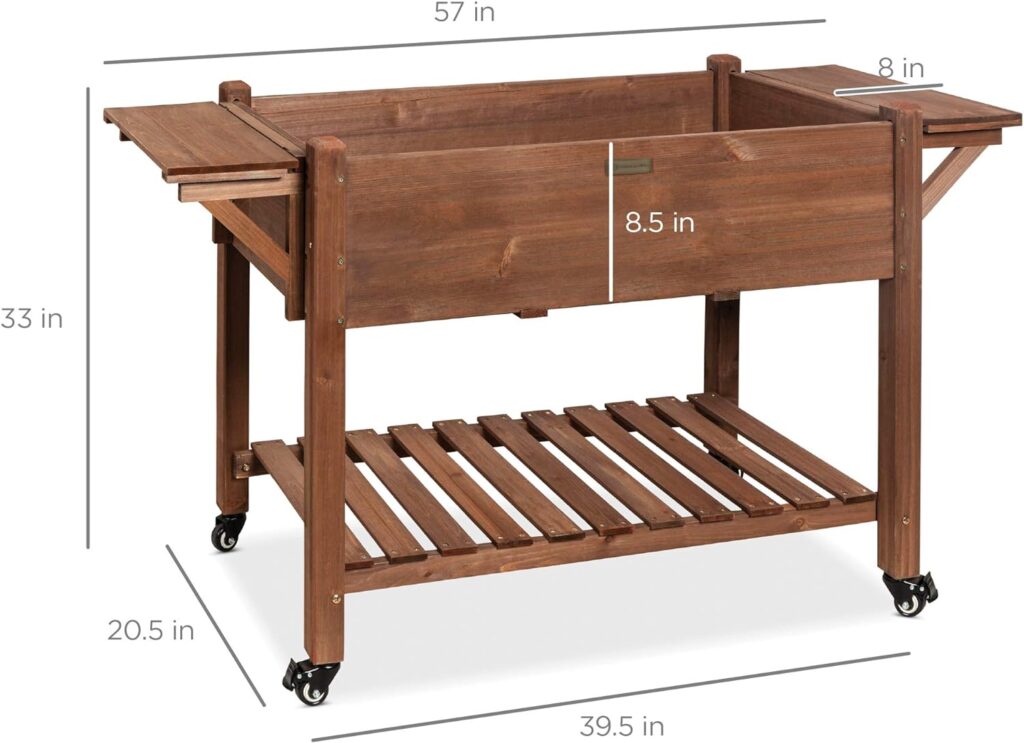
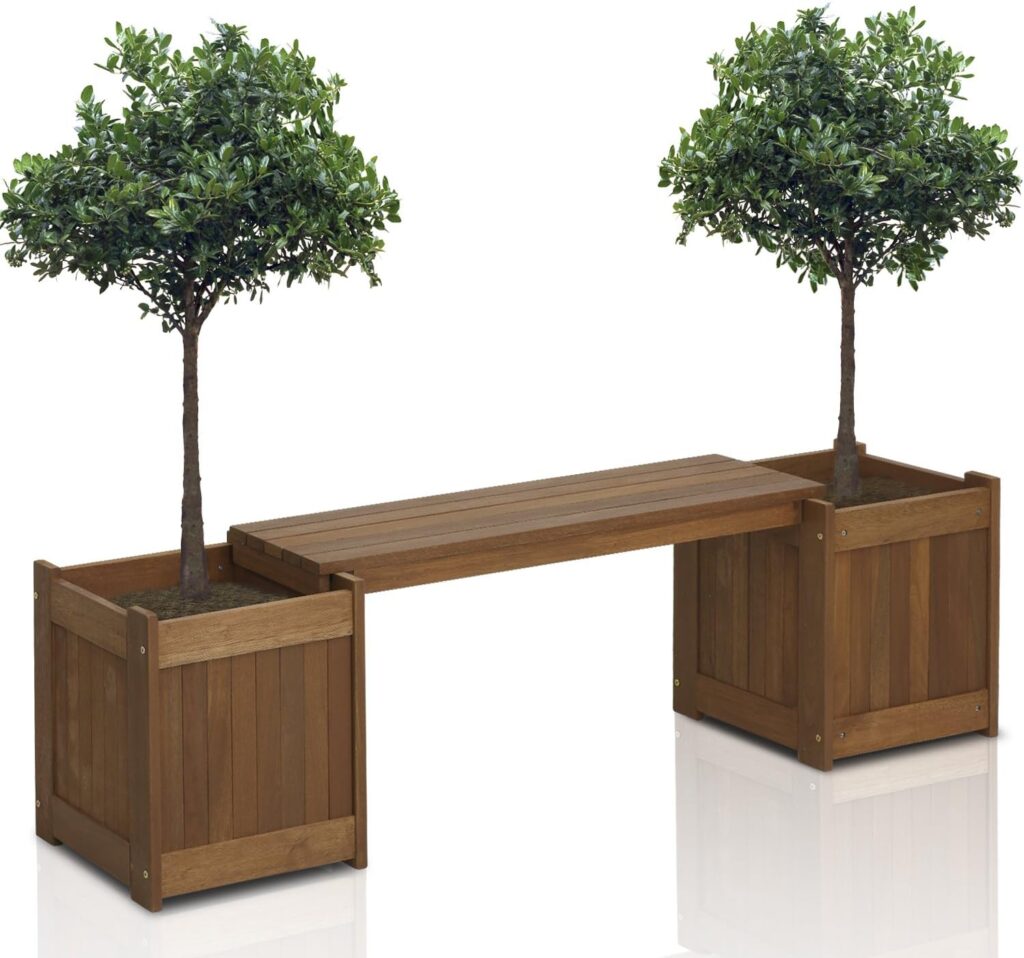
8. Outdoor Planter Bench
Combine seating with greenery for a dual-purpose bench. It’s a woodcraft project that requires a bit more time but yields a functional garden feature.
Step 1: Gather Necessary Materials
For this project, you’ll need wood (choose a type suitable for outdoor use), a saw, drill, screws, sandpaper, wood finish, and waterproof liner for the planter boxes.
Step 2: Decide on Measurements
Choose the size of your bench and the attached planter boxes, and mark these measurements on your wood.
Step 3: Cut the Wood
Cut the wood according to your measurements. This will form the bench seat, legs, and the sides of the planter boxes.
Step 4: Assemble the Bench
Join the seat and legs of the bench together with wood glue and screws, ensuring they are sturdy and level.
Step 5: Construct the Planter Boxes
Assemble the cut pieces into two planter boxes, attaching them to the ends of the bench.
Step 6: Install the Waterproof Liner
Trim the waterproof liner to fit inside each planter box, securing it with a staple gun to protect the wood from moisture damage.
Step 7: Sand and Finish
Sand all surfaces to smooth out any rough edges, then apply a wood finish suitable for outdoor use.
Step 8: Add Soil and Plants
Once the finish is dry, fill the planter boxes with soil and your choice of plants. Your outdoor planter bench is now ready to enjoy!
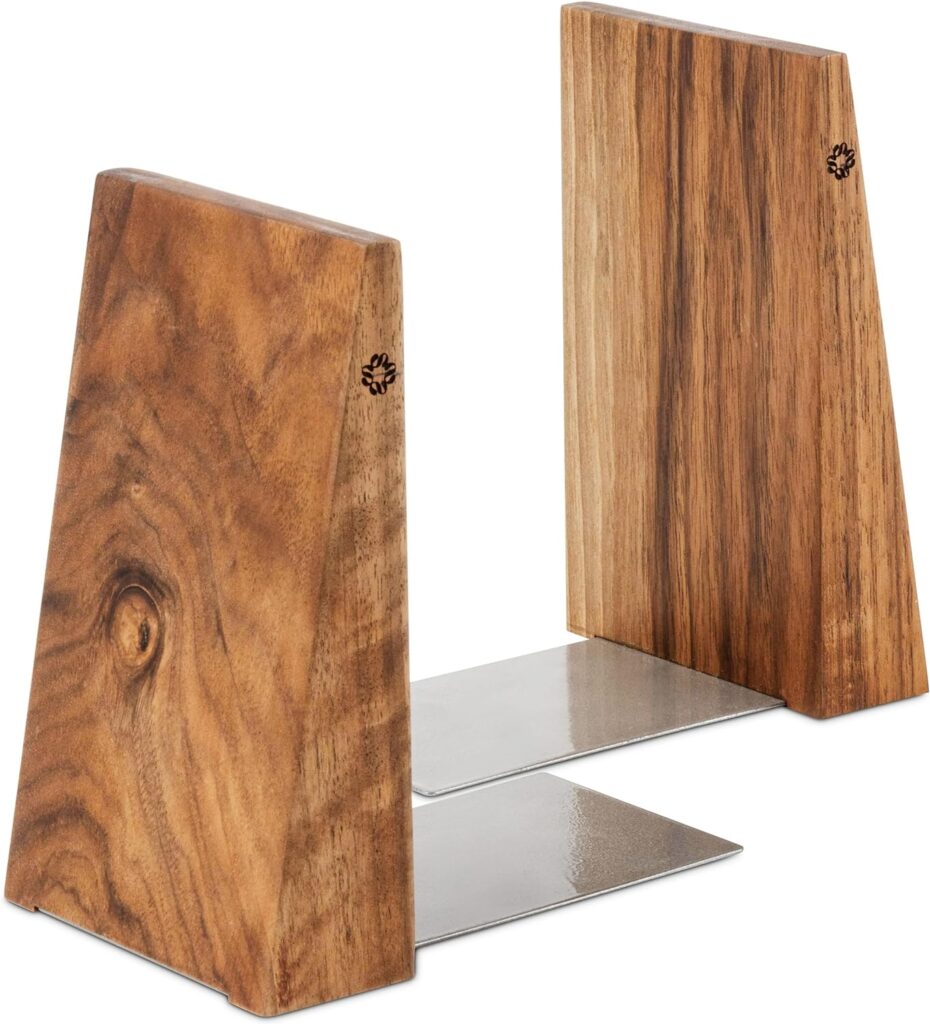
9. Wooden Bookends – Most easy Woodcraft
Keep your books in order with custom bookends. This is a fast and fulfilling project that lets you play around with shapes and finishes.
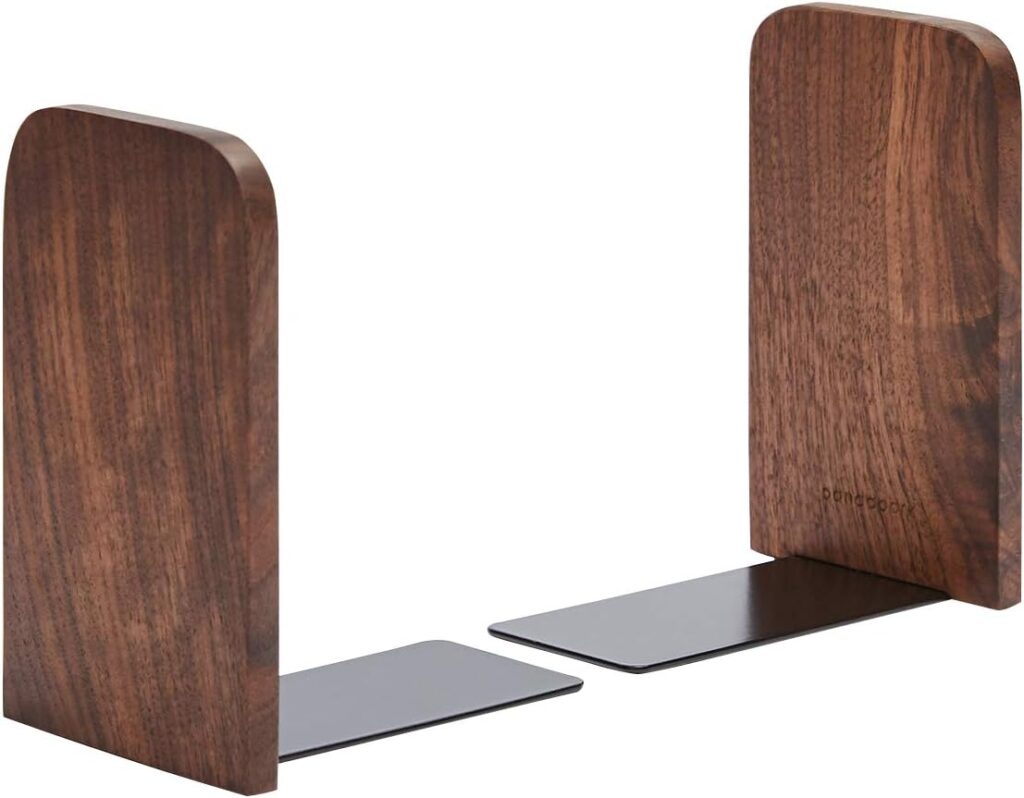
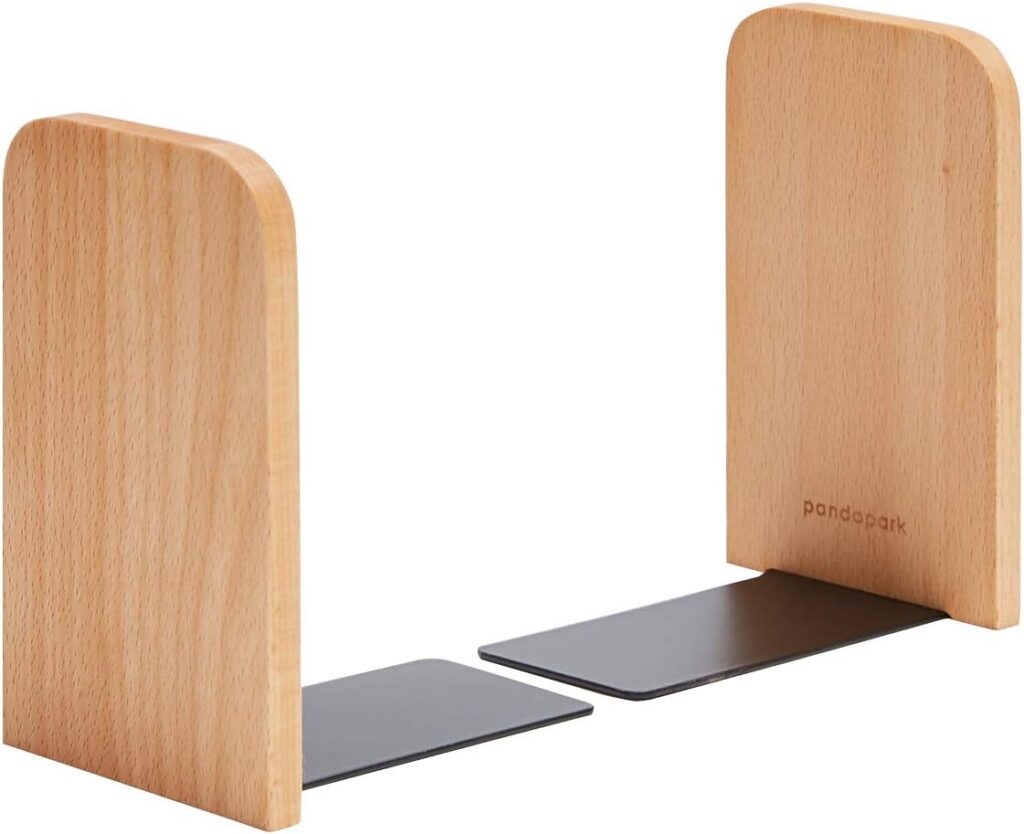
Step 1: Gather Necessary Materials
For this project, you’ll need two blocks of wood, a saw, sandpaper, wood glue, and a choice of wood finish or paint for decoration.
Step 2: Decide on Measurements
The size of your bookends may depend on the size of your books and shelf. Define and mark these measurements on your wood blocks.
Step 3: Cut the Wood
Cut your wood into four pieces according to your measurements. You will need two pieces for the base and two for the ends.
Step 4: Sand the Pieces
Use the sandpaper to smooth out all the cut pieces. This will prepare them for gluing and for the finish.
Step 5: Assemble the Bookends
Join one end piece to a base piece using wood glue, ensuring a right angle. Repeat for the other bookend. Let them dry thoroughly.
Step 6: Apply Finish or Paint
Apply your chosen wood finish or paint to your bookends. This not only makes them look better but also provides a layer of protection. Allow time for the finish or paint to dry.
Step 7: Add Non-Slip Pads (Optional)
To prevent your bookends from sliding, you can affix non-slip pads to the bottom of the base pieces.
Your wooden bookends are now ready to organize and add a touch of style to your bookshelf.
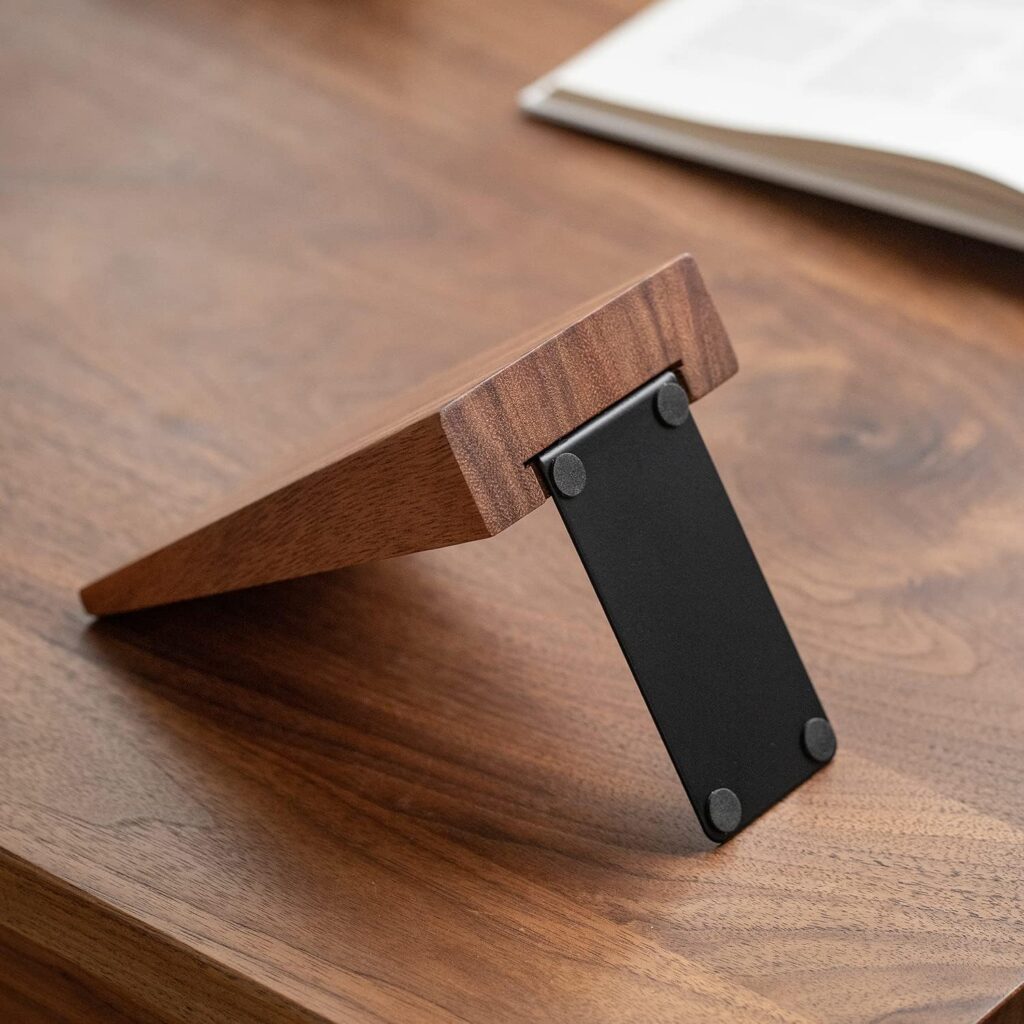
10. Wooden Smartphone Stand
With the right angle cuts, create a sleek stand that keeps your device in view. It’s quick to make and endlessly useful in your home or workspace.

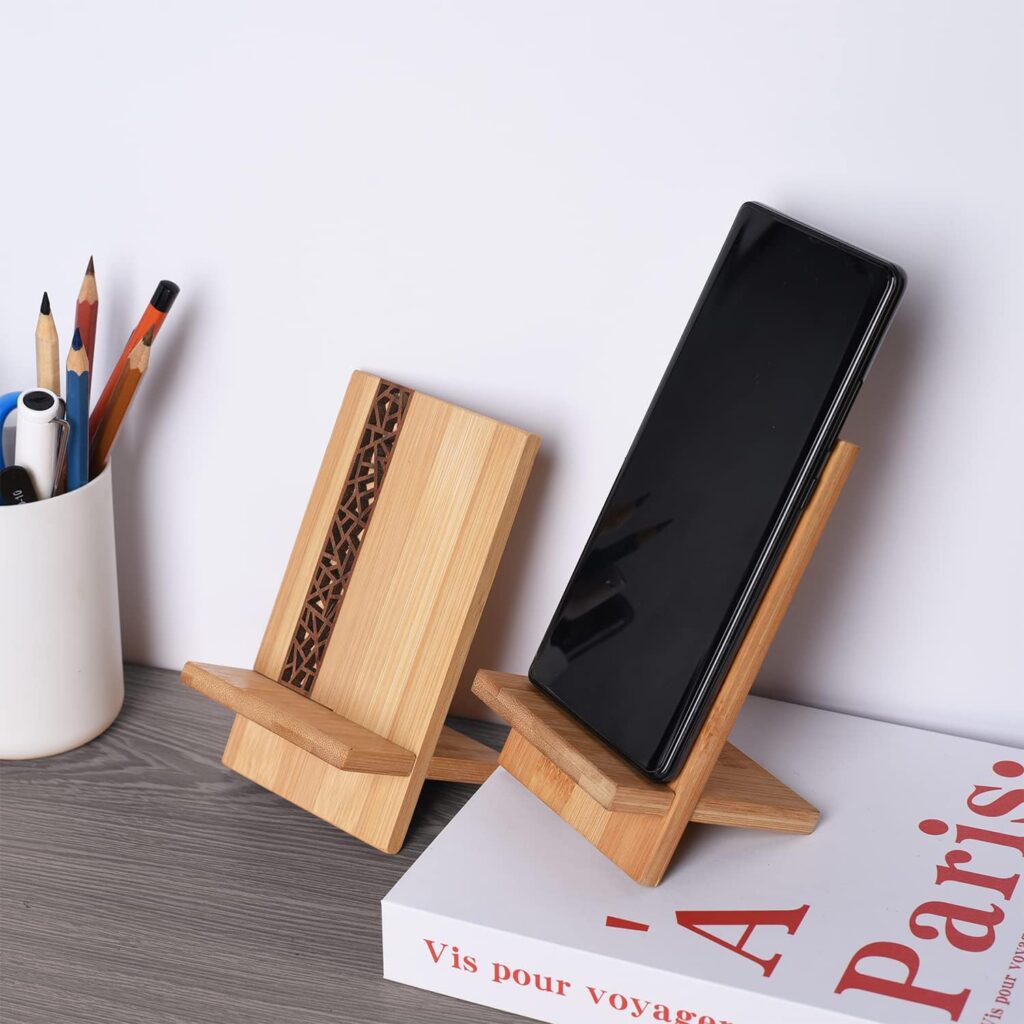
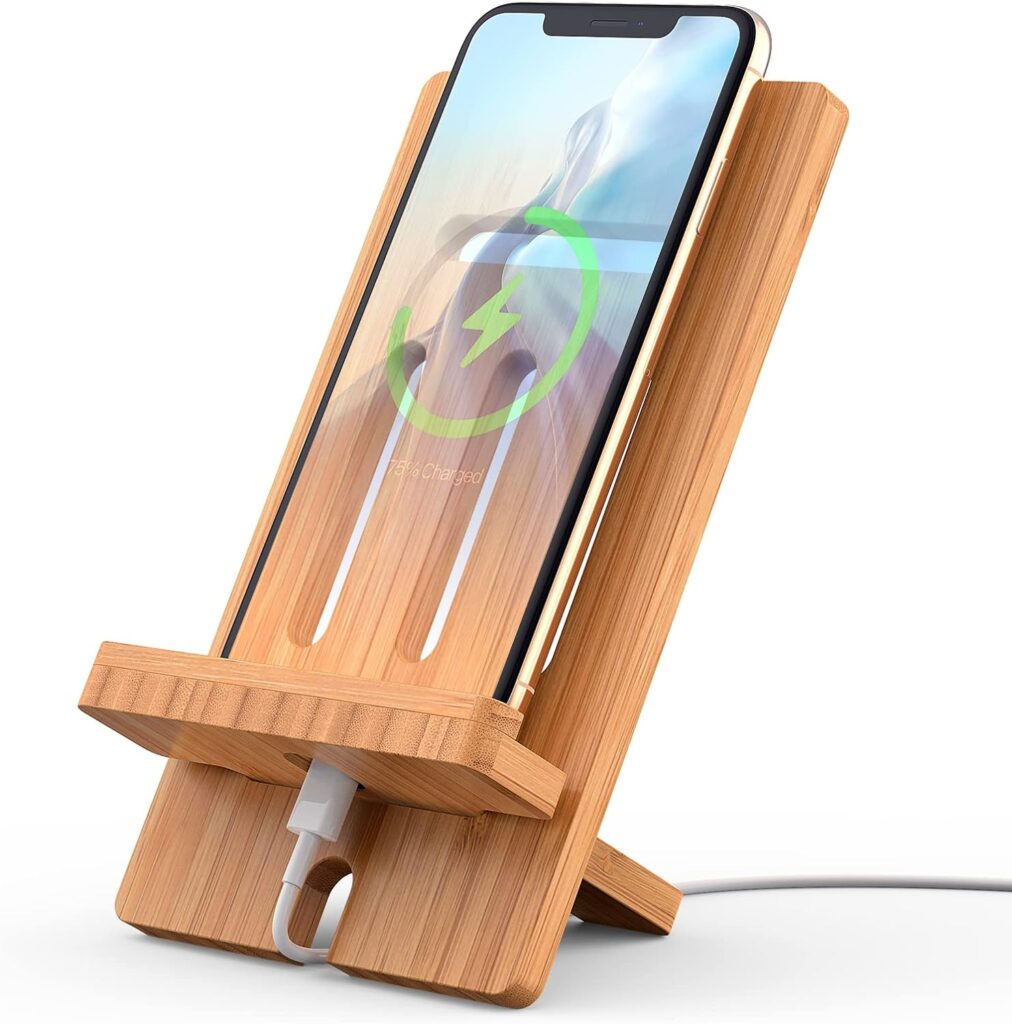
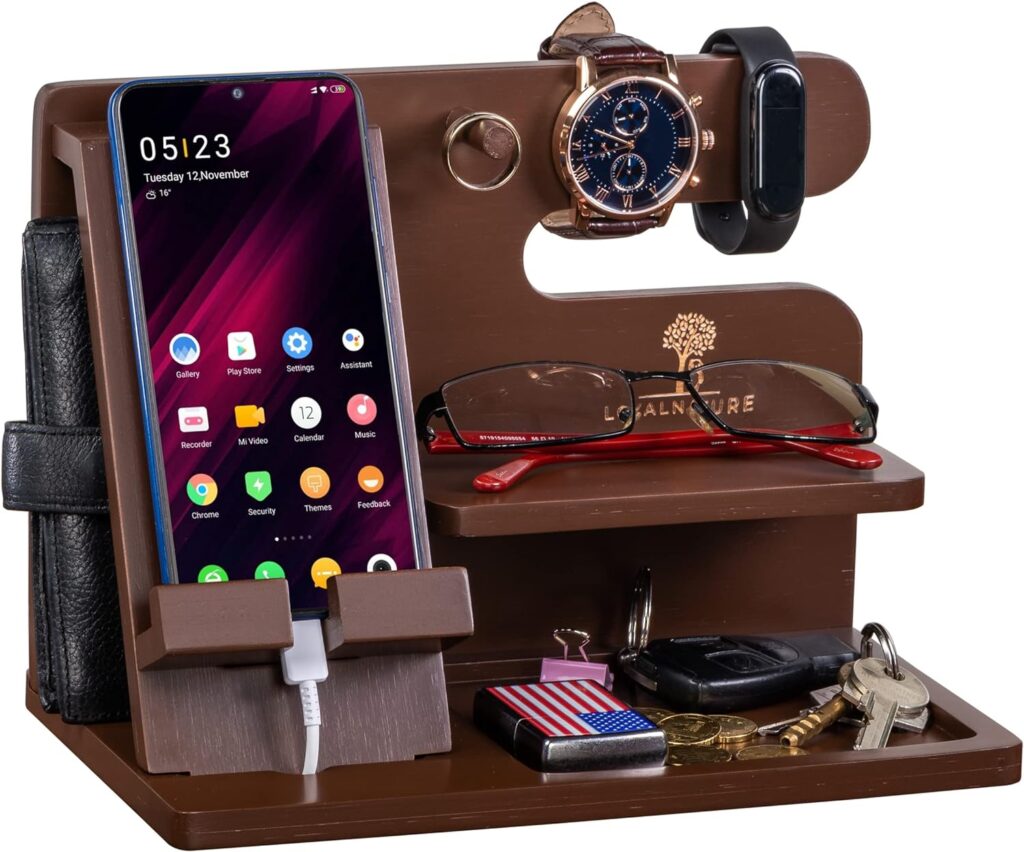
Step 1: Gather Necessary Materials
For this project, you’ll need a block of wood, a saw, sandpaper, wood glue, and your choice of wood finish or paint for decoration.
Step 2: Decide on Measurements
The size of your smartphone stand will depend on the size of your device. You will want a slot wide enough to hold your device securely. Mark these measurements on your wood block.
Step 3: Cut the Wood
Cut your wood into three pieces according to your measurements: one for the base, one for the back support, and a thinner piece for the front lip of the stand.
Step 4: Sand the Pieces
Use the sandpaper to smooth out all the cut pieces. This will prepare them for assembling and for the finish.
Step 5: Assemble the Stand
Using wood glue, attach the back support to the base at a slight angle. Then, attach the front lip about halfway up the base to hold your device. Ensure all pieces are secure and let them dry thoroughly.
Step 6: Apply Finish or Paint
Apply your chosen wood finish or paint to your smartphone stand. This not only enhances the look but also provides a layer of protection. Allow time for the finish or paint to dry.
Step 7: Test the Stand
Place your device in the slot and adjust the angle, if necessary. Now, your wooden smartphone stand is ready for use. Enjoy the convenience of having your device in view, whether you’re working, cooking, or just relaxing.
Watch our another collection: Best 10 Wooden Projects for Beginners – Part 5